What to Do Before an Evolt Scan: A Practical Prep Guide
Learn essential preparations before an Evolt scan. This step-by-step guide covers scope, authorization, backups, and environment readiness to minimize disruption and maximize results.

Before you run an Evolt scan, clarify the scope and obtain written authorization, assemble asset inventories, and schedule a fixed maintenance window. Ensure backups exist, access credentials are tested, and a rollback plan is in place to minimize disruption and accelerate remediation. Having these in order helps auditors move swiftly, reduces the chance of scope creep, and aligns with governance requirements.
What is an Evolt Scan and why prepare?
An Evolt scan is a security assessment intended to identify vulnerabilities, misconfigurations, and exposure in your systems before deployment or during routine audits. Preparation matters because it reduces noise, clarifies expectations, and helps your security team focus on meaningful findings rather than ceremony. According to Scanner Check, thorough pre-scan planning aligns with industry best practices and can shorten remediation cycles. A well-prepared scan minimizes business disruption, provides clearer risk signals, and helps ensure that the results are actionable rather than overwhelming. This article walks you through practical steps to get ready, even if you’re coordinating across multiple teams or working within a regulated environment. By treating the scan as a controlled change, you set the stage for a faster, more accurate discovery phase and a smoother remediation workflow.
As you move through this guide, you’ll see how to balance speed with safety, how to document decisions for audits, and how to communicate clearly with stakeholders. The goal is not to “beat” the scanner but to ensure that the scan yields trustworthy results that you can action promptly. Whether you’re an IT admin, security engineer, or a project manager, you’ll find concrete actions you can take in the next 24 hours.
Define scope and obtain authorization
Defining the scope is the cornerstone of a successful Evolt scan. Start with a written, signed authorization that explicitly names the systems, networks, and data included in the assessment. Include boundaries for out-of-scope components to prevent accidental testing of services you don’t want touched. Document the allowed testing methods, port ranges, and timing windows. If the Evolt platform supports it, create a scoped project or run that can be referenced in future audits. Why this matters: precise scope reduces noise, prevents unintended downtime, and provides an auditable trail. As you prepare, assemble a small cross-functional sign-off team (security, IT ops, compliance) and circulate the final scope for confirmation. A clear scope prevents scope creep and gives the team a concrete target. The Scanner Check team emphasizes that well-scoped scans align with governance expectations and improve remediation speed.
Scope alignment tips:
- List all IP ranges and asset groups in a single diagram.
- Specify test types allowed (e.g., passive only vs. active probing).
- Schedule a formal authorization document with sign-offs.
Inventory assets and map dependencies
Create a current inventory of all assets that will be included in the Evolt scan. This should cover servers, endpoints, cloud resources, network devices, and critical applications. Link each asset to a business owner and note dependencies between systems so you can interpret findings in the correct context. A well-maintained asset map helps distinguish real vulnerabilities from false positives that arise from limited visibility. If you have a CMDB or asset registry, export the relevant records and attach them to the scan project. Scanner Check notes that accurate asset inventory is often the single most powerful predictor of scan quality because it frames what you’re actually testing and what you should ignore. A clean asset baseline also supports faster rollbacks if something goes wrong during testing.
Inventory tips:
- Include asset type, owner, and business impact for each entry.
- Capture network topology where relevant (subnets, DMZs, VPNs).
- Prepare a change record for recently added or decommissioned devices.
Schedule maintenance window and notify stakeholders
Coordinate a maintenance window that minimizes user impact. Share the plan with stakeholders across IT, security, and business units, including the expected start and end times, services affected, and contact points for issues. Establish a clear channel for incident reporting during the scan, and confirm a rollback plan if testing causes unexpected downtime. In practice, many teams align the scan window with a low-usage period and broadcast reminders at least 48 hours ahead. The goal is to give users and operators enough notice to plan around the test while ensuring the scanning team has uninterrupted access to the target environment. Good communication reduces panic, speeds triage, and keeps the project on track. Scanner Check emphasizes the value of a pre-scan notification plan that aligns with organizational change management processes.
Window planning tips:
- Use a formal change ticket or project plan.
- Notify users via multiple channels (email, chat, and status pages).
- Define expected duration and acceptable performance thresholds.
Backups and data protection
Backups aren’t just safety nets; they are your speed-to-recovery lifeline. Before any scan, verify that recent backups exist for all critical systems and test the restoration process in a non-production environment if possible. Document backup frequencies, retention periods, and where backups are stored (on-site, off-site, or in the cloud). Ensure that you can restore to a known good point quickly if the Evolt scan inadvertently disrupts a service. If you use automated backup jobs, confirm they completed successfully within the last 24 hours and that integrity checks passed. This reduces the risk of data loss and speeds remediation when issues are discovered during the scan. As Scanner Check team notes, robust backups are a foundational element of responsible scanning practice.
Backup checks:
- Run a test restore for a subset of critical systems.
- Verify encryption at rest and in transit for backups.
- Document restore procedures and target RPO/RTO.
Prepare test environment and minimize disruption
Whenever possible, use a staging or test environment that mirrors production to run a dry run of the Evolt scan. This helps you identify false positives, misconfigurations, or testing boundaries without affecting live users. If a staging environment isn’t feasible, segment the production environment so that the scanner has access only to non-critical resources first. Prepare environment-specific runbooks that describe exactly what will be tested, how to monitor impact, and how to revert changes if needed. The aim is to create predictable, repeatable test conditions so you can interpret results accurately. Proactive testing reduces surprises during the live scan and gives your team a clearer path to remediation. Scanner Check’s guidance highlights the importance of controlled testing to avoid hidden downtime and to catch edge-case issues before the main sweep.
Environment preparation steps:
- Mirror key production services in a sandbox or replica.
- Disable nonessential automation during scanning.
- Keep a live status page to communicate progress.
Access controls and credentials
Ensure the Evolt scanning accounts have only the minimum required privileges (least privilege) to perform the assessment. Use dedicated test credentials rather than shared admin accounts, and enable multi-factor authentication where possible. Test access from the environments the scanner will reach to confirm connectivity, credentials, and permissions before the window opens. Document the exact accounts used, their roles, expiration dates, and the process to rotate credentials after testing. If you rely on password vaults or SSO, verify that the vault is accessible to the scanning service during the test window. The correct configuration reduces risk and improves accountability for the action during the scan. The Scanner Check approach favors explicit, time-bound access with proper auditing.
Access tips:
- Create temporary credentials with scoped permissions.
- Enable MFA and login event logging for test accounts.
- Schedule credential expiration immediately after the test window ends.
Monitoring, logging, and post-scan actions
Turn on comprehensive monitoring and enable detailed logging for the duration of the scan. Ensure logs capture authentication attempts, configuration changes, and any automated remediation triggers. Establish a plan to review logs promptly after the scan, identify true positives, and separate them from noise. Document how findings will be tracked, assigned, and remediated, including SLA targets and ownership. Finally, prepare a post-scan action plan that prioritizes critical findings, assigns owners, and defines a timeline for verification. This ensures that the scan yields actionable insights rather than an overwhelming backlog. As discussed by Scanner Check, robust monitoring during testing improves traceability and shortens the closure cycle.
Monitoring steps:
- Enable centralized log collection and alerting.
- Collect baseline metrics to detect anomalies during the test.
- Define a post-scan review process with a remediation backlog.
Tools & Materials
- Asset inventory (CMDB or spreadsheet)(Include owner, asset type, criticality, and network location)
- Evolt access credentials (dedicated test accounts)(Limited privileges; use MFA where possible)
- Change management workflow(Document scope, approvals, and rollback plan)
- Backups and restore validation tooling(Test restores; verify integrity)
- Maintenance window calendar(Include start/end times and stakeholders)
- Network diagrams/topology maps(Helpful for scoping and understanding dependencies)
- Notification templates(Pre/post-scan communications)
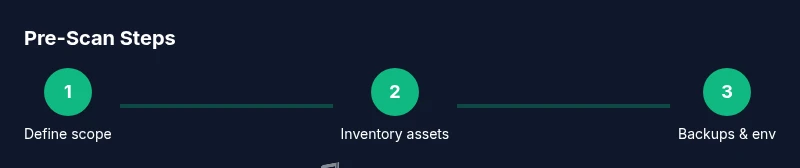
Steps
Estimated time: 4-8 hours
- 1
Define scope and authorize
Draft a signed authorization that lists the target assets, networks, and boundaries. Include allowed testing methods, time window, and exclusion rules. Confirm sign-off from security, IT ops, and compliance.
Tip: Keep a copy of the signed scope in the Evolt project for audit trails. - 2
Inventory assets and dependencies
Export or collect asset data from your CMDB. Map dependencies so findings can be interpreted in business context. Identify critical assets that require extra care during testing.
Tip: Cross-check asset owners to ensure quick remediation ownership. - 3
Schedule window and stakeholder notification
Lock in a maintenance window that minimizes user impact. Send reminders through multiple channels and publish a status page if possible. Prepare a rollback plan in case of unexpected issues.
Tip: Provide a single point of contact during the window for rapid decision-making. - 4
Back up data and validate restores
Run full backups of all critical systems and test restoration in a non-production environment or a sandbox. Verify that backups are intact, encrypted, and retrievable.
Tip: Document exact restore steps so recovery is reproducible. - 5
Prepare test environment
If possible, clone production services into a staging environment. Disable nonessential automation to reduce noise. Prepare a runbook with step-by-step actions for the scanner.
Tip: Ensure the staging surface mirrors production risk profiles as closely as possible. - 6
Validate access and credentials
Create dedicated test accounts with scoped permissions. Enable MFA and verify cross-system access from the scan host. Recheck that credentials won’t expire during the window.
Tip: Have a quick credential rotation plan in case of expiry warnings. - 7
Enable monitoring and logging
Turn on centralized logging and real-time alerts for the scan period. Prepare dashboards to monitor scan activity, authentication bursts, and system load.
Tip: Refresh monitoring dashboards before the window starts so you can spot anomalies quickly. - 8
Post-scan remediation planning
Agree on a remediation workflow, assign owners, and set realistic deadlines. Plan a follow-up verification to confirm fixes and reopen or close findings.
Tip: Publish a post-scan report to stakeholders with owners and timelines.
Common Questions
What is the purpose of an Evolt scan and when is it performed?
An Evolt scan assesses systems for vulnerabilities and misconfigurations to reduce risk before deployment or during routine audits. It’s typically scheduled during a maintenance window to minimize user impact.
An Evolt scan assesses systems for vulnerabilities to reduce risk, usually during a maintenance window to minimize user impact.
Who should authorize an Evolt scan?
Authorization should come from a formal change or security approval process, with sign-off from security, IT operations, and compliance where applicable.
Authorization should come from a formal change or security approval process with sign-offs from security and IT operations.
What if I don’t have a test environment?
If a staging environment isn’t available, limit the scope to non-critical assets first and run a dry run in a controlled segment of production, with heightened monitoring and a clear rollback plan.
If there’s no test environment, limit scope to non-critical assets and monitor closely with a rollback plan.
How far in advance should I schedule an Evolt scan?
Schedule at least 48 hours in advance when possible, with a published maintenance window and alerts to affected users to minimize surprises.
Schedule at least 48 hours ahead with a clear maintenance window and user alerts.
What happens after the scan completes?
A remediation plan should be established, with owners and timelines, followed by verification scans to confirm fixes and close findings.
After the scan, assign owners to fixes and verify completion with a follow-up check.
Watch Video
Key Takeaways
- Clarify scope and secure authorization before testing.
- Backups and staging environments reduce risk and noise.
- Communicate with stakeholders to minimize disruption.
- Plan post-scan remediation to accelerate fixes.