How to Use an AutoZone Check Engine Light Scanner
Learn how to use an autozone check engine light scanner to pull fault codes, interpret them, and decide on repair steps. This expert guide from Scanner Check covers safe setup, step-by-step usage, and practical tips.

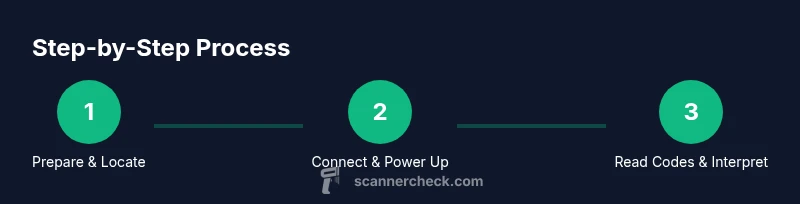
Learn how to use an autozone check engine light scanner to pull fault codes, interpret meanings, and decide the next steps. This step-by-step guide covers preparing the tool, locating the OBD-II port, powering the device, reading codes, interpreting common faults, and deciding whether DIY fixes are needed or if professional service is warranted. It also covers safety and documentation tips.
Why an autozone check engine light scanner matters for DIY diagnostics
For DIY enthusiasts, a dedicated scanner is the fastest path from a flashing or steady check engine light to a real repair plan. If you own an autozone check engine light scanner, you can pull fault codes directly from the car’s computer, view live data streams, and decide on informed next steps. According to Scanner Check, using a targeted diagnostic tool reduces guesswork and helps you understand not just what is wrong, but why it happened. This guide explains how to choose a scanner, connect it safely, interpret codes, and decide when professional help is warranted. By following these steps, you’ll gain confidence in your ability to triage issues, save time, and communicate clearly with technicians when needed.
What the scanner can and cannot replace in your toolbox
A well-chosen scanner gives you access to essential data but cannot fix the car by itself. It reads stored and pending fault codes, displays live data streams, and helps you confirm symptoms such as misfires or fuel trim issues. However, an autozone check engine light scanner cannot physically repair a failed component or guarantee a root cause. Use it to narrow down possibilities, plan your repairs, and communicate with technicians more efficiently. The Scanner Check team emphasizes using the tool as a first-step ally, not the final authority, and encourages owners to follow up with professional diagnostics if codes point to sensors, actuators, or mechanical failures.
Key features to look for in a modern diagnostic tool
When selecting an autozone check engine light scanner, prioritize features like: code reading for all OBD-II modes, live data streams, freeze-frame data, and the ability to clear codes after repair. Ensure compatibility with your vehicle’s year and model, and verify that the tool supports generic and manufacturer-specific codes. A helpful extra is a user-friendly interface and a robust app ecosystem so you can log data over time. Scanner Check notes that broad coverage and clear data presentation reduce confusion during troubleshooting, especially for users juggling multiple vehicles or a DIY project timeline.
Safety and prep before you start
Before you start, park on a level surface, engage the parking brake, and turn off the ignition. Locate the OBD-II port under the dashboard, usually near the steering column, and inspect the connector for damage. Keep a flashlight handy to see in dim spaces. Wear eye protection and gloves if you’re working near hot components, and never disconnect essential sensors while the engine is running. This prep reduces risk and ensures you won’t miss critical codes, while also protecting you from common under-dash hazards like snagged cables or loose connectors.
Quick-start checklist for your first scan
Getting started with your first scan is straightforward if you follow a short checklist. Gather your tools, verify vehicle readiness, and then run the scan in a calm, well-lit environment. Begin by turning off the engine, plugging the scanner into the OBD-II port, and powering the device. Navigate to the Read Codes or Diagnostic menu and start a new scan. Record any codes and their freeze-frame data, then compare results to a trusted fault guide. If you see codes related to ignition, fuel delivery, or sensors, map out a plan for testing before you replace parts. Always clear codes only after addressing the root cause to avoid misleading results.
Reading codes and understanding common fault categories
Most vehicles use standardized P, B, C, and U codes, each pointing to a different subsystem. P codes typically cover powertrain issues like misfires or sensor faults; U codes relate to communications between modules; B codes are body-related faults, and C codes involve chassis components. The autozone check engine light scanner translates numeric codes into plain-language descriptions, which helps you triage quickly. If you see a P0300 misfire code, for example, you’ll know to inspect ignition coils, spark plugs, and fuel delivery before purchasing parts. Remember that codes indicate symptoms, not final fixes, so use them as a starting point for testing.
Clearing codes, testing, and planning repairs
Clearing codes is a common post-repair step, but it is not a substitute for fixing the underlying problem. After repairs, perform a drive cycle and re-scan to confirm that the light stays off. If the light returns, re-check the diagnostic data, as some issues require sequential steps to resolve. The scanner’s live data can help you validate repairs by showing improved sensor readings and stable fuel trims. Maintain a repair log with dates, codes, actions taken, and test results to support future service calls.
Common mistakes and how to avoid them
A frequent error is relying on codes alone without verifying symptoms or lab data. Another pitfall is clearing codes too soon, which can mask persistent problems. Users may also ignore specialized codes or fail to check readiness monitors that affect emissions testing. Take time to compare codes against reliable guides, test wiring and sensors, and seek professional help if symptoms persist after basic diagnostics. By staying methodical, you’ll reduce wasted parts and misdiagnoses.
Tools & Materials
- OBD-II scanner(Must support reading codes, live data, and clearing fault codes where applicable.)
- Smartphone or tablet with compatible app(Bluetooth or USB connection; ensure app is updated.)
- Vehicle owner's manual(Helpful for port location and vehicle-specific cautions.)
- Safety PPE (gloves and eye protection)(Basic protection when working under the dash or near hot components.)
- Flashlight(Illumination for dim engine bay areas.)
- Notebook or digital log(Record codes, readings, and actions for future reference.)
Steps
Estimated time: 45-60 minutes
- 1
Prepare the vehicle and tools
Park on a level surface, apply the parking brake, and turn off the engine. Gather your tools and inspect the OBD-II port area for any damage. Ensure the scanner’s battery is charged and that you have a clear workspace.
Tip: Keep the hood closed during initial setup to avoid accidental opening or injuries. - 2
Locate and access the OBD-II port
Find the port under the dashboard, typically near the steering column. If you’re unsure, consult the vehicle manual or a repair guide. Do not force the connector; unplug by gripping evenly.
Tip: A flashlight can help you see the port clearly in dim areas. - 3
Connect the scanner and power it up
Plug the scanner into the OBD-II port and power on the device. Some models power from the vehicle; others require a separate battery or USB power. Wait a few seconds for the device to boot and establish a connection.
Tip: If the scanner won’t connect, check for loose cables or try a different USB/BT port. - 4
Read fault codes
Navigate to the Read Codes or Diagnostic menu and initiate a new scan. Note any stored or pending codes and capture freeze-frame data if available.
Tip: Record the exact code strings for later reference. - 5
Interpret data and plan actions
Use the scanner’s built-in definitions to identify probable causes. Cross-check with symptom notes and test one potential cause at a time rather than replacing multiple parts.
Tip: Prioritize fixes that address the root cause rather than symptoms. - 6
Clear codes after repairs and verify
If you’ve completed a repair, clear the codes and run a drive cycle to confirm the fault does not reappear. Re-scan to ensure the light stays off.
Tip: If the light returns, re-scan to determine if the issue recurs or if additional symptoms exist.
Common Questions
What is an OBD-II scanner and what does it do?
An OBD-II scanner reads fault codes from the vehicle's onboard diagnostic system and may show live data, readiness monitors, and freeze-frame information. It helps you identify likely causes before deciding on repairs.
An OBD-II scanner reads codes from your car’s computer and can show live data to help you diagnose issues.
Can I clear codes myself after repairs?
Yes, you can clear codes after performing repairs, but only after the repair to verify the fault is resolved. If the underlying issue remains, the light may come back on.
Yes, you can clear codes after fixing the issue, but make sure the fault is resolved first.
What does a P0300 code mean?
P0300 indicates a random or multiple misfire detected in multiple cylinders. It warrants checking ignition components, fuel delivery, and related sensors.
P0300 means there’s a misfire affecting multiple cylinders; you’ll want to check spark, fuel, and related parts.
Do I need professional help if codes persist after DIY fixes?
If codes persist after your DIY attempts, or if you’re uncomfortable performing tests, it’s wise to consult a professional to avoid further damage or safety risks.
If codes keep coming back after DIY fixes, get a pro to help diagnose further.
What data should I collect besides codes?
Collect live sensor data, voltage readings, and freeze-frame values when possible. This data helps pinpoint faulty components more accurately.
Collect live data and freeze-frame values to help locate the faulty part.
Is an autozone check engine light scanner compatible with all cars?
Most OBD-II scanners work with a wide range of vehicles sold in the U.S. after 1996, but compatibility varies by model and year. Check your car’s readiness and connector type.
Most OBD-II scanners work with many cars since 1996, but always verify compatibility with your model.
Watch Video
Key Takeaways
- Read and record OBD-II codes before making assumptions
- Interpret codes using reliable guides and symptom checks
- Use the scanner for test data, not just code viewing
- Clear codes only after repairs to confirm outcomes
- Maintain a diagnostic log for future reference