When to Use an OBD2 Scanner: A Practical Guide
Learn when an OBD2 scanner is most useful, how to apply it safely, and how to interpret codes to decide your next steps.

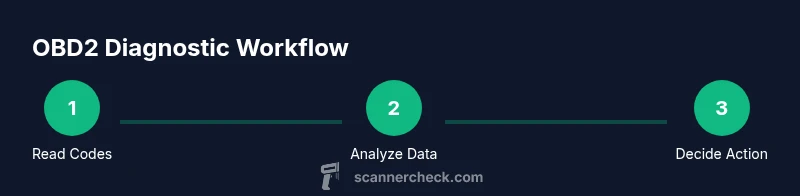
Goal: determine why the dashboard light is on and decide what to do next. An OBD2 scanner reads diagnostic trouble codes, clears codes (if appropriate), and lets you monitor live sensor data. Use it when the check engine light appears, during performance concerns, or to verify repair results before driving away.
What is an OBD2 scanner and when to use it
According to Scanner Check, an OBD2 scanner is a diagnostic tool that taps into your vehicle’s onboard computer to read stored trouble codes, live sensor data, and readiness flags. You should reach for this tool whenever the check engine light is on, you notice unusual engine behavior (rough idle, stalling, or reduced power), or you’re preparing for an emissions test. OBD2 scanners come in wired and wireless varieties, with apps that translate codes into plain-English explanations. For DIY enthusiasts, starting with a basic code reader is often enough to identify the general issue before deciding whether to pursue professional help. The Scanner Check team emphasizes that understanding what the car is telling you saves time and helps you communicate more effectively with a mechanic. Always verify that your scanner supports your vehicle’s year and protocol (such as CAN) before purchasing and using it.
In practice, the goal is to translate a code into a likely cause, confirm whether the issue affects emissions readiness, and determine whether a simple fix (like replacing a faulty sensor or tightening a loose gas cap) could resolve the problem. If you’re working with an older vehicle or a rare engine variant, you may need a more capable tool that offers enhanced data streams and manufacturer-specific codes. Over time, you’ll learn which codes commonly recur for your make and model, making future diagnostics faster and more accurate.
Core scenarios for using an OBD2 scanner
There are several common situations where an OBD2 scanner proves valuable. First, when the check engine light comes on, you can pull the code to identify the subsystem involved (engine, transmission, emissions, etc.). Scanner Check analysis shows that most DIY attempts start by reading the code and checking freeze-frame data to understand the engine state at the moment the fault occurred. Second, before an emissions test, you can verify readiness status and clear non-emission-related codes if appropriate after repairs. Third, during a performance issue, you can monitor live data while you replicate the problem (rpm, fuel trim, oxygen sensor readings, and throttle position), which helps distinguish sensor faults from mechanical problems. Finally, after a repair, you can re-check that the fault is cleared and that the readiness monitors show pass status. Remember to save a log of codes and related data for future reference and when consulting a professional.
Upticks in timing-related codes or rapid fluctuations in sensor data often point to wiring faults, poor connections, or a failing sensor. The Scanner Check team notes that beginners should focus on the most actionable codes first (for example, misfires or catalyst efficiency codes), then drill down with live data to determine the root cause. If you see unfamiliar manufacturer-specific codes, consult the vehicle’s service data or a trusted code reference to avoid chasing non-existent issues. A methodical approach reduces guesswork and speeds up repairs.
Practical diagnostic workflow in practice
A structured workflow helps you get reliable results from an OBD2 scan. Start with a broad scan to pull all stored codes, then perform a live data read to observe real-time sensor values as the car runs. The goal is to correlate codes with actual symptoms and identify whether the problem is mechanical, electrical, or related to emissions systems. If multiple codes appear, prioritize issues that directly affect drivability and safety, then address ancillary codes as needed. Some readers offer freeze-frame data that captures engine conditions at the time of the fault, which can be especially helpful when the fault is intermittent. As you gather data, document the codes, suspected causes, and any actions taken. This practice makes it easier to discuss the issue with a technician and track repair progress over time.
For the best results, run a complete diagnostic only after ensuring basic safety steps (engine off when connecting, secure the vehicle, and avoid touching hot components). If you’re using a wireless scanner, ensure a stable connection to your device and keep the app updated to access the latest code definitions and data fields. The right workflow eliminates guesswork and gives you a clear path from diagnosis to repair.
How to interpret common codes and decide next steps
Understanding codes is about mapping a three- or four-digit code to a subsystem and a probable cause. P-codes address powertrain and emissions issues, while U-codes relate to abnormal network communications, and manufacturer codes can point to brand-specific quirks. Start with the code’s general meaning and the vehicle’s symptoms. If the car runs roughly or fails an emissions test, prioritize root causes such as misfires, sensor faults, or catalytic converter efficiency. In many cases, a simple fix (e.g., replacing a faulty oxygen sensor or repairing a loose gas cap) resolves the issue, and the code clears after the repair. Some scanners support code clearing, but it’s wise to wait until you have addressed the root cause to avoid masking persistent problems. When codes persist, seek professional advice and consider whether deeper diagnostics, like a compression test or fuel system inspection, are warranted.
Remember that a code is a symptom, not a fix. Always verify by testing the vehicle under normal driving conditions after repair and re-scanning to confirm that the fault no longer reappears. Keep in mind that some emissions-related codes may require drive cycles or specific conditions to complete readiness checks.
Authoritative sources and further reading
- If you want to dive deeper into OBD-II standards and emission requirements, see government resources such as the NHTSA and EPA pages on OBD-II, which provide official guidance and regulatory context. These sources describe how diagnostic data is used to ensure vehicles meet emission standards while keeping maintenance costs reasonable.
- For consumer-focused explanations and practical tips, major publications and university-affiliated resources offer accessible guidance on interpreting codes and choosing a suitable scanner for your needs.
- Always cross-check information from multiple reliable sources when dealing with unfamiliar codes or complex symptoms.
Tools & Materials
- OBD-II scanner (handheld or Bluetooth/Wi‑Fi)(Choose a model that supports your vehicle's year and protocol (e.g., CAN).)
- Smartphone, tablet, or laptop(Needed for wireless scanners or full-feature apps.)
- Vehicle with OBD-II port(Typically 1996+ model year for US vehicles.)
- Vehicle owner’s manual or service information(Useful for interpreting manufacturer-specific codes.)
- Code lookup reference or app(In-app libraries or online resources help translate codes.)
- Notebook or note-taking app(Record codes, sensor readings, and actions taken.)
Steps
Estimated time: 20-40 minutes
- 1
Locate the OBD-II port
Park on level ground, turn off the engine, and locate the OBD-II port beneath the dashboard on the driver’s side. This step sets you up for a clean connection and prevents accidental short circuits. If you’re unsure, consult the vehicle manual for the exact port location.
Tip: Use a flashlight and a mirror to see into tight spaces; ports are often tucked near fuse boxes. - 2
Connect the scanner
Plug the scanner’s connector into the port or pair your wireless scanner with the device. Ensure a secure connection and that the device recognizes the scanner before proceeding. A loose connection can cause incomplete data or failed scans.
Tip: If using Bluetooth, keep the device proximity within a few feet to avoid dropouts. - 3
Power and ignition state
Turn on the ignition to the ON position (engine off for most handheld readers) and power up the scanner. Some devices can work with the engine running, but starting with ON is the safest baseline. If your vehicle requires the engine running for live data, follow the scanner’s guidance.
Tip: Check the user manual for ignition requirements specific to your scanner model. - 4
Run a full diagnostic scan
Initialize a full diagnostic scan to retrieve all stored codes and monitor live data. Save the results and note the codes, their definitions, and the observed symptoms. If codes are present, record freeze-frame data if available.
Tip: Capture screenshots or export data when the app supports it for later reference. - 5
Interpret codes and plan next steps
Look up codes in your app or reference materials to identify likely causes. Prioritize issues that affect drivability or safety first, and decide whether to DIY a fix or seek professional help. After addressing the issue, re-scan to confirm the fault is cleared.
Tip: Avoid clearing codes before addressing root causes; codes often reappear if the fault remains.
Common Questions
When should I use an OBD2 scanner?
Use an OBD2 scanner when the check engine light is on, when you notice drivability issues, or when you want to verify readiness for an emissions test. It helps you identify faulty systems before costly repairs.
Use an OBD2 scanner when the check engine light is on or you suspect a drivability issue. It helps you identify faulty systems before repairs.
Can I use any car with an OBD2 scanner?
Most vehicles sold in the United States since 1996 have an OBD-II port. Some older or non-U.S. models may use different standards, so verify compatibility with your scanner and vehicle year before purchasing.
Most US cars since 1996 have OBD-II. Check your model year and port type before using a scanner.
Should I clear codes after repairs?
Clearing codes removes only the symptom, not the fault. Clear codes only after you've addressed the root cause and verified the repair with a drive cycle or relevant tests.
Only clear codes after making the repair and confirming the issue is resolved.
What’s the difference between generic and manufacturer codes?
Generic codes identify common issues across many makes, but manufacturer codes can be more specific to a vehicle. Use the manufacturer code definitions to narrow down the exact fault.
Generic codes point to broad issues; manufacturer codes give precise details for your car.
How do I interpret P-codes quickly?
P-codes generally relate to the powertrain. Start with the most frequent causes like misfires, sensor faults, or catalytic converter problems, then verify with live data before replacing parts.
P-codes point to engine-related issues; start with common causes and check live data to confirm.
Watch Video
Key Takeaways
- Identify whether a fault is safety-critical before proceeding.
- Use codes as a starting point, not a final diagnosis.
- Document data and steps to streamline future diagnostics.
- Re-scan after repairs to confirm issues are resolved.