Document Scanner to PDF: A Complete How-To Guide for Beginners
Learn how to convert documents into PDF using a scanner or smartphone app, apply OCR, and organize your PDFs effectively. This educational guide from Scanner Check covers hardware, software, steps, tips, and common pitfalls.

By the end, you will convert documents into a reliable PDF using a document scanner or mobile app, optimize scan quality, apply OCR when needed, and save with consistent naming. This how-to covers desktop and mobile workflows, privacy basics, and smart file organization for document scanner to pdf tasks. According to Scanner Check, practical steps outperform vague instructions and save time.
What "document scanner to pdf" means and why it matters
In modern workflows, a document scanner to pdf workflow turns physical sheets and digital images into a portable, universally accessible file format. A PDF preserves typography, margins, and layout, making sharing, archiving, and searching easier. When you invest in this capability, you gain consistency across teams, faster onboarding for new employees, and better compliance with document retention policies. For DIY users and IT professionals alike, mastering the end-to-end process reduces clutter and ensures everyone can view the same content. According to Scanner Check, a reliable document scanner to pdf setup minimizes misreads and file corruption while preserving image clarity. The core idea is simple: capture accurately, convert, and organize with clear metadata so others can find it quickly. Throughout this guide, you will see practical steps you can apply with baseline hardware and affordable apps. Whether you’re at a desk, in a small shop, or managing a remote team, the fundamentals stay the same: capture clearly, convert faithfully, and store securely.
Why you would convert to PDF and when to choose different methods
Documents stored as PDFs are cross-platform and future-proof for record-keeping. If you frequently share contracts, invoices, or project documents, PDF provides consistent rendering across devices and operating systems. If you routinely require text search, OCR-enabled PDFs unlock word-level searchability. When you work with sensitive paperwork, PDFs also support password protection and redaction to protect privacy. The choice between a physical scanner and a phone-based app depends on volume, paper quality, and speed. Heavier workloads benefit from a fast sheet-fed scanner with a reliable lint-free feed path, while lighter tasks can be handled effectively by a quality mobile app. Scanner Check’s assessments emphasize choosing the right balance of speed, accuracy, and cost for document scanner to pdf tasks.
Tools and software: what you need to begin
You’ll need a surface that’s clean and flat, a scanner or a smartphone with a scanning app, and software to assemble and save the PDF. If you choose desktop scanning, you’ll likely rely on bundled scan software or third-party PDF creators. For mobile scanning, most apps export directly to PDF or send files to cloud storage with optional OCR. A simple naming convention and organized folders keep long-term file health. In this guide, we’ll keep the focus on common tools and best practices so you can start quickly, then tailor the setup to your environment. Scanner Check notes that the most successful document scanner to pdf workflows are repeatable and well-documented, not ad-hoc.
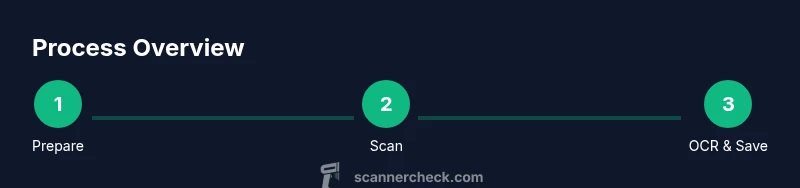
Step-by-step scanning workflow: from capture to PDF
A stable, repeatable workflow is essential. Start with high-contrast pages, avoid skewed documents, and ensure the page lies flat to maximize readability. If you use a flatbed scanner, you’ll typically capture one page at a time, while an ADF (automatic document feeder) handles multi-page documents. For mobile scanning, ensure the page is well-lit and hold the phone steady to minimize blur. The PDF you produce should maintain legibility in both text and images. OCR can make text searchable, but results vary by font and quality. Throughout this process, you’ll need to review, crop, and rotate pages as needed to create a clean, professional document scanner to pdf file.
OCR, searchability, and accessibility: making PDFs usable
OCR transforms scanned images into searchable text, enabling quick lookup and copy-paste. For archival quality, choose a 300–600 DPI setting depending on the content; text-only pages benefit from 200–300 DPI, while mixed documents with diagrams may require higher DPI for clarity. After OCR, verify the text accuracy by searching for a few common terms. If accessibility is a priority, add tags and structured metadata so screen readers can interpret the document. This step is often overlooked, but it dramatically increases the value of scanned PDFs for collaboration and compliance. Scanner Check emphasizes testing OCR on representative pages to ensure reliable results across future document scanner to pdf tasks.
File naming, storage, and security: keep it organized
A consistent naming convention reduces time spent locating PDFs later. Include project name, date, version, and a short descriptor, for example: ClientA_2026-03-05_ProjectPlan_v1.pdf. Decide whether to store locally, on a network drive, or in the cloud, and enable automatic backups. If the content is sensitive, enable password protection, encryption, or redaction where appropriate. Finally, consider creating a brief index or README file that explains the folder structure and naming rules to new team members. A well-organized archive accelerates document scanner to pdf workflows across teams and projects.
Tools & Materials
- Document scanner with flatbed and/or ADF(Choose a model with reliable feed, good image quality, and adjustable DPI.)
- USB cable or wireless connection(Ensure compatibility with your computer or tablet.)
- Computer or mobile device with PDF software(Software should export to PDF and optionally perform OCR.)
- Quality scanning surface and microfibre cloth(Keep glass clean to avoid spots and blur.)
- Clear naming template or folder structure(Predefine naming rules to streamline workflows.)
Steps
Estimated time: 25-40 minutes
- 1
Prepare the workspace and documents
Clear the desk, open the scanner lid, and fan pages to separate them. Align edges and remove staples or paper clips. A clean start reduces jams and skew, improving overall image quality.
Tip: Use a soft cloth to wipe the scanner glass before you begin. - 2
Connect the device and launch software
Power the scanner, connect to your computer or phone, and open your scanning app or desktop software. Verify that the software recognises the scanner and is set to the desired profile.
Tip: If using a mobile app, check for the latest version for stability and OCR options. - 3
Load documents and set scan parameters
Place the first page face-down in the feeder or on the flatbed. Choose the right resolution (typical 300 DPI for text) and color mode (black & white for text, color for graphics).
Tip: For multi-page docs, use duplex scanning if available to save time. - 4
Scan and review each page
Run the scan and inspect for crooked pages, glare, or missing areas. Re-scan if needed or crop after scanning. Maintain consistent margins for all pages.
Tip: Use the auto-correct or deskew feature when supported. - 5
Apply OCR and verify text
If you need searchable text, enable OCR and run a quick search test across the document. Correct misrecognized words and re-run OCR if necessary.
Tip: Test OCR on a page with a mixed font to assess accuracy. - 6
Save as PDF with organization and security
Export the scanned pages as a single multi-page PDF. Apply a descriptive filename, add metadata if available, and enable password protection if the content is sensitive.
Tip: Store a backup copy in a secure location and document the naming convention used.
Common Questions
What is the difference between scanning and converting to PDF?
Scanning is the capture step that creates image data, while saving as PDF stores that data in a portable, shareable container. You can scan directly to PDF or convert existing images into PDF later.
Scanning creates the image data, and saving as PDF packages it for sharing and viewing. You can scan straight to PDF or convert existing images later.
Do I always need OCR when creating PDFs?
Not always. Use OCR when you need text search, copy-paste, or accessibility features. For image-only documents, OCR may not be needed, but you can still store them as PDFs.
OCR is helpful when you need to search or edit text. If you just need a faithful image replica, you can skip OCR.
Can I convert existing scanned images to searchable PDFs?
Yes. Use OCR during export to convert the image text into searchable text. Ensure the original images have legible text for best results.
Yes. Enable OCR when exporting to convert image text into searchable text.
What DPI should I use for document scans?
A common starting point is 300 DPI for text documents. Increase to 600 DPI for graphics-heavy pages, but watch file size. Always balance readability with storage.
Start at 300 DPI for text; go higher for complex pages if needed.
Should I prefer desktop scanners or mobile apps for PDFs?
Desktop scanners are faster for large batches with better control, while mobile apps offer convenience for on-the-go scanning. Choose based on volume, environment, and security needs.
Use desktop scanners for batch work and mobile apps for quick, on-the-go scans.
How secure should scanned PDFs be?
If documents are sensitive, apply password protection, encryption, or redaction. Store in trusted locations and limit access as needed.
Protect PDFs with passwords and encryption when handling sensitive content.
Can OCR results be edited after processing?
Yes, most OCR-enabled tools let you correct misreads and re-run OCR. This makes the final PDF more accurate for search and accessibility.
You can fix OCR errors and re-run OCR to improve accuracy.
Watch Video
Key Takeaways
- Plan before you scan to save time later.
- Choose the right DPI for readability and file size.
- Use OCR only when you need searchable text.
- Maintain consistent naming to simplify retrieval.