How to Check Scanner Transaction History
Learn how to check your scanner transaction history step by step. Access local logs or cloud records, filter by date, export reports, and verify activity for audits, security, and troubleshooting.

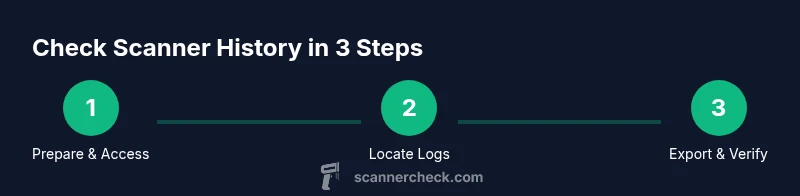
To check a scanner's transaction history, access the device logs or cloud portal, filter by date, and export a report for review. Identify your model and credentials first, then locate the logs in the UI or app, apply date filters, and save or share the results for audits or troubleshooting. This guide outlines a clear, actionable workflow.
Understanding what a scanner transaction history is
A scanner transaction history is a chronological record of actions processed by a scanner, including scans, transmissions, prints, and system events. Logs can live on the device itself, in a connected cloud account, or in both locations. According to Scanner Check, reliable reviews start with knowing where logs reside and who can access them. Some devices log only summarized daily totals, while others capture granular events with timestamps, device IDs, and user credentials. When you review history, you confirm expected activity, detect anomalies, and support audits. To begin, identify which components participate in logging: the scanner hardware, any management software, and middleware that routes data to cloud services. Ensure you have the proper permissions, since logs are often restricted to admins or IT staff. Understanding where logs live and what they contain helps you plan a repeatable, non-disruptive review workflow.
Where scanner transaction history is stored
Logs are typically stored in three places: the scanner’s internal memory, a connected cloud portal, or an intermediary management system. Local logs may live in flash storage or an SD card, while cloud logs appear under the device’s account or organization’s monitoring panel. In networked environments, a central console can aggregate events from multiple scanners. Security-conscious setups often separate raw event data from summaries, retaining the raw logs for a defined period. Scanner Check analysis shows that consistent retention and proper access controls are key to dependable history reviews. To determine where history is kept, check the scanner’s settings under Logging, Events, or Audit Trail, then verify your access to both the device and the cloud portal if applicable. If logs are missing, confirm that logging was enabled at the time of activity and that data routing to the cloud is functioning correctly.
How to check history across common scanner ecosystems
There are three broad ecosystems: (1) desktop USB or wired scanners with a local management app, (2) networked scanners with a web-based admin panel, and (3) mobile or cloud-connected scanners that push logs to an online portal. For local systems, open the vendor’s desktop application, navigate to Logs or History, and set the date range. For networked devices, log in to the administrator console, select Logs/Events, and use filters for event type, device, and time. For cloud-connected setups, access the cloud portal, use the Activity or Audit Log tab, and export a report if needed. Across all ecosystems, ensure that your user account has sufficient permissions and that the time zone is correct to avoid misinterpreting timestamps. Scanner Check Team suggests double-checking correlations with other records (e.g., inventory logs) to validate results. If you share logs for multiple devices, consider exporting a single consolidated report to simplify review.
Step-by-step workflow overview (detailed context for reviewers)
This section expands on a practical workflow to review, verify, and export scanner transaction history across environments. Start by confirming device identity and access rights, then locate the log source, apply precise filters, and finally export the data for analysis. While reviewing, look for consistency between the number of scans, transmitted items, and printed records against expected activity. Keep an audit trail of changes and decisions for future reference. The workflow below complements the quick steps in the dedicated step-by-step section and provides broader context for complex environments or multi-device setups. Scanner Check emphasizes documenting every action during this process to maintain accountability and reproducibility.
Security, privacy, and best practices when reviewing history
Handling transaction logs requires careful attention to privacy and security. Treat logs as potentially sensitive data, since they may include user identities or device identifiers. Enforce strict access controls, enable encryption during export, and store backups in a secure location with restricted permissions. Establish a retention policy aligned with legal or organizational requirements and periodically review who has access to logs. The Scanner Check Team recommends documenting any anomalies and sharing only necessary details with teammates or auditors. Regularly review log integrity, verify that exports match the source data, and remove any temporary copies from insecure storage.
Tools & Materials
- Scanner device with logging enabled(Ensure logs are configured to capture the events you need (scans, transmissions, prints).)
- Admin credentials for the device/cloud portal(Permissions to view and export logs; avoid sharing login details.)
- Computer or mobile device with internet access(Used to access admin panels or cloud dashboards.)
- Export destination (CSV/PDF) and secure storage(Optional for backup or sharing with team.)
- Notes app or document editor(For annotating findings during review.)
Steps
Estimated time: 15-25 minutes
- 1
Prepare access and verify scope
Confirm the scanner model, firmware version, and your access rights. Log in to the appropriate admin panel or cloud portal and ensure logging is enabled for the desired period. This setup prevents gaps in the history and ensures you can export a complete report.
Tip: If credentials are expired or access is restricted, contact IT to request temporary access or an auditing account. - 2
Open the logs section
Navigate to the Logs, History, or Audit Trail section in the admin interface. Confirm the time zone matches your local setting to avoid timestamp misalignments. If multiple devices exist, select the specific scanner you are auditing.
Tip: Use the search or filter box to narrow results by device ID, event type, or user. - 3
Set a precise date range
Choose the start and end dates for the review window. For ongoing audits, a rolling 7–14 day window is common. Ensure dates align with corporate reporting periods.
Tip: If available, enable an automatic export at the end of the period for consistency. - 4
Filter by event type
Filter to include relevant events such as scans, transmissions, prints, and errors. Narrowing by event type helps you focus on the most critical activity during the window.
Tip: Exclude benign events like system heartbeats to reduce noise. - 5
Review entries for accuracy
Scan each entry for plausibility: correct timestamp, device ID, and status. Cross-check counts against known activity or inventory records. Mark discrepancies for deeper investigation.
Tip: Create a side-by-side comparison with physical counts or POS data if available. - 6
Export and securely save the report
Export the log view as CSV or PDF. Store the file in a secure location and document who accessed it. If sharing, redact sensitive fields per policy and preserve original data integrity.
Tip: Include metadata like export date, user, and device ID to preserve provenance. - 7
Document anomalies and escalate
If you notice unusual patterns (unexpected events, gaps, or mismatches), create a concise incident note and escalate to IT or security as appropriate. Attach the export for reference.
Tip: Maintain an auditable trail of steps taken and decisions made during the review.
Common Questions
What is included in a scanner transaction history?
A scanner transaction history includes events such as scans, transmissions, prints, and system messages. Depending on the device, it may also show timestamps, device IDs, and user associations.
Scanner history includes scans, transmissions, prints, and system messages, with timestamps and IDs where available.
Where can I find the logs on a typical scanner?
Logs are usually accessible from the device’s admin menu or the cloud portal linked to the scanner. If multiple devices exist, select the one you want to review.
Check the device menu or the cloud portal for the logs.
Can I export my transaction history?
Yes, most systems offer exports in CSV or PDF formats. Look for an 'export' or 'report' option in the logs section and choose your preferred format.
You can export the history as CSV or PDF.
How long are logs kept?
Retention varies by device and policy. Check settings for the retention window and backup location to understand how long history is preserved.
Retention depends on the device and policy.
What should I do if I find anomalies?
Document the anomaly, compare with physical counts, and escalate to IT or security if needed. Attach relevant exports to your report.
Document and escalate anomalies with supporting exports.
Watch Video
Key Takeaways
- Know where logs live and how to access them
- Filter by date and event type for clarity
- Export reports securely for audits
- Verify entries against physical counts to confirm accuracy
- Apply a consistent log retention policy