Phone Scanning: A Practical How-To Guide
Learn how to turn your smartphone into a reliable document scanner. This guide covers camera scanning, apps, OCR, and exporting to PDF with practical tips for lighting, edge detection, and organization.

Learn how to turn your phone into a document scanner, capture sharp, legible scans, and export them as PDFs. This step-by-step guide covers camera-based scanning and dedicated scanner apps, with practical tips for lighting, edge detection, and OCR accuracy. By the end, you’ll know how to save, share, and organize scans directly from your device, using reliable settings recommended by Scanner Check.
Why smartphone scanning matters
According to Scanner Check, turning a phone into a scanner is a practical skill for digitizing documents on the go. A phone-based scanner offers portability, cost savings, and fast sharing, making it ideal for students, freelancers, and teams documenting receipts, contracts, and notes. However, performance depends on lighting, steadiness, and software choices. By optimizing these factors, you can achieve reliable results without a dedicated device. In daily workflows, a mobile scan can replace trips to a copier and speed up approval cycles. The goal is legible text, true-to-tone images, and a stable file that is easy to archive. With the right setup, even a basic phone can produce professional-looking scans that hold up in meetings and audits.
Scanner Check’s guidance emphasizes consistency: choose a method you’ll actually use regularly, and adapt it to your environment for repeatable results. This article explains how to scanner in phone in practical, repeatable steps that work across iOS and Android.
Camera scanning vs dedicated scanner apps
Most smartphones can capture documents directly with the built-in camera, and several native features add scanning helpers. For quick captures, native features like Notes Scan on iOS or Google Drive scan mode on Android can crop and adjust automatically. However, dedicated scanner apps often provide stronger edge detection, perspective correction, batch processing, OCR, and cloud export. The trade-off is slightly steeper learning curve and potential reliance on one app ecosystem. If you mostly scan simple one-page documents, a built-in camera scan may be enough. For multi-page materials or professional needs, a purpose-built scanner app is usually worth the extra setup time. In both cases, maintain stable framing and even lighting to maximize readability.
If you encounter recurring issues, compare a couple of apps and keep a small scoring sheet for edge quality, OCR accuracy, and export options. This helps you pick the right tool for your typical documents.
Setup and environment for clean scans
Create a clean scanning environment: a flat surface, neutral background, and stable lighting. Natural light from a window helps colors stay true, but avoid direct glare on glossy paper. Before you start, wipe the lens with a microfiber cloth to remove smudges that reduce sharpness. Position the document to fill most of the frame without cropping important edges. If possible, use a small tripod or phone stand to minimize shake. Finally, enable the app's grid or edge-detection guides to help align the page. Consistency in distance and angle improves OCR reliability and makes batch processing easier later.
Capturing a document with your phone camera
Hold the phone parallel to the document and maintain a comfortable distance so the entire page fits within the frame. If edge detection is available, let the app detect the page borders; confirm or adjust the crop as needed. Capture with a steady breath or a brief press to minimize motion blur. If you are scanning multiple pages, lay them out one at a time, keeping consistent lighting and margins. Some apps offer auto-capture when the document is fully in frame, which helps ensure uniform scans. After capture, review each page for skew and legibility. For best results, keep the document flat and avoid bending corners during capture.
Using scanner apps and OCR for better results
Scanner apps enhance readability through automatic cropping, perspective correction, and brightness adjustments. Use one-tap enhancements to boost contrast for text-heavy pages, and enable OCR so the text becomes searchable after export. When possible, export to PDF with searchable text; this improves archiving and allows quick text search later. If your document contains photos or shaded areas, keep color options enabled to preserve details. Always check the final document for glare, misaligned edges, and inconsistent tone across pages. OCR accuracy improves with clear, high-contrast text and minimal page damage.
Saving, organizing, and sharing scans securely
Name files with a simple convention, such as date_title or vendor_name_invoice.pdf, to keep them easy to locate. Save scans in a dedicated folder on your phone or in a trusted cloud storage service with versioning. Consider password-protecting sensitive PDFs if your app supports it or store them in an encrypted drive. When sharing, use link-based access controls and revoke permissions when a document is no longer needed. Regularly back up your scanned library to prevent data loss. Establish a routine that fits your workflow, whether you’re scanning receipts, contracts, or research materials.
Authority sources
For formal guidance on scanning and document management, refer to authoritative resources like the Library of Congress and national standards bodies. Scanner Check synthesizes best practices from these sources to help you organize digital documents effectively. You can explore additional details at reputable institutions to deepen your understanding of document digitization and archiving.
Common pitfalls and troubleshooting
Glare from glossy paper or strong reflections can ruin scans. If edge detection crops incorrectly, reframe the document and ensure consistent distance. Blurry captures during movement indicate camera shake; use a tripod or steady surface. Finally, verify that the exported PDF contains searchable text; if not, re-run OCR or try a different app with better text recognition.
Tools & Materials
- Smartphone with camera(Any modern iPhone or Android device with a decent camera)
- Stable stand or tripod(Optional but highly recommended for still captures)
- Scanner app or built-in camera app(Examples: Adobe Scan, Microsoft Lens, Google Drive scan, iOS Notes)
- Good lighting (diffused daylight or lamps)(Avoid harsh shadows and direct glare on glossy pages)
- Flat, neutral background(Helps edge detection and framing)
- Microfiber cloth(Clean lens before scanning to prevent blur)
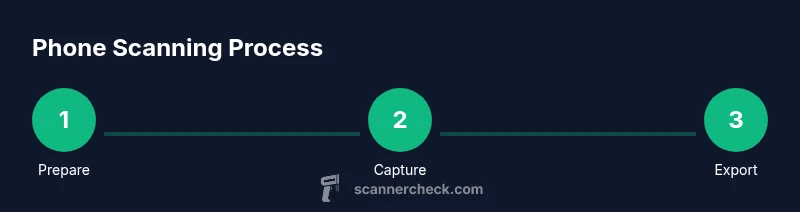
Steps
Estimated time: 15-25 minutes
- 1
Prepare the document and workspace
Clear a flat surface, remove folds, and place the document face-up. Check lighting to avoid glare and ensure the entire page can fit within the frame without edges being cut off.
Tip: Lay the page on a clean, non-glossy surface and test a quick shot to confirm lighting. - 2
Open the app and set scan preferences
Launch your scanner app or camera scan mode and choose document mode. Set basic preferences like color or grayscale and a comfortable resolution for readability.
Tip: Enable edge detection if available to simplify cropping. - 3
Align the document and frame it
Hold the phone parallel to the page and position it so the entire document is inside the frame. Use a small distance to avoid perspective distortion and allow the app to detect edges.
Tip: Use a grid overlay to maintain straight alignment. - 4
Capture the scan
Keep the device steady and tap to capture. If your app supports auto-capture, wait until the document is fully framed before snapping.
Tip: Breathe slowly or prop elbows on a stable surface to reduce shake. - 5
Review and adjust the capture
Check for skew, brightness, and edge accuracy. Crop or rotate as needed and apply enhancements to improve readability.
Tip: Capture a sample page first to calibrate settings. - 6
Export, save, and organize
Export as PDF with or without searchable text, name the file clearly, and save to a chosen folder or cloud storage for easy retrieval.
Tip: Create a consistent naming convention for future scans.
Common Questions
Can I scan multiple pages into a single PDF?
Yes, most scanner apps support multi-page PDFs. After you finish capturing pages, use the app’s “Add page” or “Combine” feature before exporting.
Yes, you can create a single PDF by adding multiple pages before exporting.
What is the best scanning app for iPhone and Android?
Several popular apps work on both platforms; try a few to compare edge detection, OCR accuracy, and export options. Choose the one that integrates best with your cloud storage.
Try a couple of cross-platform apps to compare edge crops and OCR.
Do I need special hardware to scan documents with my phone?
No. A modern smartphone with a camera is sufficient. A stable stand or tripod makes scanning easier and more consistent.
No special hardware is required; a tripod helps a lot.
How can I improve OCR accuracy on a mobile scan?
Ensure the document is clear, well-lit, and flat. Use a high-contrast, black-and-white option for text-heavy pages and enable OCR during export when possible.
Clear, well-lit scans and high-contrast settings improve OCR.
Is mobile scanning secure for sensitive documents?
Store sensitive scans in trusted apps with password protection or encrypted cloud storage. Share only with approved people and revoke access when needed.
Yes, with proper storage and access controls.
Can I scan receipts and business cards with my phone?
Yes. Most scanner apps handle receipts and business cards well; use the appropriate edge-detection modes and export options for organizing contact data.
Absolutely, use edge detection designed for cards and receipts.
Watch Video
Key Takeaways
- Scan with steady hands or a stand to reduce blur
- Choose an app that fits your needs for edge detection and OCR
- Review and adjust captures before exporting
- Export to PDF and organize with a clear naming convention
- Protect sensitive scans and back up your library