To Successfully Operate a Scanner: What to Do First
A comprehensive, step-by-step guide on the first actions you must take to operate a scanner effectively, with practical setup, troubleshooting tips, and maintenance guidance for beginners and pros alike.

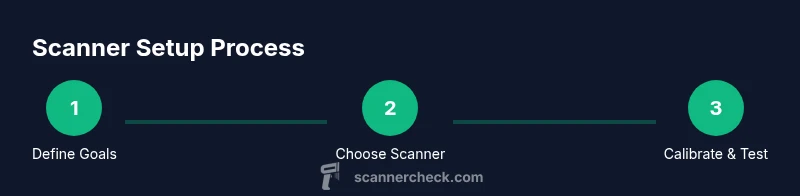
According to Scanner Check, the first step to successfully operate a scanner what will you need to do first is define your goal and confirm compatibility. Start by selecting the right scanner type for your tasks (document, photo, or barcode), verify that you have the necessary drivers and software, and assemble essential tools. This quick-start overview shows the crucial initial actions you should take.
Why the first steps matter when operating a scanner
To successfully operate a scanner what will you need to do first is establish a clear objective before you touch hardware. Your goal shapes every subsequent choice—from the scanner you buy to the resolution and color depth you select. Start by asking practical questions: What documents will you scan most? Do you need fast batch processing or high-fidelity color scans? How will you store and name digital files? By defining the scope up front, you reduce wasted time, avoid compatibility pitfalls, and set measurable success criteria. In practice, this means listing use cases, identifying required features (ADF, duplex scanning, OCR compatibility), and documenting your baseline expectations. Scanner Check’s guidance emphasizes goal alignment, hardware compatibility, and a minimal, repeatable setup to begin with.
Additionally, consider your current workstation. If you will scan large volumes, ensure your PC or Mac has sufficient RAM, USB bandwidth, and storage. If you plan to network-scan to a shared drive or cloud service, map out the destination paths now. This planning lays the groundwork for smooth operation and reduces frustration during the first real scans.
Choosing the right scanner for your use case
Choosing the right scanner is more than choosing a price point. Different tasks demand different capabilities. A flatbed scanner suits photos and delicate documents, while sheet-fed or ADF scanners excel at batch processing. For text-heavy documents, a scanner with optical character recognition (OCR) support will be valuable. If you handle fragile documents or archival work, prioritize color depth, dithering options, and grayscale accuracy. Don’t overlook scan speed and duty cycle for high-volume environments. Scout for compatibility with your preferred operating system and software ecosystem. Read reviews that focus on reliability, driver longevity, and firmware update cadence. At this stage, you should also consider future-proofing: whether you might need mixed media support, duplex capability, or built-in OCR for automating workflows.
Reflect on your typical document types—receipts, invoices, contracts, or manuals—and map those to the scanner’s media handling, glass size, and feed reliability. A good rule of thumb is to overestimate a bit on duty cycle and software flexibility to avoid daily bottlenecks as your scanning needs evolve.
Preparing your workspace and safety considerations
A clean, organized workspace is essential for reliable scanning. Clear a flat, stable surface away from dust and direct sunlight, and ensure proper ventilation if your scanner generates heat during extended runs. Use a surge protector to shield the device from power spikes and consider EMI-safe layouts to minimize interference with networked setups. Gather your documents in advance; remove staples, paper clips, and bound materials that could jam the feed mechanism. Place a lint-free cloth and a gentle cleaning solution approved by the manufacturer near the desk for glass upkeep. If you’re handling archival materials, use gloves to avoid fingerprints and recommend a soft brush or air blower for delicate cleaning. Finally, set up a consistent file-naming convention and a primary storage location to support a repeatable workflow from day one.
Safety note: never force the feed tray or run dense stacks through a scanner without checking the manufacturer’s limits. Overfeeding can cause jams, damaged rollers, or misfeeds that compromise image quality. Regular maintenance intervals help prevent buildup that undermines scan quality over time.
Installing drivers and software correctly
Driver installation is the bridge between hardware and software. Start by downloading the latest drivers from the manufacturer’s official site or using the provided installation media. Avoid third-party sites that may host outdated or tampered software. During installation, choose a standard user profile if you’re on shared devices, and enable automatic updates if available to keep your scanner firmware current. After installation, verify the device is recognized by your operating system: you should see the scanner listed under devices and printers (Windows) or in Image Capture (macOS). Install any companion apps used for scan presets, OCR, or cloud storage integration. If you’re in a managed IT environment, coordinate with your administrator to avoid conflicting USB devices or security policies that could block driver installation. Once drivers are in place, run a quick test scan to confirm the scanner feeds correctly and that the software can preview the image before saving.
Keep your driver installer files in a dedicated folder for easy reinstallation if needed and create a simple checklist you can reuse for future setups.
Calibrating settings and establishing workflows
Calibration ensures consistent image quality across sessions. Start with a baseline resolution (e.g., 300 dpi for documents, 600–1200 dpi for photo archiving) and color mode (color, grayscale, or black-and-white) based on your primary use. If you plan to OCR documents, enabling black-and-white or grayscale scanning can improve readability and reduce file size. Establish default scan areas and pages-per-minute targets, and create preset profiles for common tasks (invoices, receipts, contracts). Save these profiles in the scanner software so you can recall them in a single click. For batch workflows, enable duplex scanning when possible and configure auto-cropping, deskew, and edge-cleaning features to minimize manual post-processing. Document every setting you choose so you can reproduce results or diagnose discrepancies later. The goal is to arrive at a reliable baseline you can expand later without reconfiguring the entire system.
If you’re using OCR, test a sample document to confirm character accuracy and correct misreads early in the setup process.
Testing, documentation, and baseline results
With defaults in place, perform a comprehensive test with different document types: a clean letter, a crumpled sheet, a receipt, and a photo. Inspect image sharpness, color fidelity, and OCR accuracy. Note any issues such as skew, blur, or density variations, and adjust settings accordingly. Document your findings in a setup journal or a digital note: include scanner model, firmware version, settings used, the date, and scan results. This baseline will help you measure improvement after tweaks or hardware changes. Save representative samples for future reference, and consider exporting test results as PDFs or CSVs for easy sharing with teammates or stakeholders. Finally, schedule a periodic review of your baseline—every 6–12 months or after a major firmware update—to maintain throughput and quality.
The objective is to seal a dependable starting point that you can rely on as you scale up scanning tasks.
Maintenance, backups, and long-term reliability
Consistency in maintenance prevents performance dips. Establish a routine: wipe the glass with a microfiber cloth, vacuum any visible debris around the feed path, and check for belt wear or roller stiffness every 3–6 months. Back up configuration files and presets, and store them in a version-controlled location or cloud-synced folder. Create a quick-reference guide that outlines common troubleshooting steps, error codes, and calibration procedures. Regularly update firmware and software from trusted sources, and monitor for any changes in scan quality after updates. By documenting and backing up your setup, you create a durable foundation that can weather hardware aging or staff transitions. Finally, consider periodic audits of your file naming, storage paths, and retention policies to keep entire workflows efficient and compliant with organizational standards.
Troubleshooting startup issues and common roadblocks
New scanner users often encounter issues around device recognition, driver conflicts, or poor scan quality right after setup. If the scanner isn’t detected, confirm USB connections, try a different port, and reboot the computer. On macOS, ensure the app has permission to access the scanner; on Windows, check the Device Manager for driver conflicts. If image quality is poor, revisit resolution, color mode, deskew, and image enhancements, and run a fresh test with a known good document. For networked scanners, verify the IP address, sharing permissions, and firewall rules. Always keep a spare test document handy to verify end-to-end results after changes. Document each troubleshooting step to prevent repeating the same fixes and to build a reference guide for future incidents.
Tools & Materials
- Scanner device(Flatbed or sheet-fed; ensure compatibility with your OS)
- Computer or host device(Windows, macOS, or Linux with adequate RAM)
- USB cable or wireless setup(Stable connection; wireless may require Bluetooth/Wi‑Fi setup)
- Official drivers/software(Download from manufacturer; avoid unsupported third-party sources)
- Sample documents(A mix of clean sheets, damaged pages, receipts, and photos)
- Cleaning kit(Microfiber cloth, lens-cleaning solution approved by manufacturer)
- Calibration and test sheets(Baseline documents for accuracy checks)
- Surge protector and storage(Protects against power spikes; organize drive and presets)
Steps
Estimated time: 15-25 minutes
- 1
Power up and connect
Plug in the scanner and connect to the host device. Confirm the LED indicators indicate ready state and that the device appears in the OS as connected.
Tip: If the device isn’t detected, try a different USB port and restart the computer to reset the USB bus. - 2
Install and verify drivers
Install the official drivers from the manufacturer and restart after installation. Open the scanner utility to confirm hardware is recognized and ready to configure.
Tip: Always use the latest official drivers; outdated software can cause compatibility issues. - 3
Prepare documents and workspace
Clear the workspace, align documents, and remove staples. Ensure a clean glass surface for consistent image quality.
Tip: Use a lint-free cloth to wipe the glass before the first scan to avoid smudges. - 4
Set initial scan preferences
Choose resolution, color mode, and scan area appropriate for your primary task. Create a baseline profile for future use.
Tip: Start with 300 dpi for documents; increase to 600–1200 dpi only for photos or high-detail work. - 5
Run a test scan and calibrate
Scan a representative document and review for skew, brightness, and contrast. Calibrate settings if needed and save a baseline profile.
Tip: Document any observed issues and the exact settings used for easy replication. - 6
Document results and establish workflow
Export the test scan to your chosen format and verify OCR if needed. Add the profile to your workflow and set a naming convention for consistency.
Tip: Keep a reference of the file path, format, and quality score for future comparisons.
Common Questions
What is the first thing I should do before turning on a scanner?
Define your scanning goal and ensure compatibility. Verify drivers are ready and workspace is prepared so you can begin with a clear plan.
First, define your goal and make sure the scanner has the right drivers so you can start with a clear plan.
Do I need to install drivers before scanning?
Yes. Install the official drivers to ensure proper device recognition and feature access. Reboot if necessary to complete the installation.
Yes. Install the official drivers and reboot if needed to ensure the scanner is recognized.
How do I test that a scanner is functioning correctly?
Run a baseline scan using representative documents and inspect for alignment, brightness, and OCR accuracy. Compare results to your baseline profile and adjust as needed.
Run a baseline scan with representative documents and check alignment and text clarity.
What are common startup issues and how can I fix them?
If the device isn’t detected, check cables and ports, update drivers, and ensure any security software isn’t blocking access. Reboot and re-test after changes.
If the scanner isn’t detected, check connections and update drivers, then reboot and test again.
Can I use a smartphone for scanning instead of a dedicated device?
Smartphones can support basic scanning with apps, but dedicated scanners offer higher speed, better image quality, and batch processing. Use a phone for quick, light tasks only.
You can, but dedicated scanners give you better quality and speed for larger tasks.
How should I maintain scanner performance over time?
Schedule regular cleaning, firmware updates, and profile backups. Keep test documents to verify ongoing accuracy and adjust settings as your needs evolve.
Regular cleaning, updates, and backups help keep performance steady over time.
Watch Video
Key Takeaways
- Define scanning goals before configuring settings.
- Choose a scanner type aligned with your tasks.
- Create repeatable setup profiles to speed up future scans.
- Test thoroughly and document results for reliability.
- Maintain equipment to ensure long-term performance.