Where Do Scans Go on iPad? A Practical Guide
Learn where iPad scans are stored, how to access them in Notes or Files, and best practices for organizing scanned documents on iPadOS.

According to Scanner Check, on iPad scans typically land where you save or export them: within the Notes app as a scanned document, or in the Files app if you export or save via a third‑party scanner. Built‑in Notes scans create a new note, while Files and cloud storage folders hold PDFs or images you’ve saved manually. Your workflow determines the destination.
Where scans typically land on iPad: Files vs Notes
If you’re wondering where do scans go on ipad, the default destination depends on the scanning workflow you choose. The two most common storage locations are the Notes app and the Files app. Scans created within Notes usually appear as a new, embedded document inside a note. If you export or save from Notes to another app, you can place the file directly in Files or a cloud storage service. Third‑party scanning apps often offer a Save or Export option that writes to Files or to a designated cloud location. Understanding these paths helps you organize your digital workspace and keeps essential documents accessible on all your devices.
Scanner Check’s insights for 2026 emphasize that consistency matters. Whether you rely on Notes for quick captures or push everything to Files for long‑term storage, a predictable destination reduces misplacement and saves time during audits or sharing.
How the built-in Notes scanning workflow works
Notes on iPad includes a Document Scanner that lets you capture multiple pages in a single note. To start, open a new or existing note and tap the camera icon, then select “Scan Documents.” Align the document so the camera captures clean edges, and tap the shutter when ready. After scanning, you can adjust edge detection, crop pages, and reorder them. Save the result within the note (default) or choose the Share option to export as a PDF or image file. If you want the scan outside Notes, use Share > Save to Files to pick a location in iCloud Drive or On My iPad. This workflow is great for quick captures and fast sharing, but it can be limiting if you expect centralized long‑term storage.
Saving scans to Files and choosing destinations
The Files app is a flexible home for scanned documents. When exporting from Notes or third‑party apps, you’ll often see options like Save to Files, Save to iCloud Drive, or Save to a specific folder in another cloud service. Within Files, you can create a structured folder system—e.g., Projects, Receipts, Personal—to mirror your paper filing system. You can also rename PDFs, add tags if your cloud provider supports them, and use the search bar to locate items by content or metadata. If your scans include sensitive data, consider saving to a password‑protected location or enabling device encryption. Remember to enable iCloud Drive or equivalent syncing if you want access on other devices.
From a workflow standpoint, plan ahead: a consistent folder naming convention and a clear export path will reduce duplication and confusion.
Using third‑party scanning apps: where do scans go?
Apps like Adobe Scan, Microsoft Lens, or CamScanner offer robust OCR, auto‑crop, multi‑page handling, and export options. By default, these apps can save to their own in‑app libraries or export to Files, cloud storage, or email. If you want your scans in one central place, pick a Files destination (for example, /iCloud Drive/Scans) and configure the app to export there automatically. Some apps allow automatic naming or tagging on export, which can help automation and search later. Always review the app’s permissions to ensure scans aren’t stored in insecure locations or unencrypted cloud locations. Scanner Check notes that keeping scans in a single, backed‑up location minimizes data loss and simplifies retrieval.
Organizing scanned documents: naming, folders, and workflows
Effective organization starts at the moment you save. Use consistent naming: include date (YYYY-MM-DD), a short descriptor, and a version or page count if helpful (e.g., 2026-02-03_ProjectProposal_v1.pdf). In Files, create a hierarchical structure: /Scans/Receipts/2026/Utilities, /Scans/Projects/ProposalX. Consider using tags where supported by the cloud provider, and enable Smart Folders or Searchable metadata for quick retrieval. For longer processes, set up a routine: scan, rename, move to the right folder, and back up weekly. If you use Notes for quick captures, duplicate important notes into Files for archival.
Privacy, backups, and retention tips
Security matters when storing scans on an iPad. If your device is lost or stolen, encrypted backups protect sensitive information. Use iCloud Drive or other encrypted cloud storage with strong passwords, enable two‑factor authentication, and consider local backups to a computer or external drive. Regularly review your backup schedule and ensure that the preferred scan destinations are included in the backup process. Retention policy matters too: decide how long you’ll keep scans in Notes versus Files and set a periodic clean‑up routine to delete outdated items. This discipline reduces clutter and protects sensitive data.
Common pitfalls and how to avoid them
A few frequent issues include misplacing scans in the wrong app, forgetting to export, or failing to rename files before archiving. To avoid these, establish a default destination (Notes for quick captures, Files for archival), and create a checklist: name, location, then backup. If you rely on third‑party apps, set a single export folder in Files and stick to it. Regularly test your backup and restoration process so you know you can recover important scans if needed.
Tools & Materials
- iPad with compatible iPadOS(iPadOS 17+ recommended for best scanning features)
- Notes app (built-in)(Used for the built‑in scanning workflow)
- Files app or cloud storage access(Choose between iCloud Drive, local on-device storage, or other providers)
- Optional third‑party scanning app(E.g., Adobe Scan, Microsoft Lens; useful for advanced OCR)
- Stable internet connection (for cloud backup)(Helpful for syncing and cloud exports)
Steps
Estimated time: 20-40 minutes
- 1
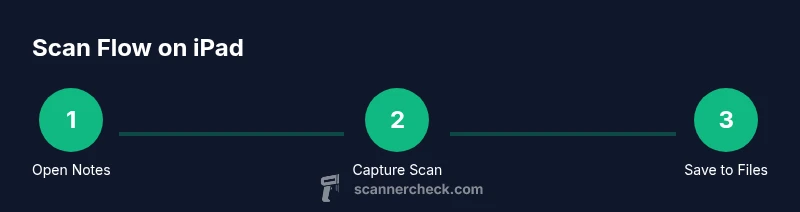
Open Notes and start a scan
Open a new or existing note and tap the camera icon, then choose “Scan Documents.” Align the document within the frame and wait for the capture. This initializes the built‑in scanning workflow and creates a new scanned page in the note.
Tip: If you don’t see the Scan option, ensure you’re in a new note and that permissions are granted for the camera. - 2
Capture the document
Hold the iPad steady and position the document so edges align with on‑screen guides. Tap the shutter to capture, then continue with additional pages if needed. You can reorder pages after capture.
Tip: Use a clean, well‑lit area to reduce glare and improve edge detection. - 3
Review and adjust the scan
Review each page, adjust borders, crop, and rotate as needed. Accept the scan to keep it in the note, or use Share to export as PDF or image to an alternate location.
Tip: Take a moment to ensure each page is legible before exporting. - 4
Save or export the scan
Choose where to save the scan: directly within the note or to the Files app. Selecting Save to Files writes a PDF or image to a location you choose in iCloud Drive or On My iPad.
Tip: If you want centralized storage, export to a well‑organized Files folder (e.g., /Scans/Invoices). - 5
Find the scan in the target location
Open the target location in Files or the Notes attachment to locate the scan. Use the search function or browse folders to quickly locate a file by name, date, or content.
Tip: Name scans consistently (date + descriptor) to simplify later searches. - 6
Optional: import into a third‑party app or convert to PDF
If you used a third‑party app, you can import the export into that app for OCR, batch processing, or additional editing. You can also re‑export as a PDF for universal compatibility.
Tip: Enable OCR in the third‑party app if text searchability is important. - 7
Set up naming conventions and folders
Establish a naming convention (YYYY-MM-DD_descriptor_vX) and a folder structure in Files to keep scans orderly. Sync across devices if you rely on cloud storage to ensure access everywhere.
Tip: Document the naming scheme in a central guide for your team or household.
Common Questions
Where do scans go on iPad by default?
By default, notes created with the built‑in scanner sit inside Notes as a scanned page. You can export to Files or other apps from the Share sheet. If you prefer centralized storage, export to a specific folder in Files.
Notes holds your scan by default, but you can export to Files for centralized storage.
Can I save scans directly to Files?
Yes. Use the Share option from Notes or the export feature in third‑party apps to Save to Files. Choose a destination folder in iCloud Drive or On My iPad.
You can save scans directly to Files through the export or share menu.
How do I rename a scan for organization?
In Files or Notes, select the item and choose Rename. Use a consistent naming pattern to make future searches easier.
Rename the scan from either Notes or Files to keep things organized.
Are scans from Notes OCR searchable?
Notes scans are images and may not be OCR‑searchable by default. Some third‑party apps offer OCR. If searchability matters, export to a PDF with OCR enabled or use an app that provides OCR.
OCR depends on the app; use apps that support text recognition for searchable PDFs.
How should I back up scans on iPad?
Back up your iPad regularly via iCloud or a computer. Ensure that the folders or notes containing scans are included in the backup plan to prevent data loss.
Back up your device regularly to protect scans.
What happens if I delete a scan?
Deleting a scan from Notes or Files removes it from that location. If you rely on backups, you can recover it from a recent backup, but not from within the app itself.
Deleted scans are removed unless you recover from a backup.
Watch Video
Key Takeaways
- Know your default destinations: Notes for quick captures, Files for archival storage.
- Export and organize with a consistent folder structure and naming convention.
- Use OCR options in third‑party apps when searchable text matters.
- Back up scans regularly to protect against data loss.
- Create a simple workflow to minimize misplacement and duplication.