How to Scan on Notes App: A Practical Guide
Learn how to scan documents using the Notes app on iPhone and iPad. This educational guide covers prerequisites, step-by-step scanning, exporting options, organization tips, and troubleshooting to digitize receipts, contracts, and more.

You can scan documents directly into Notes on your iPhone or iPad using the built-in Scan Documents feature. Start with a clean, well-lit surface, open Notes, create a new note, and choose Camera > Scan Documents to capture, crop, and save. You can export as PDF or image and share easily.
What you can scan in Notes
Notes is not just a place for text notes; it also supports capturing documents, receipts, business cards, and photos directly into a note. The Scan Documents feature creates high-contrast images and crops edges automatically for a cleaner digital result. This is ideal for quick digitization when you need to store paper documents, such as invoices or travel receipts, without leaving the Notes app. While this approach is convenient, it may not replace professional scanners for archival quality; however, for everyday needs, it offers a fast, on-device workflow that keeps everything in one place. Remember that scans are stored in the note you’re actively editing, so organization matters—name the note clearly and add a date or project tag to locate it later.
Getting set up: prerequisites and environment
To scan in Notes, you need an
Capture quality: lighting, alignment, and framing
A crisp scan starts with lighting. Use natural light or a bright lamp to avoid yellowing or shadows. Hold the device directly above the document, keeping the edges within the on-screen frame. Try to fill the frame with the document without cutting off edges, and avoid tilting the device; a slight tilt is acceptable if edge alignment is maintained. The Notes Scan tool automatically detects corners, but you can fine-tune the crop after capture. If the document has a reflective surface or glare, adjust the angle or use a polarizing filter if you have one. For multi-page scans, use the Add Scan button to capture additional pages in the same note.
Step-by-step workflow: narrative guide to scanning a document in Notes
Start by opening Notes and creating a new note. Tap the camera icon and select Scan Documents. Position the document within the frame, and let the device auto-detect edges. Press the shutter to capture, and then adjust the crop handles as needed. Repeat for additional pages if necessary, tapping Add Scan after each page. Once you’ve captured all pages, tap Save to insert the scans into the note. You can reorder pages by dragging, rotate pages if needed, and add a title to help future searching.
Organizing scans: naming, saving, and file formats
After saving, give the note a descriptive name that includes the project or date. Scans can be kept as images within the note or exported as a PDF. If you plan to share or archive, use the Share option to export as PDF or image. You can also add additional notes or keywords within the same note to improve retrieval. For longer-term organization, consider creating a dedicated folder in
Troubleshooting common issues
If edge detection fails, ensure the document is flat and well-lit, and retake the scan with more generous margins. In bright light with glare, adjust the angle or move to a different light source. If a scan looks blurry, stabilize your hand, pause briefly between captures, and recapture. If you cannot access the Scan Documents option, update your
Using Notes scanning on Mac and
Security and privacy considerations for scanned data
Notes scans remain on-device unless you choose to sync via
Tools & Materials
- iPhone or iPad with Notes app (iOS 11+)(Ensure camera access is enabled and Notes is installed)
- Good lighting and a flat surface(Natural light is best; avoid strong glare and shadows)
- Document ready for scanning(Flat, clean sheets; remove folds or staples)
- Optional: tripod or stand(Useful for steady captures in low light)
- Optional: Mac or another device for cross‑device sharing(Helps when working across ecosystems)
Steps
Estimated time: 6-10 minutes
- 1
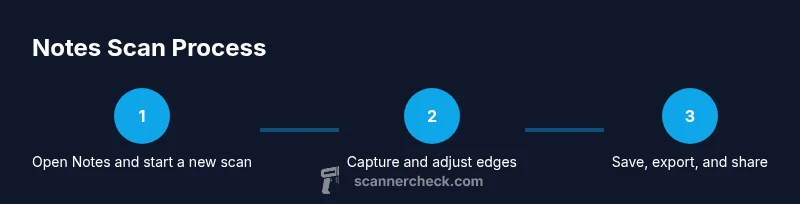
Open Notes and start a new scan
Launch the Notes app, create a new note, and tap the camera icon to choose Scan Documents. This prepares the app to capture a clean, edge-detected image of your document.
Tip: If you don’t see Scan Documents, ensure your OS is updated and the camera is allowed to access Notes. - 2
Position the document in view
Hold your device above the document so it fills the frame without cutting edges. Allow the app to detect corners and preview a rectangle around the document before capture.
Tip: Keep the document flat and avoid moving the device during the capture. - 3
Capture and review edges
Tap the shutter to capture. Review the captured image for edge alignment and legibility. If needed, adjust the crop handles to refine the final edges.
Tip: If any corner is missing, retake the scan rather than cropping aggressively afterward. - 4
Add more pages if needed
For multi-page documents, tap Add Scan to capture the next page in the same note. You can reorder pages later within the note.
Tip: Label each page mentally by its content to simplify later organization. - 5
Save and name the scan
Tap Save to insert the captured pages into your note. Rename the note to reflect the project or date for easy retrieval.
Tip: Include a date and topic in the note name for quick searches. - 6
Export or share the scan
From the note, use the Share option to export as PDF or image, or copy the content into another app. This makes distribution simple without leaving Notes.
Tip: Choose PDF if you need durable formatting for printing or archiving.
Common Questions
Can I scan multiple pages into a single note?
Yes, you can add pages during a single scan session; tap Add Scan after each capture to continue.
You can add more pages as you go.
Where do scanned documents go in Notes?
Each scan appears inside the active note. You can rename the note, and add keywords for easier finding.
Scans live inside the note you’re editing.
Can I export scanned documents as PDF?
Yes. You can export the entire note as a PDF or share individual scans as images.
You can send a PDF or an image.
Does Notes OCR recognize text in scanned images?
Notes scans are primarily images; OCR features depend on iOS capabilities like Live Text, which may improve search on newer versions.
OCR support varies by iOS version and features.
Is scanning in Notes available on Mac?
Notes’ camera-based scanning is mainly on iPhone and iPad. On Mac, you can import scans from other devices or files.
Mac can import scans, but not initiate scans from the camera.
What if the scan quality is poor?
Improve lighting, keep the device steady, recapture if needed, and use cropping to remove margins.
Try better lighting and recapturing the image.
Watch Video
Key Takeaways
- Open Notes and start a scan to digitize documents quickly
- Capture with good lighting and stable framing
- Crop and reorder pages to ensure a clean, organized scan
- Export as PDF or image for easy sharing
- Sync notes across devices for multi‑platform access