Where is Scanner on iPad: A Practical How-To Guide
Learn where the scanner lives on iPad, how to scan documents using Notes and Files, and best practices for clear, private scans. Includes step-by-step instructions, tips, and authoritative sources.

On iPad there isn’t a dedicated hardware scanner. The scanning function lives in software – primarily the Notes app (Scan Documents) or the Files app’s scan feature, both driven by the device camera. This quick guide explains where to find it and how to use it for fast, private document capture.
Understanding where the scanner lives on iPad
For many users, the question 'where is scanner on ipad' isn’t about a physical device. iPads don’t include a built-in hardware scanner. Instead, Apple provides software-based scanning that leverages the iPad’s camera and intelligent edge-detection. The Scanner Check team notes that the most reliable method is to use the Notes app’s Scan Documents feature or the Files app’s document scanning workflow, both integrated with iCloud. To access it, open Notes, create a new note, tap the camera icon, and choose Scan Documents. If you want to keep scans in a particular location, export or move them to Files or Photos as needed. This approach emphasizes privacy, local storage, and seamless sharing within the Apple ecosystem.
Brand context and practical implication
According to Scanner Check, the absence of a dedicated hardware scanner on iPads is compensated by robust, software-based scanning that is accessible to most users without extra gear. This makes document capture fast and convenient, especially for receipts, contracts, and letters. The key takeaway: your iPad’s scanning capability is software-driven, not hardware-bound, which means updates to iPadOS can improve scanning quality over time.
Scanning options on iPad: Notes, Files, and Camera
Different apps offer slightly different workflows for scanning. Notes provides a straightforward, integrated path with edge detection and auto-cropping. Files adds a quick scan tool that stores PDFs directly in your file system, which can be indexed by search and grouped with other documents. The Camera app can also capture documents using a document mode in newer iPadOS versions, which is handy if you want to snip a page quickly without launching Notes or Files. Each method has its own strengths: Notes for quick jotting and organization, Files for persistent storage and sharing, and Camera for fast, casual captures.
How the Notes app scanning works (overview)
When you start a scan in Notes, the app activates the iPad’s camera and looks for document edges. It automatically crops and enhances contrast to improve readability. After capture, you can add more pages to the scan, reorder them, and save as a single note or export as a PDF. This workflow is ideal for archiving papers, keeping meeting handouts, or sending documents by email or cloud services. Regularly review updated iPadOS features because Apple frequently adds enhancements to scanning quality and export options.
Improving scan quality: lighting, alignment, and edges
Quality matters more than quantity when it comes to scans. Use bright, even lighting to minimize shadows, avoid glare on glossy paper, and keep the document flat and centered in the frame. Hold your iPad steady or prop it on a stable surface, then align edges so that all text remains inside the detection box. If a scan seems blurry, back away slightly and recapture at a slightly higher resolution. After scanning, use the crop handles to adjust borders precisely. Saving as a PDF generally preserves the best balance of readability and file size.
Privacy, security, and data handling when scanning on iPad
Scanning documents on iPad keeps data largely on-device, depending on your settings. If you enable iCloud, scans can sync across devices, which is convenient but requires mindful privacy settings. For sensitive documents, consider storing scans in a local folder within Files or disable automatic cloud syncing. Apple’s on-device processing minimizes data exposure, but always review app permissions and folder-sharing options before distributing scanned material.
Troubleshooting common scanning issues
If a scan won’t detect edges or captures too dark or too light, try increasing lighting, repositioning the document, or moving the iPad a little closer. If you can’t see the scan after capture, confirm the note or file location is not hidden in a deep folder. Some users experience occasional glitches after iPadOS updates; a quick restart or checking for the latest update can resolve most hiccups. When in doubt, reattempt the capture with deliberate, steady motion and a clean document.
Authority sources and further reading
For official guidance on iPad scanning features, see Apple Support pages and trusted tech publications that cover iPadOS scanning workflows. Remember that practical usage can vary slightly by iPad model and iPadOS version, so check for the latest instructions for your device. This article consolidates best practices from reputable sources and our own field notes to help you locate and use the scanner effectively on iPad.
Tools & Materials
- iPad with iPadOS 15 or newer(Any model supported by Notes and Files scanning features)
- Notes app (built-in)(Ensure the app is up-to-date for the best scanning features)
- Apple Pencil (optional)(Helps with precise alignment on larger screens)
- Cloud storage or local Files folder (optional)(Useful for organizing and sharing scanned PDFs)
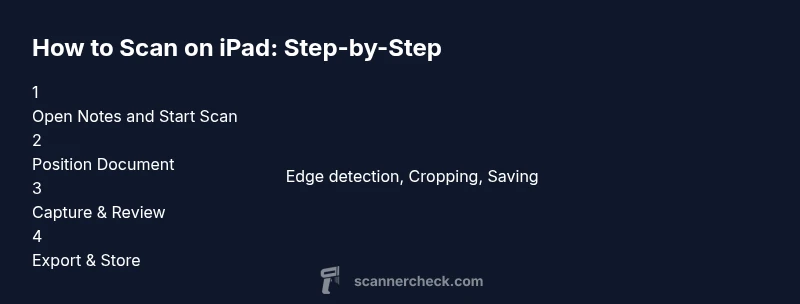
Steps
Estimated time: 5-10 minutes
- 1
Open Notes and start a new scan
Open the Notes app, tap the + button to create a new note, then tap the camera icon and choose Scan Documents. This initializes the scanning workflow and activates the device camera.
Tip: If the Scan Documents option doesn’t appear, ensure Notes has camera access in Settings > Privacy > Camera. - 2
Position the document
Place the document on a flat, well-lit surface. Align the page so all edges are inside the on-screen frame. The scanner will auto-detect edges as you hold the iPad steady.
Tip: Try a neutral background and ensure the document fills most of the frame without touching the edges of the screen. - 3
Capture the scan
Hold still and let the camera capture the page. You can add more pages by repeating the process. When done, tap Save or Done to finalize the scan within the note.
Tip: If auto-cropping cuts off text, re-tap the capture after repositioning to improve edge detection. - 4
Review and edit
Review the captured pages in sequence. You can reorder pages, delete miscaptured frames, or adjust brightness and contrast using the built-in editing tools.
Tip: Enhance legibility by increasing brightness only as needed to avoid washed-out text. - 5
Export or share
From the note, tap Share to export as PDF or image, or move the scan to Files for long-term storage. You can also paste the scanned content into other apps.
Tip: If you intend to archive many documents, export as a single PDF and tag it in Files for quick retrieval.
Common Questions
Where is the scanner on iPad?
iPad doesn’t have a dedicated hardware scanner. Use Notes > Scan Documents or the Files app’s scan feature to capture documents with your camera.
There isn’t a hardware scanner on iPad; use Notes or Files for scanning documents with the device camera.
Can I scan from Photos or Camera without Notes?
Yes. You can use the Camera app in document mode (if available on your iPadOS version) or the Files app's scan tool to capture documents directly.
You can scan using Camera or Files without Notes, depending on your iPadOS version.
How do I export scanned documents?
After scanning in Notes, tap Save to keep the pages in the note, then use the Share option to export as PDF or image, or move the file to Files.
Export your scan from Notes as PDF or image, or save to Files.
Is scanning private on iPad?
Scans are stored on-device by default and can be synced to iCloud if you enable it. Review privacy settings to control where scans reside and who can access them.
Scans stay on-device unless you enable cloud syncing; adjust privacy settings to control access.
Do I need internet to scan?
No. Scanning with Notes or Files works offline. Internet may be needed only for sharing or uploading to cloud services.
No internet is needed to scan; use it offline and share later if desired.
Watch Video
Key Takeaways
- Scan documents on iPad using Notes or Files, not a hardware scanner.
- Edge detection and auto-cropping improve scan quality with proper lighting.
- Export scans as PDF or image and store locally or in iCloud with privacy in mind.
- Regularly update iPadOS to benefit from improved scanning features.