How to Deal with MRI Scan: Prep, Procedure, and Post-Care
Practical, step-by-step guide to dealing with an MRI scan: safety checks, preparation, what to expect during the procedure, and post-scan care.

Getting ready for an MRI scan sets you up for safety, comfort, and clearer images. You’ll confirm safety by removing metal, sharing medical history, and following pre-scan instructions about eating or drinking if contrast is used. Knowing what to expect lowers anxiety and speeds your appointment. This guide walks you through steps, timings, and tips for a smooth MRI experience.
Understanding MRI Scans and Your Experience
According to Scanner Check, understanding MRI scans helps patients feel more in control. If you’re asking how to deal with mri scan, the first step is to learn what the machine does, what the images look for, and how the process affects you physically. An MRI uses strong magnets and radio waves to create detailed pictures of soft tissues without radiation. Most scans are painless, but you will hear tapping noises and may feel cooled or still during the exam. The staff will talk you through each phase, from pre-checks to positioning and image acquisition. Knowing what to expect reduces anxiety, improves cooperation, and can lead to faster results. Scanner Check’s guidance emphasizes clear communication with the technologist, asking questions about the procedure, and reporting any discomfort immediately. The more you know, the easier the experience becomes. Throughout the prep, you’ll confirm safety, discuss any implants or metal hardware, and plan for potential contrast injections if your doctor orders them. By approaching the MRI with preparation, you’ll make it smoother, safer, and more accurate.
Preparation: Before You Enter the Scanner
Before your MRI, preparation matters more than you might think. The easier you make things for the technologist, the faster and smoother your exam will be. Start by choosing comfortable, metal-free clothing and avoiding anything with metal fasteners, snaps, or jewelry. Remove all jewelry, watches, piercings, hearing aids, and dental retainers if possible, and leave them in a secure locker. Some facilities require you to change into a gown; this can further reduce the risk of metal interfering with images. Check whether you need to fast or avoid certain foods if your scan uses contrast, and plan to arrive early for safety screening. Pack basic items like your photo ID, insurance card, and any prior imaging records that might help the radiologist compare with current findings. If you have particularly long hair or hair extensions, tie hair back away from the face to avoid artifacts. For those who feel cold in the MRI suite, bring a light blanket; some scanners have climate control, but you still might feel chilly during long sequences. Finally, communicate any discomfort, claustrophobia, or pregnancy status to the operator before the scan begins. Proper preparation can streamline the process and make the experience more comfortable.
Medical History and Safety Checks
Safety checks are essential before any MRI. You will complete a screening questionnaire that asks about implants, devices, pacemakers, aneurysm clips, cochlear implants, and metal fragments. It also covers pregnancy status, recent surgeries, tattoos with metallic ink, and any metal in your body that could interact with the magnetic field. If you have a known allergy to contrast dye or kidney disease, inform the staff because this might change whether you receive gadolinium-based contrast. The technologist will verify your medications and ensure there are no ferromagnetic tools or jewelry on your person. If you are unsure about an item’s safety, it is best to remove it and ask staff to assess. Some devices are MRI-safe, while others are not, so a pre-scan safety check helps identify risk factors and avoids complications during scanning. The goal is to minimize risk and maximize image quality, while respecting patient comfort. Scanner Check’s team emphasizes clear, honest communication during safety checks; speak up if you’re uncertain about any device or gadget you wear. With a thorough safety screening, you’re better prepared for a successful exam.
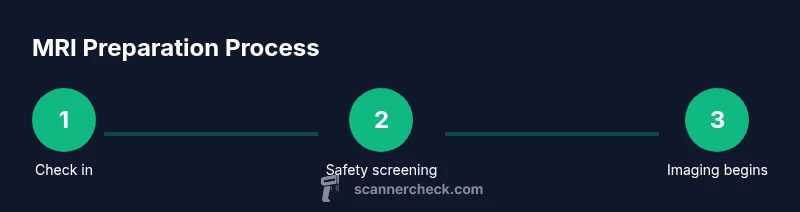
The Scan Day: What Happens Step by Step
On scan day, you’ll check in, confirm consent, and change into MR-safe clothing if required. You’ll be placed on the table, and the technologist will position you for the specific sequences needed by your doctor. You’ll hear the machine start with a loud hum and tapping noises; ear protection will be offered to reduce the noise. The technologist may place foam pads, straps, or a sponge pillow to stabilize your head and limbs. You’ll be asked to remain still and to hold your breath for brief periods during certain sequences if required by the protocol. The table will slide slowly into the bore; you should remain calm and follow any instructions, such as breathing slowly or counting to stay still. If you feel uncomfortable, tell the staff immediately—they can pause the exam or adjust positioning. If contrast is planned, a nurse will insert an IV line and monitor you during administration; you may feel warmth or a metallic taste. After the imaging is complete, you’ll be moved off the table and the room will be prepped for the next patient or for image review. If results aren’t ready immediately, you’ll receive a timeframe for when to expect them.
Dealing With Anxiety and Claustrophobia
Many patients experience anxiety during MRI, especially in a narrow bore. Start with deep, slow breathing and a steady rhythm to reduce panic. Focus on a fixed point on the wall or listen to headphones with music provided by the facility. If available, choose an MRI sequence described as open or quieter; some facilities offer noise-reduction options. Bring a supportive friend or family member to wait nearby and ask the technologist to check in at intervals during the test. For severe claustrophobia, discuss possible alternatives such as an open MRI or mild sedatives prescribed by a physician; never take medication without medical guidance in advance. Cognitive strategies, such as visualization or counting backwards, can keep your mind engaged while you remain still. The key is to communicate honestly about how you feel; staff can adjust the environment, provide reassurance, and expedite the process when possible. As Scanner Check notes, preparation and coping techniques can significantly improve comfort, adherence to instructions, and overall exam quality.
Special Considerations for Children and Those with Mobility Needs
For pediatric patients, MRI preparation should involve explaining the process in age-appropriate terms and using practice sessions or a 'dummy' scanner if available. Parents may be allowed to stay with the child during the procedure, depending on the facility’s policy. For patients with limited mobility, extra padding, straps, and transfer aids are provided to help with positioning and safety. In some cases, sedation or anesthesia may be considered for younger children or anxious adults, but this requires close coordination with the clinical team. Ensure you bring a caregiver’s information and any medical history or medications that could influence sedation. Clear communication with the technologist about needs or disabilities helps tailor the setup to the patient, reduce risk, and improve the quality of imaging. The goal is inclusive care that makes the exam feasible and safe for everyone, while maintaining high standards of diagnostic usefulness.
Post-Scan Care and Understanding Your Report
Once the imaging is complete, technicians will check that the images meet the required quality and then forward them to your radiologist for interpretation. You will typically receive results within a few days, depending on the facility and urgency. If contrast was used, you might be told to monitor for a short period for any adverse reaction. It’s important to discuss the results with your physician, who can explain the findings and outline next steps. If you want copies of your images, request digital or film copies and note whether the report includes recommendations for follow-up tests. If the doctor requests additional images or follow-up studies, you may need a second MRI. Throughout this phase, stay in touch with your healthcare provider to understand what the results mean for your care plan. Scanner Check emphasizes asking for clarification on any terms you don’t understand, so you leave with a complete grasp of the imaging results.
Common Issues and Troubleshooting
Even with careful preparation, some MRI sessions encounter hiccups. Common issues include longer wait times due to equipment availability, claustrophobic discomfort, or discomfort from positioning devices. Motion during the scan can blur images, requiring repeat sequences; discuss with staff if you anticipate difficulty staying still. Some patients notice a metallic taste or warmth when contrast is administered; this is usually temporary and well tolerated, but inform staff if it persists. If you have implanted devices, notify the technologist at least 24 hours before the exam; some devices require specialist knowledge to safely image. In rare cases, MRI findings may be limited by artifacts or patient anatomy, which can affect interpretation. The key is proactive communication with the tech and radiologist, so if you notice anything unusual or disagree with the comfort level, speak up immediately to avoid delays or unsafe situations. Scanner Check’s guidance reinforces the value of candid dialogue with your care team to ensure safe, accurate imaging.
Tips to Improve Comfort and Efficiency
Practical Preparation
- Reach out ahead of time to confirm the exact sequences and whether any contrast is planned. This helps you plan meals, medication, and travel.
- Pack a small bag with your ID, insurance, prior scans, and a list of medications for quick screening.
Comfort and Communication
- Ask about ear protection, quiet sequences, and any available open MRI options if claustrophobia is a concern.
- If you have anxiety, request a pre-scan orientation or a brief practice run.
Safety and Post-Exam
- Remove all metal before entering the suite and verify that your clothing is MRI-compatible.
- Ask when and how you will receive results, and whether copies of images can be provided.
Tools & Materials
- MRI safety screening form(Completed with radiology staff prior to entering the scan room)
- Metal-free clothing(Loose-fitting, non-metal buttons preferred)
- Ear protection (MRI-safe)(Earplugs or MR-compatible headphones to reduce noise)
- Medical history and medication list(Include implants, allergies, kidney function for contrast)
- Photo ID and insurance card(Needed for check-in and consent)
- Past imaging records(Helpful for comparison)
- Comfort items(Blanket or sweater if you tend to feel cold)
Steps
Estimated time: 60-90 minutes
- 1
Review safety screening
Confirm no contraindicated metal or devices, and verify implants with the technologist. Update any changes in your medical history and confirm whether contrast will be used.
Tip: Ask for clarification on any device or implant to ensure safe imaging. - 2
Dress for the scan
Put on comfortable, metal-free clothing or a provided gown. Remove jewelry, watches, piercings, and belts to prevent artifacts and safety risks.
Tip: Choose outfits with soft fabrics and no metal parts. - 3
Remove all metal items
Deposit all metal possessions in a secure locker. Double-check items like hairpins, clips, and footwear hardware that might contain metal.
Tip: If you’re unsure about an item, remove it and ask staff to assess. - 4
Explain contrast options
If gadolinium-based contrast is planned, inform about allergies and kidney function. Your clinician may decide on a contrast-free protocol if risk factors exist.
Tip: Know whether you’ll receive contrast and what to expect after administration. - 5
Positioning and cushions
Technologists position you with foam pads and straps to minimize movement and optimize image quality. Communicate any discomfort in positioning.
Tip: Small adjustments can improve comfort without affecting results. - 6
Stay still during the scan
Remain as still as possible; the machine may require short breath holds. If you need a break, signal the operator.
Tip: Use mental strategies like counting or relaxation to stay calm. - 7
Post-scan and next steps
You’ll be checked out, and results are typically reviewed by a radiologist after the session. Ask when to expect the report and how to obtain copies.
Tip: Clarify follow-up timing and any additional imaging needed.
Common Questions
What should I wear to an MRI?
Wear comfortable, metal-free clothing and remove all metal items. Some facilities provide gowns. Avoid jewelry, watches, and accessories that could interfere with imaging.
Wear metal-free clothing and remove all metal items. If unsure, ask staff for a gown.
Is an MRI loud?
Yes, MRIs can be noisy due to the magnet switching. You’ll typically receive ear protection, and some facilities offer quieter sequences when available.
MRIs can be loud; ear protection is usually provided and quieter options may be available.
Will I be awake during the scan?
Most MRI scans are performed with you awake. Staff will guide you through the process, and you can communicate if you need a break or have questions.
Most MRI scans are done while you’re awake. You can speak up anytime if you need a break.
What about contrast dye safety?
If contrast is used, inform your clinician about allergies and kidney function. Most people tolerate gadolinium well, but discuss risks if you have kidney issues.
Contrast is usually safe, but tell the staff about allergies and kidney health before use.
How long does an MRI take?
Typical MRI sessions last from 30 to 60 minutes depending on the protocol and body area imaged. Your technologist will give you an estimate before starting.
Most scans take 30 to 60 minutes; your tech will provide an estimate.
Watch Video
Key Takeaways
- Prepare metal-free clothing and documents ahead of time.
- Communicate implants, allergies, and pregnancy status clearly.
- Ask about contrast risk and alternatives if needed.
- Stay still and use coping strategies to improve image quality.
- Follow up promptly to understand results and next steps.