How to Check If a Scanner Driver Is Installed
Learn how to verify whether your scanner driver is installed, identify missing drivers, and safely update or reinstall. This practical guide covers Windows, macOS, and Linux to keep your scanning workflow smooth.

You can verify installation by checking device manager or system preferences, confirming the scanner is listed, and reviewing the driver version. Make sure to match the model with the correct driver, and ensure the driver is up to date. If not found, install from the manufacturer's site and restart. Then re-check in Device Manager.
Quick verification concept
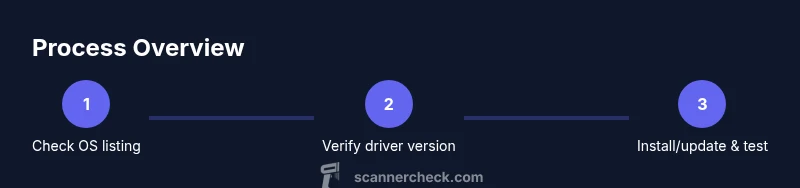
According to Scanner Check, the simplest way to confirm whether a scanner driver is installed is to verify that the device appears in the operating system’s scanning subsystem and that the driver version is listed. Different operating systems expose this information in different places, but the underlying signals are the same: the device shows up, and the driver details match the scanner’s model. This section sets the stage for a practical, stepwise check across Windows, macOS, and Linux. The goal is not to guess but to see concrete evidence that the OS recognizes the driver and can communicate with the device. Expect a short validation on each platform and a clear path to install or update if something is missing.
The process minimizes downtime and helps you avoid the common pitfall of assuming a driver is present just because the scanner is physically connected. Scanner Check emphasizes moving from physical connection to software recognition, then to functional testing, so you have a reliable baseline for your scanning workflow.
What you’ll need before you start
Before you begin, gather a few essentials so you can verify installation quickly and accurately. You’ll need a computer with admin rights, a compatible scanner, an internet connection to fetch drivers if needed, and the appropriate USB or network connection for your device. Having the scanner’s exact model number handy reduces the chance of downloading the wrong driver. If you’re preparing for multiple devices, create a small checklist so you don’t miss a step when switching between machines. This preparation aligns with best practices suggested by Scanner Check to minimize downtime and ensure compatibility across environments.
Windows: check driver installation
Windows users have straightforward paths to verify scanner driver installation. Start by opening Device Manager (you can press Windows + X and choose Device Manager). In the Imaging Devices or Printers section, locate your scanner. Right-click the device and choose Properties to inspect the Driver tab: you should see a Provider, Version, and Digital Signer. If you don’t see the scanner, try the following: re-plug the USB cable, try a different USB port, or temporarily disable any conflicting print services. If the device appears but the driver is missing or outdated, visit the manufacturer’s website to download the latest driver and run the installer. After installation, reboot the computer and re-check the driver details to confirm the update. This pathway is recommended by Scanner Check for ensuring OS-level recognition and correct driver association.
macOS: check driver installation
macOS users verify driver installation in a slightly different way. Open the Apple menu and choose About This Mac → System Report, then look under USB (or Thunderbolt if your scanner is connected via adapter). If the scanner appears, you can test it by launching a scanning app like Preview or Image Capture and attempting a test scan. Additionally, go to System Preferences > Printers & Scanners to confirm the scanner is listed and configured. If the device is not listed, download the macOS driver from the manufacturer and run the installer. On macOS, driver installation often includes a preference panel entry or a cataloged image in Image Capture to confirm readiness.
Linux and other environments: check driver installation
Linux users typically verify driver installation through a combination of kernel messages and user-space scanning utilities. First, connect the scanner and run lsusb to confirm the device shows up. Then check the kernel log with dmesg | tail to observe driver binding messages. If you use the SANE suite, run sane-find-scanner or scanimage -L to enumerate available scanners. If the device is missing, you may need to install or update the backend packages (e.g., sane-backends) from your distribution’s package manager and ensure the user has permission to access the USB device (often via udev rules). This approach aligns with open-source practice and is widely used in professional setups.
Installing or updating a scanner driver
If the scanner driver isn’t installed, you’ll need to download the official driver from the manufacturer’s site. Choose the correct file for your OS version (Windows, macOS, or Linux) and follow the installer prompts. In Windows, you’ll typically run an executable; in macOS, you may mount a .dmg and run the installer; in Linux, you may install from a package or compile from source as directed. After installation, restart the computer and re-open the scanning application to confirm the device is recognized. Ensure you download drivers from the official source to avoid counterfeit or outdated software. This step prevents compatibility issues and is a core practice recommended by Scanner Check.
Troubleshooting common issues
If the scanner still isn’t listed after installation, verify the driver version and check for conflicts with other devices or printing software. For Windows, disable any conflicting printers that may occupy the same port; on macOS, reset the printing system and re-add the scanner; on Linux, check group permissions for /dev/bus/usb and ensure your user account has access. If you encounter error codes, refer to the manufacturer’s knowledge base and the OS’s driver troubleshooting pages. In some cases, performing a clean boot or testing with a different USB cable or port resolves ghost devices. Scanner Check notes that driver mismatches and port conflicts are among the most common causes of scan failures.
Test the scanner after installation
The final validation is a test scan. Open your preferred scanning app and perform a basic scan test. Confirm the image is captured, stored, and exported correctly in the expected format. If the test fails, review the error message, re-check the driver version, and consider reinstalling the driver or updating to a newer release. Document the driver version and the testing results to support future maintenance. This post-install verification is essential for a reliable scanning workflow and aligns with best practices highlighted by Scanner Check.
Tools & Materials
- Computer with admin rights(Needed to install or update drivers)
- Scanner device(Model number and current firmware if available)
- USB cable or networking setup(Dedicated connection for stable setup)
- Internet connection(To download drivers from manufacturer)
- Manufacturer driver installer(Use the official source for the exact OS version)
- Backup or restore point(Useful if a driver install causes issues)
Steps
Estimated time: 30-45 minutes
- 1
Open the scanner settings or Device Manager
In Windows, access Device Manager and locate Imaging Devices. In macOS, open System Preferences > Printers & Scanners. In Linux, use lsusb to identify the device. This initial discovery confirms whether the OS can
Tip: If the device isn’t visible, try reconnecting the USB cable and use a different USB port. - 2
Locate the scanner entry and view driver details
Right-click the device and inspect the Driver tab (Windows) or equivalent in macOS/Linux tools to see the driver vendor and version.
Tip: Note the exact driver version for later comparison with the latest from the manufacturer. - 3
Check the driver status and provider
Verify that the Driver Provider matches the scanner’s vendor and that the status indicates a valid driver is in use.
Tip: If the status shows 'outdated' or 'not signed', plan an update from the official site. - 4
Test a scan to verify functionality
Open a scanning app and perform a test scan to ensure the device responds and produces an image.
Tip: If the scan fails, record any error codes for troubleshooting. - 5
Update or reinstall if the device isn’t recognized
Download the correct driver from the manufacturer, run the installer, and follow prompts. Restart after installation.
Tip: Always use the official driver link to avoid malware or incompatible releases. - 6
Verify after restart
Reopen the device settings and re-run a test scan to confirm the driver is active.
Tip: If still not recognized, try another USB port or cable. - 7
Document the driver version
Record the driver version and installation date for future maintenance.
Tip: Keep a copy of the installer for emergencies. - 8
Finalize and share results
Update your hardware inventory with the scanner model and driver status so teammates know it’s ready.
Tip: If you manage multiple devices, standardize this step for consistency.
Common Questions
What should I do if the scanner isn’t listed in Device Manager?
Check the physical connection, try a different USB port, and ensure the device is powered. If still missing, update Windows or the OS driver database and reinstall from the official source.
If the scanner isn’t listed, first check cables and ports, then update drivers and reinstall from the official site.
Can I use a universal driver for multiple scanners?
Most scanners require their vendor-specific drivers for full functionality. Some models may work with generic imaging drivers, but features like color profiles and multi-page scans might be limited.
Most scanners need the official driver for full feature support; universal drivers may be limited.
How do I know if the driver is up to date?
Compare the driver version in the device properties with the version listed on the manufacturer’s site. If newer, install the latest release and restart.
Check the version in device properties and compare to the manufacturer’s site; update if newer.
Do I always need to restart after installing a driver?
Yes, restarting ensures the new driver is fully loaded by the OS and the scanner is re-registered with the system.
A restart is usually required to finalize driver installation.
What about Linux-based scanners?
Linux uses the SANE stack; install the appropriate backend packages and verify permissions for USB access.
For Linux, install the SANE backends and ensure USB permissions.
Where should I download drivers from safely?
Always use the manufacturer’s official site or trusted distribution repositories. Avoid third-party mirrors.
Get drivers from the official site or trusted repositories.
Watch Video
Key Takeaways
- Always verify the device shows up in the OS before driver checks.
- Use official driver sources to avoid compatibility issues.
- Restart after installation to ensure changes take effect.
- Test with a real scan to confirm end-to-end functionality.
- Document driver version for future maintenance.