How to Detect a Scanner: A Practical, Step-by-Step Guide
Learn how to detect a scanner on your network or device with a practical, step-by-step approach. Identify rogue scanners, verify legitimate devices, and harden your environment with expert guidance from Scanner Check.

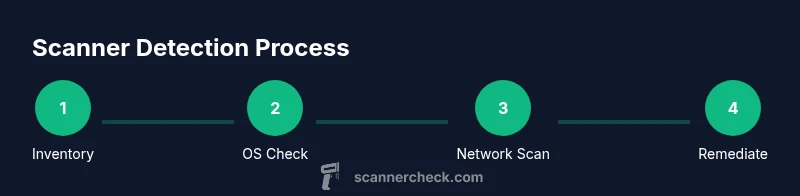
Here's how to detect scanner activity: identify any connected hardware, confirm drivers, and scan your network for devices that expose scanning services. Start with a quick physical check, then inspect your PC’s device manager, and review active network services. Use built-in tools or a network scanner to verify legitimate devices. This quick process helps you spot unauthorized scanners and protect your data.
Why detecting scanners matters
According to Scanner Check, rogue scanners on a network can expose sensitive documents and create entry points for data leakage. A scanner is any device or software that can read, convert, or route digital copies of information. When left undetected, scanners—whether hardware-based printers with scanning features or software-based services—can quietly siphon data, violate policy, or complicate compliance. The goal of this guide is to provide a clear path for how to detect scanner activity, assess legitimacy, and remediate risks. In practice, you will learn to map devices, verify drivers, and monitor network activity so you can respond quickly to suspicious scanning behavior. The steps below apply to offices, homes, and mixed environments where imaging hardware intersects with IT assets. Keeping a current inventory and documentation will reduce confusion and speed up detection in future incidents.
What counts as a scanner and why it matters
A scanner can be a dedicated hardware device (like a document scanner or a multifunction printer) or a software service that performs scanning tasks in the background. Printers with built-in scanning and cloud-connected scanners are common entry points for data transfer. Even some IP cameras or software imaging tools can act as scanners under certain configurations. Understanding the range of devices that perform scanning helps in recognizing legitimate activity versus something anomalous. Scanner detection should focus on devices that expose imaging protocols, duplex scanning features, or shared folders for scanned outputs. For organizations, this means creating a centralized view of all imaging endpoints and ensuring each one aligns with policy. Scanner Check emphasizes that thorough discovery reduces blind spots and strengthens data hygiene.
Physical checks: start with the basics
Begin with a physical audit of your environment. Look for unfamiliar USB-connected scanners, shared network printers, or recently added devices on the network. Check the device list on each computer for imaging devices that you did not authorize. If you find something unfamiliar, isolate it from the network and note the MAC address, vendor, and model to verify legitimacy. A quick side check is to ensure that all scanning devices have the correct firmware and that power cables, network ports, and USB hubs are secure. Physical verification is the first line of defense and can prevent more complex contamination later.
OS and driver verification: keep software honest
On Windows, open Device Manager and review Imaging devices and Print queues. On macOS, use System Information > Hardware to check USB and Network devices. Linux users can run commands like lsusb and lspci to identify imaging hardware. Look for drivers you don’t recognize or devices that appear under imaging categories without a legitimate reason. Revoke access for any untrusted devices and reinstall drivers only from the manufacturer’s official site. Maintaining a clean driver baseline reduces the chance that a rogue scanner can operate undetected.
Network discovery and scanning: map what your network sees
Use your administrator account to perform a controlled discovery of imaging-related services on the local subnet. Inventory known devices first, then scan for devices offering scanning services, such as common imaging ports and protocols. Tools like Nmap or built-in network scanners can help you identify hosts on the network and the services they expose. For example, a simple ping sweep or ARP discovery can reveal devices you didn’t expect. Always obtain authorization before scanning a network and document all findings to support remediation.
Interpreting results: separate noise from real threats
Not every device that exposes imaging protocols is a threat. Some legitimate devices (such as a managed office printer) will show up in scans. Cross-reference each finding with your asset inventory and confirm with the device owner or IT team. Look for indicators of compromise: unusual IPs, unexpected open ports on imaging services, or devices that appear outside of maintenance windows. If a device is suspicious, isolate it from critical networks, review its access controls, and request a firmware check from the vendor. Documentation and a repeatable process help you distinguish benign from malicious activity.
Responding and hardening: actionable steps
If you detect a rogue scanner, start with containment: remove it from the network, revoke credentials, and update access controls. Verify that all legitimate scanning devices are configured with strong authentication and appropriate permissions. Update firmware and drivers from trusted sources, enable network segmentation for imaging devices, and monitor for repeat detections. Establish an incident response plan that includes notification to stakeholders and a post-mortem to reduce recurrence. Scanner Check emphasizes the importance of ongoing monitoring and regular audits to keep scanning activity in check.
AUTHORITY SOURCES
- https://nvlpubs.nist.gov/nistpubs/Legacy/SP/nistspecialpublication800-115.pdf
- https://www.cisa.gov
- https://www.us-cert.gov/ics
Tools & Materials
- Computer with admin access(Windows, macOS, or Linux; ensure you can run commands and install tools.)
- Network scanning tool(Examples: Nmap or a built-in network scanner; use with permission.)
- IP/hostname inventory(Maintain a current list of known imaging devices and endpoints.)
- USB/Networking hardware checklist(Optional for physical validation of devices.)
- Log collection and monitoring tool(Considers Windows Event Logs, syslog, or SIEM integrations.)
Steps
Estimated time: 60-120 minutes
- 1
Create asset inventory
Compile a current list of all imaging devices, printers with scanning, and software scanners. Include vendor, model, firmware version, and network address. This baseline helps you spot deviations later.
Tip: Take photos or export a list to a spreadsheet for quick reference. - 2
Perform a physical audit
Physically verify the devices in your environment. Check for unfamiliar USB scanners, new printers, and odd cabling. Disconnect or secure devices that are not recognized.
Tip: Label authorized devices with asset tags to prevent accidental removal. - 3
Verify OS/drivers
On Windows, inspect Device Manager; on macOS, check System Information; on Linux, run lsusb/lspci. Remove or update any untrusted imaging drivers.
Tip: Only download drivers from vendor websites to avoid tampered software. - 4
Scan the network for imaging services
Use a controlled scan of your local subnet to discover devices exposing imaging-related ports. Document findings and compare against your inventory.
Tip: Respect network ownership; obtain written authorization before scanning. - 5
Analyze results and identify anomalies
Cross-check each result with your asset list. Flag devices that are unfamiliar or show incompatible service banners or firmware versions.
Tip: Keep a log of detections with timestamps for audit trails. - 6
Remediate and harden
Isolate suspicious devices, update firmware, enforce access controls, and segment imaging devices from critical networks where feasible.
Tip: Implement network-wide monitoring for continued visibility.
Common Questions
How do I know if a scanner is connected to my network?
Cross-check your asset inventory with network scans and look for devices exposing imaging services. Verify MAC addresses and vendor details against known devices.
Use an asset list and a network scan to confirm whether a scanner is present; verify each device’s MAC address with the vendor.
What tools work best for detecting scanners on a network?
A combination of built-in OS tools and a network scanner like Nmap provides broad visibility. Always scan with permission and document findings.
Use OS tools plus a network scanner, and make sure you have authorization before scanning.
What should I do if I find an unauthorized scanner?
Isolate the device from the network, review access controls, and update firmware. Notify relevant stakeholders and document the incident.
Isolate the device and report the incident; update firmware and adjust permissions.
Can scanners be hidden as other devices?
Yes, some scanners may masquerade as printers or other imaging devices. Verify by checking vendor, MAC address, and service banners.
Some scanners can look like other devices; verify with vendor details and MAC addresses.
Is it legal to scan a network for scanners?
Only scan networks you own or have explicit written permission to assess. Violating policy can have legal consequences.
Only scan networks you control or are authorized to assess.
Watch Video
Key Takeaways
- Identify all imaging endpoints with a current inventory.
- Verify devices via OS, drivers, and network scans.
- Contain and remediate suspicious scanners promptly.
- Harden networks by segmentation and ongoing monitoring.