How to Install a Scanner in a Laptop: A Practical Guide
Learn how to connect a scanner to a laptop, install drivers, and configure scanning software. This educational guide covers wired and wireless setups, troubleshooting, and best practices for Windows and macOS.

You're about to enable direct scanning from your laptop. This guide shows how to connect a scanner, install the necessary drivers, choose the best software, and test your setup. It covers wired and wireless options, driver sources, and essential troubleshooting for Windows and macOS. Whether you're in a home office or on the go, the steps stay straightforward and reliable.
How to Install a Scanner in a Laptop: Why It Matters
Getting a scanner working with your laptop is a gateway to fast, digital document capture. For anyone who handles receipts, forms, or literature, knowing how to install scanner in laptop reduces the friction between paper and pixels. The Scanner Check team notes that a smooth setup translates into quicker workflows, fewer interruptions, and better archiving. This block explains the value of a reliable setup, the interfaces you might use, and the impact on daily tasks. By understanding the core process you’ll save time and avoid repeated troubleshooting later.
Advantages of a solid laptop-scanner integration include easy digitization on the go, better organization of digital files, and compatibility with common document management software. You’ll also gain flexibility when selecting scanning apps, whether you’re scanning in color, grayscale, or high-resolution modes. The goal is to establish a stable baseline that works with your existing hardware and software ecosystem.
As you follow these steps, you’ll keep your system secure and up to date. A well-configured scanner reduces exposure to malware through trusted driver sources and safer scanning pipelines. In short, this guide helps you master the basics so you can focus on the content you digitize, not the setup itself.
Compatibility Checks Before You Begin
Before you install any scanner, confirm compatibility with your laptop’s operating system, available ports, and the scanner’s supported interfaces. Key questions include: Is your OS up to date (Windows or macOS)? Do you have the correct ports (USB-A, USB-C, or Thunderbolt) or a reliable Wi-Fi connection? If you’re using a USB scanner, verify that the power supply is stable during setup. For wireless models, check that the network is secure and stable.
The goal is to avoid mid-setup surprises like missing drivers or driver conflicts. Create a quick inventory: your laptop model, OS version, scanner brand, and the intended scanning tasks. If you encounter a driver prompt during connection, note the exact prompt text. Documenting these details helps you search for a precise solution and reduces back-and-forth debugging.
Wired vs Wireless Scanners: Choosing the Right Interface
Wired scanners typically offer plug-and-play simplicity and reliable transfer speeds, which reduces communication errors during scanning. Wireless scanners provide flexibility and clean desk space but may introduce latency or intermittent connectivity if the network isn’t robust. Consider your environment: a shared desk with multiple devices benefits from USB reliability, while a flexible workspace may suit Wi-Fi or Bluetooth models.
When making a choice, factor in scanning volume, color depth, and the types of documents you handle most often. A low-to-mid volume operation with critical reliability usually favors a wired setup, whereas occasional scanning from different rooms may justify a wireless option. If possible, try both interfaces via a test run to gauge speed and consistency.
Preparing Your Laptop: Drivers, Apps, and Settings
Driver sources matter as much as the hardware itself. Start by ensuring the laptop has the latest OS updates and administrative privileges to install new software. Download drivers directly from the scanner manufacturer’s site or use the OS’s built-in driver databases for universal interfaces like TWAIN or WIA. Disable security features only temporarily if the installer requires it, and re-enable them after installation. Keep a copy of the driver package in a known location.
Install the companion scanning software or driver suite recommended by the manufacturer. This software often includes scanning profiles, OCR, and image adjustments. Verify you have enough disk space and that your antivirus isn’t blocking the installer. After installation, restart the laptop to ensure all services start properly.
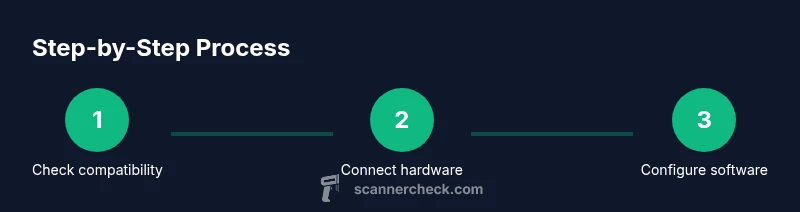
Step-by-Step Setup: Install and Configure (Overview)
The following steps outline a typical installation flow. The detailed step-by-step block provides precise actions with timing estimates. This overview helps you understand the sequence and prepare mental checkpoints before you begin:
- Install drivers from the manufacturer or OS vendor.
- Connect the scanner physically (USB) or join the scanner to the wireless network.
- Open the scanning software and configure basic preferences (color mode, resolution, save location).
- Add the scanner as a usable device in the OS (Windows or macOS) if required.
- Run a test scan and adjust default settings as needed.
A well-structured setup reduces repeated troubleshooting and ensures the scanner is ready for routine use.
Do a Test Scan and Verify Results
With the driver and software installed, perform a test scan using a representative document (text-heavy, color image, and mixed media if applicable). Check the output for legibility, color accuracy, and edge-to-edge alignment. If the test reveals issues, revisit resolution settings, color calibration, and automatic deskew options. Save a few test files to confirm consistent results across sessions.
Document any abnormalities, such as streaks, banding, or skew, and adjust the software’s enhancement filters or brightness/contrast accordingly. Make sure OCR (if used) recognizes the text accurately. A successful test confirms your baseline configuration and helps you refine future scans.
Troubleshooting Common Issues
Connectivity problems are the most common pain points when installing a scanner in a laptop. If the device isn’t recognized, try a different USB port or reset the USB controller in the OS. For wireless models, verify network settings, ensure the scanner is on the same network, and check firewall rules that might block the scanner’s IP. Driver conflicts can occur if two scanning apps vie for the same TWAIN driver.
If you experience degraded image quality, re-check the resolution, color mode, and compression settings. Ensure the software is up to date and that no conflicting background processes are consuming resources. Finally, consult the manufacturer’s knowledge base for device-specific tips.
During troubleshooting, keep a log of changes you make so you can reverse unwanted settings quickly.
Security and Privacy Considerations When Scanning
Scanning can involve sensitive information. Always download drivers and software from official sources to minimize risk. Keep the laptop firewall enabled and review application permissions for scanning software. If you store scanned documents locally, implement encryption or secure storage practices. For wireless setups, use a secured network and disable remote administration on the scanner if not needed. Regularly update firmware and software to protect against known vulnerabilities.
By adopting these practices, you reduce exposure to malware, avoid data leakage, and maintain a safer digital workflow.
Maintenance and Optimization for Long-Term Use
To ensure longevity, periodically update drivers and software, check for firmware updates on the scanner, and keep the device dust-free. Use a consistent storage path and file naming convention to simplify future archiving. Schedule routine scans as part of your document-management workflow to keep your system ready. If you use OCR, re-train or re-run accuracy checks as your document mix changes. Regular maintenance reduces downtime and preserves image quality over time.
Authority References and Further Reading
-
Practical guidance and standards from reliable sources help reinforce best practices. See official resources and educational sites for broader context on imaging standards and data handling.
-
For standards and technical information, refer to NIST materials on image quality and scanning fundamentals.
Following these references can deepen understanding and support more advanced workflows.
Tools & Materials
- Scanner device (USB or wireless)(Must be compatible with the laptop's interfaces (USB-A, USB-C, or Wi-Fi))
- Laptop with available port(Ensure adequate USB/network capability and admin access)
- USB cable or Wi-Fi network(USB cable should be length sufficient for desk setup; Wi-Fi requires network access)
- Driver/software installer(Download from official manufacturer site or use OS-provided TWAIN/WIA drivers)
- Power supply (if applicable)(Some scanners require external power; ensure stable supply during use)
- Optional: USB-C to USB-A adapter(Use if your laptop only has USB-C ports)
Steps
Estimated time: 60-90 minutes
- 1
Verify compatibility
Check your laptop OS version and the scanner’s supported interfaces. Confirm you have the correct drivers or software available for download. This step prevents driver conflicts and ensures smooth installation.
Tip: If your OS is out of date, update before starting to reduce compatibility issues. - 2
Power off and connect hardware
Power off the laptop and connect the scanner using the preferred interface (USB or join the wireless network). Ensure the connection is secure before turning the laptop back on.
Tip: For USB, try a different port if the device isn’t recognized after boot. - 3
Install drivers and software
Run the manufacturer’s installer or use the OS driver. Follow prompts to grant necessary permissions and complete the installation. This step often installs TWAIN/WIA bridge components.
Tip: Disable security prompts temporarily only if the installer requires it, and re-enable after installation. - 4
Add the scanner to your OS
In Windows, access Devices and Printers to confirm the scanner appears and is set as default. On macOS, check System Preferences > Printers & Scanners and add the device if needed.
Tip: Set the scanner as the default when you intend to scan most documents. - 5
Configure scanning software
Open the bundled software and set color mode, resolution, and destination folder. Create a profile for common tasks (black-and-white documents, color photos, OCR).
Tip: Enable automatic file naming to keep scans organized. - 6
Run a test scan
Place a sample document on the scanner, start a test scan, and review the output. Check alignment, brightness, and legibility. Adjust settings as needed.
Tip: If the scan is skewed, enable deskew or border detection in the software. - 7
Finalize settings and save
Save your preferred resolution, color depth, and file format. Apply these defaults for future scans to speed up workflows.
Tip: Document your chosen defaults so you can replicate the setup on another device if needed. - 8
Secure and maintain
Keep drivers updated and periodically clean the scanner’s glass surface for best results. Back up drivers or keep a local copy of installers.
Tip: Schedule a quarterly check to ensure firmware and software remain current.
Common Questions
Do I need a wired scanner to avoid connection issues?
Not always. Wired scanners tend to be more reliable for stationary setups, while wireless models offer flexibility. Your choice should align with your workspace and scanning volume.
Wired scanners are usually more reliable for fixed desks, but wireless options work well if you need flexibility.
Can I use a scanner without internet access?
Yes. USB-connected scanners and locally installed software can function without internet access. You may need the drivers installed beforehand and occasional online activation depending on the vendor.
Yes, offline scanning is possible with USB connections and locally installed software.
What should I do if the computer doesn’t recognize the scanner?
First, try a different USB port and reboot. Check for driver updates and confirm the device appears in the OS’s device manager. For wireless models, verify network visibility and firewall settings.
Try another USB port, recheck drivers, and ensure the scanner shows up in your device manager.
Which drivers should I install first?
Install the manufacturer's driver package first, then set up any accompanying software. If your OS provides TWAIN/WIA compatibility, you can use those bridges as fallback.
Install the manufacturer’s driver first, then the software.
Is TWAIN or WIA better for scanners on Windows/macOS?
TWAIN is widely supported and offers robust feature sets. WIA is built into Windows. On macOS, you’ll typically rely on vendor software or TWAIN bridges for broader compatibility.
TWAIN is commonly preferred for broader compatibility, especially across apps.
How long does the installation typically take?
Most installations take about 30 to 60 minutes, depending on driver availability and software complexity. A smoother setup happens when the OS is up to date and you have a stable network.
Most people finish in about 30 to 60 minutes with up-to-date software.
Watch Video
Key Takeaways
- Verify OS and interface compatibility before starting
- Choose wired for reliability or wireless for flexibility
- Install drivers from official sources and configure software
- Run a test scan to validate color, resolution, and alignment
- Maintain drivers and firmware for long-term reliability