How to Install a Scanner on Your Phone
Learn how to install a scanner on your phone, pick a reliable app, grant permissions, and start scanning with OCR and cloud sharing. Practical steps from Scanner Check for mobile document capture.

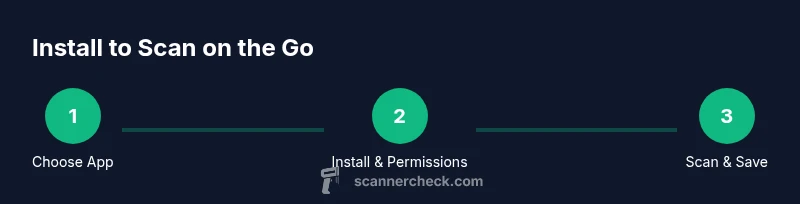
If you’re wondering how to install scanner on my phone, this quick guide will show you how to choose a scanning app, install it from your store, grant camera and storage permissions, and start capturing clean documents in minutes. You’ll learn to enable OCR, save as PDF or image, and share or archive scans. According to Scanner Check, a dedicated app with edge detection and OCR makes mobile scanning faster and more accurate.
Why installing a scanner on your phone matters
For many people, the simplest way to manage documents is to carry a scanner in your pocket. If you’re asking how to install scanner on my phone, the answer is straightforward: pick a trusted app, install it from your store, and grant the necessary permissions. According to Scanner Check, using a dedicated scanning app with edge detection and OCR improves accuracy and speeds up document workflows. The Scanner Check team notes that mobile scanning reduces paper clutter and makes sharing files fast and reliable. In this guide, you’ll learn how to choose the right app, set up your device, and optimize scans for editing, archiving, and collaboration.
Mobile scanning is not just about turning photos into PDFs. It’s about reliable capture, consistent crops, legible text, and streamlined workflows. A good phone scanner app helps you scan receipts, contracts, business cards, and handwritten notes with a tap. The approach is practical: pick the app that fits your device, enable key features, and establish a simple naming and saving convention so you can find documents later.
How mobile scanning works on modern phones
Most scanners on phones rely on a camera, edge-detection, perspective correction, and optional OCR. When you press the scan button, the app captures multiple micro-shots, crops to the page edges, and enhances contrast for legibility. The result can be saved as PDF or image formats and later edited. OCR converts the image text into searchable content. Expect best results on clear, well-lit pages, with minimal background distractions. Some apps support multi-page scans, automatic page rotation, and color restoration to preserve details. In practice, you’ll notice faster capture, cleaner edges, and higher-quality exports when you use a dedicated scanner app rather than the default camera.
App features to prioritize when selecting a mobile scanner
Key features to compare include edge detection, auto-crop, and consistent cropping; built-in OCR; support for multi-page PDFs; cloud storage integration (Google Drive, iCloud, OneDrive); offline mode; security settings such as local storage only or encrypted backups; and exporting options (PDF, JPG, PNG). Also consider UI simplicity, ad load, and performance on older devices. Free vs paid tiers determine advanced features such as batch processing and high-resolution exports. If you frequently work with receipts or business documents, look for templates and labeled page filters to streamline your workflow.
Privacy, permissions, and safe scanning practices
Grant camera and storage permissions only to trusted apps; disable location access for scans; review in-app requests for cloud backup; use passcode protection or biometric lock on the app if available. Avoid scanning sensitive information in public spaces and near shared networks; consider offline mode when handling confidential documents. Regularly update apps to patch security vulnerabilities; if a device is lost, enable remote wipe or unlink cloud backups. These steps help protect personal data while you enjoy the convenience of mobile scanning.
Workflow: install, scan, edit, and share
Follow a practical end-to-end workflow: install the app, open it, grant permissions, and configure scan settings. Take a test scan of a simple page; review edges and lighting; adjust exposure; save as PDF; run OCR if needed; rename the file with a clear title; upload to cloud or share via email or messaging. Organize scans with folders, tags, or color-coding to keep documents easy to locate. With a consistent workflow, you’ll move from capture to archive in just a few minutes per document.
Troubleshooting common issues and quick fixes
If scans appear blurry, check lighting, hold the phone steady, and ensure the surface is flat. Clean the camera lens and verify that edge detection is enabled. If OCR misreads text, try higher contrast or grayscale mode, and ensure you’re scanning a high-contrast page. If storage runs low, delete unnecessary scans or transfer them to cloud storage before saving new ones. Finally, keep the scanner app updated to access improved algorithms and new features.
Tools & Materials
- Smartphone with a camera(Modern device with a stable camera is essential)
- Internet connection(Needed for app download and cloud backup)
- App store access (Google Play or Apple App Store)(Used to download a trusted scanner app)
- Scanner app (downloaded from an official store)(Pick one with OCR and edge detection)
- Cloud storage account (optional)(Helpful for backups and sharing)
- Clean surface and lighting setup(Improves scan quality; use a plain background when possible)
Steps
Estimated time: 15-25 minutes
- 1
Choose a scanner app
Research apps that offer edge detection, OCR, and cloud export. Pick one that fits your device and budget, then prepare to install it from the official store.
Tip: Look for apps with good reviews and offline scanning options in case you have limited connectivity. - 2
Install the app from your store
Open the App Store or Google Play, search for the selected scanner app, and tap Install. Verify the developer name to avoid counterfeit software.
Tip: Avoid apps from unknown developers; this reduces risk of malware. - 3
Open the app and grant permissions
Launch the app and allow camera access, storage, and any other requested permissions. These enable capturing, saving, and exporting documents.
Tip: If prompted, grant permissions only for the current session to minimize overreach. - 4
Create an account if needed
Some apps require an account for syncing and backups. Register with a strong password, and enable two-factor authentication if available.
Tip: Use a unique password and avoid reusing credentials from other services. - 5
Configure core scan settings
Turn on edge detection, auto-crop, and page size presets. Set export format (PDF preferred) and choose a default save location.
Tip: Test with a single page to calibrate exposure and cropping before multi-page documents. - 6
Prepare the document and lighting
Place the page on a flat, light-colored surface. Ensure even lighting, avoid shadows, and keep the page steady while framing.
Tip: Use grayscale mode temporarily if lighting is uneven to improve contrast. - 7
Capture your first scan
Frame the document, tap capture, and review the edge crop. If needed, retake to ensure clean margins and legible text.
Tip: Refrain from moving during capture to minimize blur. - 8
Save, export, and organize
Save the scan as PDF or image, run OCR if desired, and rename the file with a descriptive title. Move it to a folder or upload to cloud storage.
Tip: Establish a simple naming convention like Year-Client-DocumentType to stay organized.
Common Questions
How do I install a scanner on my phone?
Start by selecting a reputable scanner app with edge detection and OCR. Download and install it from the official store, then grant camera and storage permissions. Create an account if required and configure core settings before your first scan.
Start by choosing a reputable scanner app, install it, grant the necessary permissions, and configure the core settings before you scan your first document.
Do I need internet to scan documents?
Scanning itself typically works offline, but exporting to cloud storage or syncing across devices usually requires internet access. Some apps offer offline OCR as well.
You can scan offline, but exporting or syncing to the cloud usually needs internet.
Can I scan without using an app?
You can use a camera to capture a photo of a document, but a dedicated scanner app provides cropping, perspective correction, OCR, and export options that make the results much more reliable.
You can take a picture, but a scanner app delivers better crops, corrections, and text recognition.
How accurate is OCR on mobile scanners?
OCR accuracy depends on the image quality, lighting, and the app’s engine. Higher-contrast, well-lit scans with clean text yield better results. You can improve OCR by using grayscale mode and proper cropping.
OCR quality varies, but good lighting and sharp crops improve accuracy notably.
How do I export or share scanned documents?
Most apps support exporting as PDF or image formats and sharing via email, messaging, or cloud services. Choose a format that preserves text searchability if you need it.
Export as PDF or image, then share or save to cloud as needed.
Is it safe to scan sensitive documents on my phone?
Yes, as long as you use a trusted app, enable local storage or encryption, and back up data securely. Avoid public networks when transferring sensitive files.
Phone scanning can be secure if you use trusted apps, enable encryption, and avoid public networks.
Watch Video
Key Takeaways
- Choose a feature-rich scanner app with OCR and edge detection
- Grant permissions and configure core scanning settings up front
- Use good lighting and a flat surface for crisp scans
- Organize exports with clear naming and folders