DIY 3d Scanner Construction: A Practical Guide
A practical, step-by-step guide to building a DIY 3d scanner from affordable parts. Learn components, calibration, and safe assembly for reliable 3d scanning.

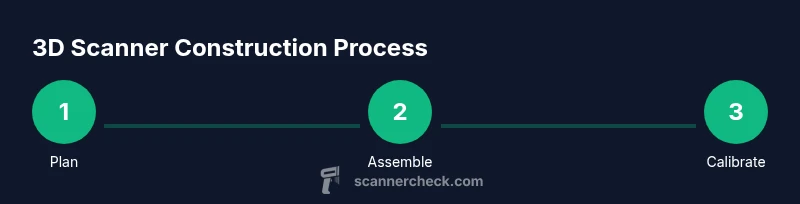
This guide helps you build a basic 3d scanner from affordable parts. You’ll learn how to choose components, assemble a stable frame, calibrate for reliable depth data, and validating results. Follow a clear, step-by-step process to create a DIY scanner suitable for learning, hobby projects, and iterative improvements. This quick answer sets the stage for deeper exploration in the body.
3d scanner construction: framing the project
Embarking on 3d scanner construction begins with a clear set of goals. Decide what you want to scan (small objects, furniture, or scenes), what resolution you need, and how quickly you want results. The three common approaches—optical triangulation, structured-light, and photogrammetry—each have tradeoffs in cost, complexity, and software support. For beginners, a structured-light or triangulation-based kit is easiest to assemble and calibrate. According to Scanner Check, starting with a modular frame and a predictable lighting plan helps keep projects reproducible and safe. In practice, you should sketch a plan that describes the frame geometry, the mounting points for the camera, and a stable turntable or motion system. This planning phase reduces rework later and helps you budget time and materials. As you define requirements, consider how you will validate the results: will you scan a known object and compare its dimensions, or use a calibration target to measure depth accuracy? The answers shape every subsequent step. 3d scanner construction is not quick magic; it’s a careful assembly of parts, alignment, and testing.
Core design choices for accuracy and speed
When selecting a design approach, balance accuracy, speed, and complexity. Optical triangulation uses a fixed baseline to deduce depth and works well with steady lighting and precise alignment. Structured-light projects encoded patterns onto objects so the camera can decode depth information; this method is popular for hobbyist kits because cameras and projectors are affordable and software stays accessible. Photogrammetry relies on multiple photos to reconstruct geometry and can handle complex scenes, but often requires more processing and better texture data. For a practical home project, aim for a robust, modular design that you can upgrade—add a better camera, adjust lighting, or swap in a higher-contrast calibration target. The choice you make will influence calibration strategies, scan speed, and post-processing workflows, so document assumptions at the start and maintain version control on your build.
Essential components and how to select them
A successful build starts with selecting components that fit your budget and skill level. A solid frame can be built from aluminum extrusion, wood, or 3D-printed parts depending on your tools and tolerance requirements. The camera is the eyes of the scanner; a USB webcam in the 1080p range can be enough for learning, while higher-end cameras reduce noise and improve depth fidelity. A rotation platform—manual or motorized—drives complete object captures, with lighting that clearly reveals surface detail. Calibration targets, such as checkerboards or spheres, are critical for mapping sensor geometry to real-world dimensions. Finally, a capable computing unit, whether a Raspberry Pi or a desktop PC, runs the reconstruction software and stores data. Collect cables, power supplies, and sturdy mounts to keep rigs safe and fields repeatable. Remember to plan cable routing and grounding to minimize noise during scans.
Building the frame: materials, tolerances, and assembly
Frame construction dictates long-term stability, repeatability, and alignment accuracy. Use materials with low thermal expansion and rigid joints. If you’re new to fabrication, consider a hybrid approach: a light aluminum frame for strength, with 3D-printed brackets for camera mounts. Precision is achieved by sanding mating surfaces, using alignment pins, and ensuring perpendicularity between the camera axis and the scan surface. Tolerances matter: aim for snug fits but allow for small adjustment via set screws or sliders. Attach a flat, level platform for the object and verify it with a spirit level before each session. Keep the design modular so you can swap components without rebuilding the entire rig. Keep instructions and tests documented to track improvements over time.
Camera integration and lighting setup
A stable camera mount is essential for repeatable scans. Attach the camera so its optical axis is consistent across runs and align it with the calibration target at a known distance. Use a diffuse, uniform light source to reduce specular highlights and shadows that complicate depth extraction. A simple LED ring or softbox provides even illumination; avoid direct glare on shiny surfaces. If using structured-light, project a high-contrast pattern (grid or stripe) onto the subject and ensure the pattern edges are crisp in the captured frames. Cable management matters here—avoid snagging the projector or camera during rotation. Finally, run quick test captures to confirm that the scene is well-lit and that the camera exposure remains stable during movement.
Calibration workflow: intrinsic/extrinsic parameters
Calibrating the system is essential for translating image data into accurate 3D models. Start with intrinsic calibration to determine camera focal length, principal point, and lens distortion. Use a known calibration target and multiple images taken from different angles; your software will estimate camera parameters. Extrinsic calibration aligns the camera coordinate system with the turntable or movement axis, describing how the camera views the object in space. Repeat calibration after any mechanical adjustment to avoid drift. Document calibration values and verify them with a simple test object of known size. Consistent calibration across sessions leads to more reliable reconstructions and easier comparisons between scans.
Data capture, reconstruction, and post-processing
Capture sessions should be structured: fix a scanning volume, record a series of angles or rotations, and capture enough frames to cover the object from multiple viewpoints. Use reconstruction software to generate a mesh from the captured data. Post-processing typically includes noise reduction, hole filling, and texture mapping. Be mindful that different software packages handle data geometry and textures differently, so choose tools that align with your goals, whether accuracy for measurement or visual quality for presentation. Save intermediate results frequently and maintain a versioned archive of scans. With practice, you’ll identify the right balance of resolution, frame rate, and lighting that yields crisp, usable models.
Troubleshooting and iteration strategies
No build is perfect on the first try. Common issues include misalignment between frames, inconsistent lighting, and aliasing in depth maps. If scans drift or wobble during rotation, recheck the frame squareness and tighten joints. Improve lighting uniformity by repositioning lights or adding diffusion. Calibration drift often comes from mechanical looseness or vibration; dampen movement paths and re-run intrinsic/extrinsic calibrations. For complex surfaces, adjust camera exposure and pattern contrast to avoid washed-out or oversaturated regions. Finally, document every change and compare new scans to previous ones to measure improvement and guide further iterations.
Tools & Materials
- Raspberry Pi 4 or similar single-board computer(Include a reliable power supply and a microSD card with a lightweight OS.)
- USB camera (1080p or higher)(Prefer global shutter if available; otherwise ensure robust calibration.)
- Rotating platform (turntable)(Manual or motorized; ensure smooth rotation and level mounting.)
- LED lighting or diffuse light source(Even illumination to reduce shadows and glare.)
- Calibration targets (checkerboard or spheres)(Used for intrinsic and extrinsic parameter estimation.)
- sturdy camera mount and frame supports(Aluminum extrusion or wood, sized to your build.)
- Cables, power supplies, and adapters(Keep cables tidy and secured to prevent interference.)
- Software toolkit (open-source options)(Include reconstruction and calibration tools; plan backups.)
Steps
Estimated time: 3-6 hours
- 1
Define project scope and requirements
Describe the scanning goals, target object size, and required resolution. This step ensures you select compatible components and realistic timing before purchasing parts.
Tip: Write down success criteria and how you’ll validate results. - 2
Assemble the frame and mounting points
Build a rigid frame that supports the camera and turntable. Check for squareness and level surfaces; inaccuracies here cascade into later errors.
Tip: Use alignment pins and level surfaces during assembly. - 3
Install the camera and lighting
Mount the camera securely and set up diffuse lighting to minimize reflections. Ensure consistent focal distance and stable exposure during rotation.
Tip: Mark a fixed camera position and lock it once aligned. - 4
Mount the turntable and alignment aids
Secure the turntable and position alignment aids to mirror the camera's view. Verify rotation smoothness and repeat positions for test captures.
Tip: Test a few rotations before calibration. - 5
Calibrate camera intrinsics
Capture multiple images of the calibration target from different angles to estimate focal length, principal point, and distortion.
Tip: Take at least 10–15 images for stable estimation. - 6
Run a pilot reconstruction
Capture a known object and reconstruct a basic model to identify gaps or misalignments that require adjustment.
Tip: If gaps appear, re-check frame alignment and lighting. - 7
Iterate and optimize
Tweak lighting, camera position, and calibration parameters based on results. Maintain versioned backups of configurations and scans.
Tip: Document every change for reproducibility.
Common Questions
What is 3d scanner construction?
3d scanner construction refers to the process of designing, assembling, and calibrating hardware and software to capture 3D representations of real-world objects. It involves selecting a sensing method, building a stable frame, and applying algorithms to reconstruct geometry from captured data.
3d scanner construction is the process of building a system that captures 3D shapes using sensors and software, including planning, assembling a frame, and calibrating the setup.
Do I need specialized equipment to start?
You can start with affordable parts such as a USB camera, a simple frame, and a manual turntable. As you gain experience, you can upgrade to higher-resolution cameras and motorized stages for improved accuracy.
You can begin with budget parts and improve as you learn.
What software is used for reconstruction?
Common open-source tools provide reconstruction and alignment workflows. Look for packages that support calibration, mesh generation, and texture mapping. Choose software that aligns with your hardware and learning goals.
Many open-source options are available for reconstruction and alignment.
How long does a typical build take?
A first functional build may take several hours, with additional time devoted to calibration and testing. Expect multiple iterations to reach stable results.
You’ll likely spend several hours to a few days depending on your setup.
Is home-based construction safe?
Yes, with basic safety practices. Work in a well-ventilated, organized space and unplug power when assembling. Avoid overloading circuits and secure all cables.
Yes, with standard safety practices at home.
What calibration issues are common?
Drift due to loose joints, inconsistent lighting, and misalignment between the camera and turntable are common. Re-tighten joints, standardize lighting, and re-run calibrations to address these.
Loose joints and lighting variations are typical calibration troubles.
Watch Video
Key Takeaways
- Plan before you build and document assumptions.
- Calibration is essential for accuracy and repeatability.
- Iterate with structured tests to steadily improve results.
- Keep the setup modular to allow upgrades.
- Safety first when handling electronics and mechanical parts.