3D Scanner for Beginners: A Practical How-To
A practical, beginner-friendly guide to choosing, setting up, and using a 3D scanner. Learn core concepts, key features, and a step-by-step workflow to start creating your first accurate digital models.

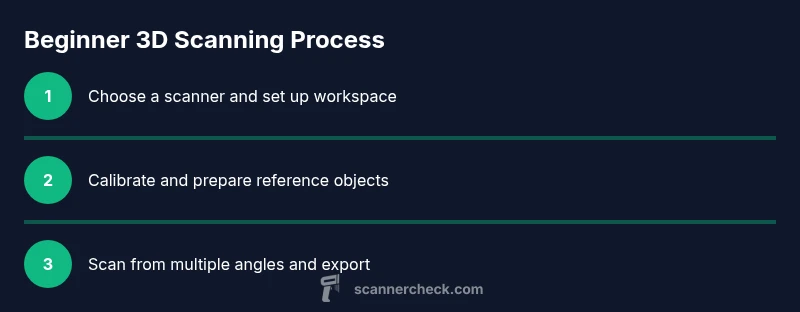
In this guide, you’ll learn how to select a beginner-friendly 3D scanner, what features matter most for learning, and a simple, reliable workflow to capture your first usable models within a few hours. We cover handheld vs desktop options, essential accessories, and a beginner-friendly processing pipeline that minimizes frustration while maximizing learning. By following these steps, you’ll be scanning with confidence and building a solid foundation for more advanced projects.
What is a 3D scanner for beginners and who it's for
A 3D scanner creates a digital representation of a real-world object by measuring its shape and surface details. For beginners, these devices come in two main families: handheld scanners you move around an object, and desktop/stationary scanners that sit on a table. The goal is to capture enough data so software can reconstruct a 3D mesh, which you can edit, measure, or print. According to Scanner Check, beginner-friendly scanners emphasize ease of use, guided software, and automatic calibration. The Scanner Check team found that entry-level scanners prioritize a simple workflow, quick setup, and strong community support over ultra-high accuracy. This makes learning scanning fundamentals practical without feeling overwhelming. In practice, a good starter setup lets you scan common objects—tools, figurines, small props—and gradually tackle more complex shapes as you gain experience. The emphasis is on building fundamentals: how to hold, how to avoid shadows, and how to interpret a point cloud and mesh. By starting small and growing with your equipment, you’ll gain momentum quickly.
Choosing between handheld and desktop: what fits a beginner
Handheld scanners are versatile and portable, letting you move the sensor around a subject to capture every angle. Desktop scanners stay in one place and often deliver excellent resolution for small objects but require you to physically rotate the item or use a turntable. For beginners, a handheld device can reduce setup friction and encourage experimentation, while a desktop option can shine when you want more precise scans of stationary objects. The decision depends on what you plan to scan, your workspace, and how much you value speed vs. accuracy. The Scanner Check team notes that most learners benefit from starting with a beginner-friendly handheld model due to its ease of use and flexibility, then adding a desktop option later if needed. Always consider software guided modes, alignment features, and the availability of community tutorials when choosing your first scanner.
Core features to prioritize for beginners
When shopping for a beginner-friendly 3D scanner, prioritize features that reduce friction and boost learning:
- Guided software and automatic alignment
- Structured-light or laser options with stable color capture
- Out-of-the-box calibration or simple reference objects
- Broad file format support (OBJ, STL, PLY) and easy export
- Solid warranty and strong online community
- Clear documentation and beginner-friendly tutorials Selecting a model that simplifies the workflow helps you focus on learning concepts rather than wrestling with tools. The emphasis should be on accessibility, not just raw performance. Scanner Check’s analysis highlights that accessible software and community support are decisive for beginners, often more valuable than the highest possible resolution.
Basic scanning workflow explained
A typical beginner workflow consists of choosing a subject, preparing the scanner and workspace, taking a sequence of scans, and stitching them into a complete model. You’ll often start with a rough scan to capture the general shape, then fill gaps with additional passes from different angles. Post-processing steps—such as merging frames, smoothing surfaces, and cleaning noise—are approachable with guided software. Start with small objects to learn how movement, lighting, and distance affect data quality. As you gain experience, you’ll recognize how different textures and colors influence scan fidelity and texture capture. Remember: consistency in distance and angle is more critical than cranking up resolution for a first project.
Setup and calibration: creating your first scan
Proper setup reduces post-processing effort. Place the object on a stable surface and use consistent lighting to avoid harsh shadows. Connect the scanner to your computer and install the vendor’s software, ensuring you have the latest update. Use any built-in calibration routine or a simple reference object (like a known-size cube) to help the software align scans. Start with a short, test scan to verify that the object is visible from multiple angles and that the mesh builds without major holes. If you see gaps, reposition the object or adjust the distance slider to optimize data capture. Calibration isn’t about perfection on day one; it’s about teaching your software how your scanner sees the world.
Post-processing: turning scans into usable models
Post-processing turns raw scan data into a clean, usable model. Begin by merging scans from different angles, then remove obvious outliers or stray points. Use smoothing and decimation sparingly to preserve shape while reducing noise. Export options vary by software, but OBJ and STL are the most widely supported formats for 3D printing and modeling workflows. Texture maps or color data can be added if your scanner supports color capture. Practice basic trims and mesh repair to fix holes or non-manifold edges. A well-processed model is easier to edit, inspect, and share, which makes your early projects more rewarding.
Common challenges and how to fix
Beginners often encounter issues like misalignment, holes in the mesh, and noisy surfaces. Start with stable lighting and a clean background to reduce shadows. When alignment fails, re-scan from a few additional angles or use a lower distance setting to improve data redundancy. Holes are common in tricky areas; fill them with targeted scans from different directions. If surfaces look noisy, apply a light smoothing pass or increase the number of reference frames. Finally, ensure your computer meets the software’s recommended hardware requirements to avoid processing slowdowns and crashes.
Practical project ideas to practice
Build a small collection of practical projects to reinforce learning: a common office tool, a decorative figurine, a plant, and a handheld gadget. Each project should emphasize a different challenge—uniform color, curved geometry, and fine details. Use these practice pieces to compare how lighting, distance, and angle affect scan fidelity. Document your process so you can review what worked well and what didn’t, which accelerates learning. As you complete more projects, you’ll identify preferred objects, scanning positions, and settings that consistently produce solid results.
Maintenance and safety considerations
Keep your scanner’s optics clean with a soft microfiber cloth and avoid touching lens surfaces. Store the device in a dry environment away from dust, and disconnect it before cleaning or moving between rooms. Use clean, dry hands when handling reflective or dark materials to minimize erroneous readings. Regularly check cables for wear, update firmware, and back up your project files. Maintenance is a simple routine that protects the longevity of your kit and ensures consistent results over time.
Tools & Materials
- Entry-level 3D scanner(Look for guided workflows, good software support, and common export formats (OBJ, STL, PLY).)
- Power supply / USB cable(Ensure it includes a compatible connector and sufficient length.)
- Computer with modest specs(At least 8 GB RAM; prioritize SSD for faster processing.)
- Calibration reference object(A known-size cube or plane helps with quick alignment.)
- Turntable or rotating platform(Helpful for small to medium objects to improve coverage.)
- Soft microfiber cloth(For cleaning lenses and the object surface before scanning.)
Steps
Estimated time: 60-90 minutes
- 1
Unbox and connect the scanner
Remove packaging carefully and connect the scanner to power and to your computer with the included USB cable. Verify the device powers on and appears in the software as a connected device.
Tip: Keep the scanner on a stable surface to prevent vibrations during initial scans. - 2
Install and update the software
Install the vendor-provided software and check for the latest updates. This ensures you have the newest features and bug fixes that improve beginner workflows.
Tip: Enable auto-updates if available to keep your tools current without manual checks. - 3
Calibrate with a reference object
Run the calibration or alignment step using a reference object or the scanner’s built-in calibration routine. Calibration helps the software align multiple scans into a coherent model.
Tip: Use a flat reference surface for quick checks and verify alignment with a small test object. - 4
Prepare the object and environment
Place the object on a clean, non-reflective surface with diffuse lighting. Keep the distance consistent and avoid moving the object during a scan.
Tip: Cover shiny or translucent surfaces with a matte, non-reflective backdrop if possible. - 5
Run the first scan using guided mode
Select guided or automatic mode if available, then capture scans from several angles. Use the model preview to ensure coverage around the whole object.
Tip: Take at least three passes from different angles to reduce blind spots. - 6
Export, review, and refine
Export the mesh in OBJ or STL, then load it into a 3D editor or viewer to inspect holes or noise. Run a quick cleanup pass and re-export if needed.
Tip: Document your settings (distance, angle range) for future scans of similar objects.
Common Questions
What is a 3D scanner for beginners used for?
A 3D scanner for beginners is used to capture the shape of real objects so you can create digital models for editing, printing, or analysis. It’s designed to be approachable and educational, helping new users learn scanning concepts with guided software.
A beginner-friendly 3D scanner helps you create digital models from real objects, teaching the basics of scanning and modeling in an approachable way.
Do I need a powerful computer for basic scans?
For basic scans, a modest computer usually suffices. Most beginner software runs well on mid-range hardware, and you can upgrade gradually as you take on larger projects.
Most beginners can start with a mid-range computer; you can upgrade as you take on more demanding projects.
Is photogrammetry a better option than a 3D scanner for beginners?
Photogrammetry is an alternative that uses many photos to construct a model. It’s useful when you don’t own a scanner, but it requires careful image capture and can be more time-consuming than a dedicated scanner for consistently accurate results.
Photogrammetry is an option if you don’t have a scanner, but it demands careful shooting and more time to produce reliable models.
What file formats do beginner scanners typically export?
Most beginner scanners export common formats such as OBJ, STL, or PLY, which integrate with standard 3D modeling and printing tools.
Common exports include OBJ, STL, and PLY for easy use in modeling and printing.
How long does it take to learn the basics of 3D scanning?
Learning the basics typically takes a few sessions. Start with short, focused practice runs and gradually add complexity as you become comfortable with the workflow.
A few practice sessions are usually enough to get comfortable with the basics, then you’ll grow faster with each project.
What maintenance is required for a beginner scanner?
Keep the optics clean, ensure cables are intact, update firmware, and store the device in a dry place to protect it from dust and moisture.
Clean the lens, check cables, update firmware, and store properly to keep your scanner in good shape.
Can I integrate a beginner scanner with 3D printing?
Yes. Most beginner scanners produce meshes that can be refined in 3D software and then prepared for 3D printing, provided the mesh is water-tight and clean.
You can usually print scans once you repair and clean the mesh in 3D software.
Watch Video
Key Takeaways
- Choose beginner-friendly scanners with guided software.
- Plan your workflow from setup to export to minimize rework.
- Practice with simple objects to build confidence and consistency.
- Post-processing matters as much as the raw scan quality.