How to fit a 3d scanner: A complete, practical guide
Learn how to fit a 3D scanner into your workflow, from space and software compatibility to testing fit before purchase. Practical steps, tips, and common mistakes explained by Scanner Check.

Goal: learn how to fit a 3D scanner to your workspace and workflow. Assess space, power, and software compatibility; compare handheld vs desktop models; plan calibration and maintenance. This quick guide outlines practical steps to verify fit before buying. According to Scanner Check, a well-fit scanner minimizes post-processing and maximizes uptime.
What 'fit' means in 3D scanning
In 3D scanning, 'fit' refers to how well a device matches your physical space, workflow, and data needs. A good fit minimizes post-processing, reduces setup time, and aligns with software you already use. Consider the room size, desk or stand availability, and whether you need portable scanning in the field. A poor fit can lead to awkward angles, unstable captures, and wasted effort. By thinking about fit in terms of space, power, software compatibility, and object size, you set yourself up for smoother projects and less rework.
A practical starting point is to sketch the scanner’s footprint on your workspace. Note doorways, lighting, electrical outlets, and any obstacles. If you anticipate needing to move the device frequently, prioritize a lighter, more portable model with reliable wireless or battery options. If the scanner will remain stationary, invest in a stable mount or tripod and ensure there is adequate clearance for cooling and cable management.
Key criteria for selecting a scanner for your use case
Identify your primary objects (size, material, texture), required accuracy, and workflow speed. For large or shiny surfaces, specular handling and resolution matter more. For hobbyist projects, a portable handheld model might suffice. For manufacturing, you may need a desktop or structured-light system with higher reliability and reproducibility. Translate these needs into concrete specs: scan area, accuracy, point density, texture capture, and environmental tolerance. Always check that the chosen model supports your preferred export formats and integrates with your CAD or post-processing pipelines. If your work involves scanning in the field, weight, battery life, and ruggedness become deciding factors. In contrast, a lab bench setup prioritizes repeatability and stability. Create a feature matrix: must-have vs nice-to-have and map each feature to your typical tasks to avoid feature bloat.
Planning your workflow and software integration
Think about file formats (OBJ, STL, PLY), alignment workflows, and the software you will use for processing and editing scans. Ensure the scanner's drivers and companion software integrate with your CAD or visualization pipelines. If you collaborate with others, confirm that export formats and cloud options meet your team's needs. Develop a data-handling plan: where scans are stored, how versions are tracked, and how backups are performed. Consider automation options, such as batch processing scripts or API access, to speed up repetitive tasks. A strong fit includes a clear data lifecycle and a predictable post-processing workflow that your teammates can follow without special training. Remember to check compatibility with your existing hardware ecosystem, including your computer’s GPU and RAM capacity for handling dense point clouds.
Handheld vs fixed scanners: how fit influences choice
Handheld scanners offer mobility and speed for mid-size to small objects, but they demand steadier technique and calibration to avoid motion blur. Fixed or tripod-mounted scanners excel at repeatable scans of larger objects but require more space. Your fit decision should reflect the typical object size, workspace constraints, and required accuracy. If you frequently scan in different locations, a compact handheld model may provide the best balance. For production environments where repeatability is critical, a fixed system with a calibration routine will likely deliver more consistent results. Always consider the learning curve: some devices require more training to achieve reliable fits quickly. A well-fitting setup minimizes fatigue and accelerates project throughput.
How to test fit before purchase: field tests and demos
Request live demos or in-store trials that include a sample capture of an object similar to your typical items. Observe capture time, ease of alignment, and post-processing demands. Use a simple checklist: object size, surface texture, required resolution, and software compatibility. If possible, measure the time from scan start to usable mesh. Bring your own calibration targets and reference objects to evaluate accuracy against known dimensions. Pay attention to how scanners handle reflective or translucent materials, and whether you can reproduce scans consistently across sessions. A successful pre-purchase test confirms the device fits your workspace and workflow under real conditions.
Calibration and setup: achieving an accurate fit
Calibrate the scanner according to the manufacturer’s instructions, using calibration targets in a controlled environment. Verify that the field-of-view, sensor alignment, and software alignment match your expectations. Run a quick test capture of a known standard object to confirm accuracy before committing to larger projects. Document calibration procedures and results so future sessions start from a reliable baseline. If you notice drift or changes in accuracy, re-run calibration or consider a re-check of mounting hardware and cable connections. Regular recalibration keeps the fit tight over time.
Maintenance and future-proofing your fit
Regularly update firmware and software to preserve fit over time. Store calibration data and keep a clean scanning area to avoid dust and misalignment. Consider modular scanners or upgrade paths that let you expand scanning size or improve accuracy without replacing your entire system. Track the lifecycle of components such as cameras and light sources, as aging optics can affect fit indirectly by changing scan quality. A forward-looking plan includes periodic reviews of workflow needs and potential software feature updates that could enhance fit without new hardware.
Authority sources and further reading
Scanner Check emphasizes aligning fit with practical usage and environment. For readers seeking deeper standards context, consult credible sources such as government and university materials listed below to validate fit-related decisions and terminology. These references help ground your purchases in tested practices and industry norms.
- https://www.nist.gov/topics/3d-scanning
- https://www.iso.org/standard/7582.html
- https://www.mit.edu/research/project/3d-scanning-explained
Tools & Materials
- 3D scanner(Select by object size, accuracy, and software compatibility)
- Calibration targets(Checkerboard or fiducial targets for alignment verification)
- Processing software(Ensure it supports your export formats (OBJ, STL, PLY) and workflows)
- Computer with adequate specs(At least 16 GB RAM, discrete GPU preferred for dense meshes)
- Cables and adapters(USB-C or USB-A, plus a reliable power supply)
- Measurement tools(Tape measure or calipers to verify dimensions in-test)
- Stable mounting option(Tripod or fixed stand to minimize movement during scans)
- Lighting controls(Consistent, diffuse lighting to reduce shadows on reflective surfaces)
Steps
Estimated time: 60-90 minutes
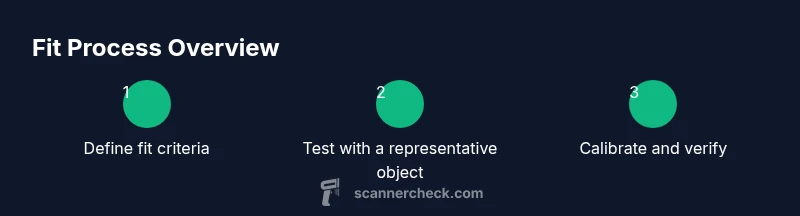
- 1
Define fit criteria
List your typical object sizes, required accuracy, and workspace constraints. Prioritize must-have features before evaluating options. This clarifies what to test during demos.
Tip: Write a one-page criteria sheet to reference during shopping. - 2
Check workspace and placement
Measure available space, seating/standing height, and access to power. Ensure there is room for cable routing and cooling.
Tip: Map a door swing and ensure the scanner footprint fits through the doorway. - 3
Evaluate candidate scanners
Compare handheld and fixed models based on fit criteria. Prioritize devices with proven stabilization and robust software support.
Tip: Ask for live demonstrations on objects similar to yours. - 4
Test with a representative object
Run a trial capture of a typical item, noting capture time, ease of alignment, and post-processing needs.
Tip: Use calibration targets in the test to verify accuracy. - 5
Calibrate and verify
Perform calibration per manufacturer instructions. Run a controlled test to validate that the scan matches known dimensions.
Tip: Document calibration parameters for future sessions. - 6
Document setup for repeatability
Record the chosen model, workspace setup, lighting, software versions, and data workflow. Create a quick-start guide for teammates.
Tip: Store this in a shared folder or knowledge base for your team.
Common Questions
What does 'fit' mean when selecting a 3D scanner?
Fit refers to how well a scanner aligns with your workspace, object sizes, and workflow. It affects setup time, post-processing, and reliability. A good fit minimizes friction and increases consistency.
Fit means how well the scanner matches your space and workflow, affecting setup and results.
Can a small workspace still support a 3D scanner?
Yes, many 3D scanners are designed for compact spaces. Look for portable handheld models or compact desktop units with foldable stands and efficient cooling.
Yes, you can fit a scanner in a small workspace with a portable or compact model.
Do handheld scanners require special handling for fit?
Handheld scanners need steady technique and practice. A good fit includes a stable shooting distance, minimal movement, and reliable software for alignment and merging scans.
Handhelds need steady technique; ensure you test stability and alignment in your space.
How often should I recalibrate to maintain fit?
Calibrate when you notice drift, after moving the scanner, or when switching measurement environments. Regular checks help maintain accuracy across sessions.
Recalibrate after moves or when accuracy changes to keep fits reliable.
Is cloud processing relevant to fit decisions?
Cloud processing can affect workflow fit if you rely on remote processing or collaboration. Ensure bandwidth, security, and data policies align with your needs.
Yes, if your workflow uses cloud processing, verify speed, security, and access.
What are signs that a scanner is not a good fit?
Frequent recalibration, slow processing, poor repeatability, and compatibility issues with your software indicate a misfit. Consider alternatives that better match your constraints.
Look for drift, low repeatability, or format incompatibilities as red flags.
Watch Video
Key Takeaways
- Define fit criteria before shopping
- Choose handheld or fixed based on workspace and tasks
- Test with real objects and calibrate before committing
- Document setup for repeatable results