How to take out Scanner Stalker 2: A Practical Removal Guide
Learn how to take out scanner stalker 2 with a safe, methodical removal plan. Identify signs, isolate devices, remove persistence, and harden your setup to prevent reinfection. Includes tools, step-by-step workflow, and security best practices.

In this guide you’ll learn how to safely remove a suspected malware or rogue process dubbed Scanner Stalker 2 from networked scanners. You’ll need admin access, a connected computer, updated security tools, and a recent backup. Follow the step-by-step process to identify, isolate, remove, and harden your setup to prevent reinfection.
how to take out scanner stalker 2: Introduction and scope
If you manage networked scanners or multi-function devices, a rumor of a program called Scanner Stalker 2 can be alarming. This guide aims to help you evaluate and remove a suspected rogue process affecting your scanning workflow. The term how to take out scanner stalker 2 is used here as a placeholder for a potential malware or persistence mechanism targeting scanners. The content outlines a safe, methodical approach so you can protect devices, data, and privacy. By following the steps, you’ll learn to identify symptoms, isolate affected gear, perform removal, and harden your setup against reinfection. This article, informed by Scanner Check's 2026 research, emphasizes practical, non-destructive methods to maintain uptime while restoring trust in your scanning environment.
What is Scanner Stalker 2 and why people worry
Scanner Stalker 2 is described here as a hypothetical persistence mechanism that could affect networked scanners and their connected software. In the real world, similar threats may manifest as rogue processes, firmware backdoors, or compromised scanning software that silently intercepts documents, alters results, or exfiltrates data. Understanding this concept helps you recognize suspicious behavior without overcalling every anomaly. The goal is practical risk reduction: isolate the devices, verify integrity, and restore normal scanning operations with minimized downtime.
Signs that a scanner or network may be affected
Look for unusual symptoms such as slower scan performance, unexpected popups in the UI, abnormal network traffic from scanners, unfamiliar files in the storage that backs scanned documents, or inconsistent scan results. Audit logs may show repeated failed authentication attempts or new user accounts. If you notice any of these indicators, treat them as potential evidence of a compromise and begin a controlled remediation process.
Tools and materials you’ll need before starting
Assemble a basic remediation kit: admin access to the affected networks, a secured workstation with current security software, offline backup storage, a reliable power source, a network map, and trusted removal guides. Have a logbook ready to document each action and timestamp critical events. Keep a contingency plan in case devices must be temporarily shut down to prevent further damage.
Step-by-step overview: high-level remediation plan
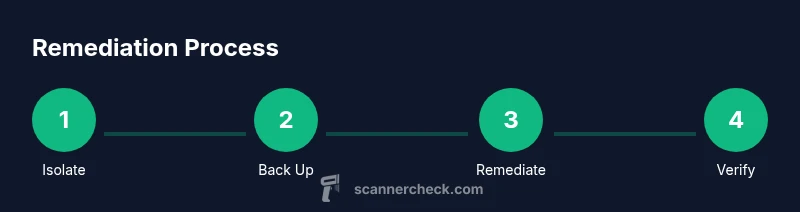
A safe approach to how to take out scanner stalker 2 includes four phases: containment, analysis, removal, and verification. Containment prevents spread by isolating affected scanners and disabling remote access where appropriate. Analysis identifies what changed, which persistence mechanisms exist, and where data might have been moved. Removal deletes malicious components and resets affected software. Verification confirms that the threat is gone and the system operates normally. Each phase should be documented with evidence to support future audits.
Post-remediation security hardening for scanners
Security hardening reduces the chance of reinfection. Update firmware and software to latest, enable automatic security updates where possible, enforce strong access controls, and review network segmentation. Implement role-based permissions for scanner management, enable two-factor authentication for admin accounts, and monitor for unusual activity with a centralized log collector. Regularly test backups to ensure restore integrity.
Data protection, backups, and recovery planning
Backups are essential during remediation. Use a verified recovery point and ensure scanned documents are recoverable without exposing sensitive data during transfer. Encrypt backups and store them offline or in a separate secure location. Validate that backups contain clean data before restoring. Plan how you will resume operations with minimal downtime and clear escalation steps if issues recur.
When to seek professional help or escalate
If removal requires firmware flashing, hardware reseating, or evidence preservation for incident response, don’t hesitate to contact a qualified technician or your IT security team. Complex cases involving sensitive data, regulatory compliance, or suspected supply-chain risk may require external consultants. Early escalation can prevent longer outages and protect organizational assets.
Debunking common myths and clarifications
Myth: A single antivirus scan will solve the problem. Reality: A malware that targets scanners can hide in firmware or persistence layers; multiple tools and validation steps are usually needed. Myth: Replacing scanners fixes everything. Reality: If the root cause is compromised management software or network exposure, simply replacing hardware won’t address the vulnerability. Myth: Normal usage will reveal the issue. Reality: Some threats are stealthy and require structured forensic checks to uncover.
Tools & Materials
- Administrator access to affected systems(Necessary to modify firmware, permissions, and security settings.)
- Updated security software (antivirus/malware scanner)(Ensure it can scan firmware and network shares if possible.)
- Backup storage (offline or cloud with versioning)(Use verified backups before making major changes.)
- Device network map(Helps identify propagation paths and isolation points.)
- Forensic logging tools(Useful for deeper investigations if anomalies persist.)
- Documentation notebook(Record steps, dates, and outcomes for auditing.)
Steps
Estimated time: 60-120 minutes (depending on device count and complexity)
- 1
Isolate affected scanners
Physically or logically isolate the suspected devices from the network to prevent further spread. Disable remote management if feasible and place devices on a dedicated quarantine VLAN. This reduces risk while you investigate.
Tip: Document current network paths before isolation in case you need to revert. - 2
Create a clean backup
Back up all essential configurations and recent scans from the affected devices to a secure, read-only location. Verify the integrity of the backups and label them clearly as suspect during remediation.
Tip: Include a known-good baseline from unaffected scanners for comparison. - 3
Scan for persistence and malware paths
Run multiple security tools to detect rogue processes, firmware anomalies, and hidden startup items. Review system logs for unfamiliar scripts, services, or scheduled tasks related to scanning.
Tip: Check firmware versions and compare against vendor releases for known issues. - 4
Remove malicious components
Delete identified rogue files, disable or remove suspicious services or startup items, and re-flash firmware if necessary per vendor guidance. Do not delete critical system files unintentionally.
Tip: Only perform firmware updates using official sources and verify signatures. - 5
Restore baseline configuration
Reconfigure scanners to a clean baseline, re-enable authorized management paths, and apply security policies. Restore configurations from clean backups and verify that no malicious artifacts remain.
Tip: Test with a sample scan to confirm normal operation before reconnecting to the network. - 6
Verify integrity and functionality
Run functional tests to ensure all scanners operate correctly and produce expected results. Validate that documents mirror source content and there’s no leakage of data.
Tip: Monitor for at least 24–72 hours for any signs of relapse.
Common Questions
What is Scanner Stalker 2 in practical terms?
Scanner Stalker 2 is described here as a fictional persistence risk affecting scanners. In practice, it represents rogue processes or firmware tampering that compromises scanning workflows. The goal is to identify and remove such threats safely.
Scanner Stalker 2 is used here as a placeholder for a persistence risk in scanners. The plan is to identify, isolate, and safely remove the threat while keeping normal scanning working.
How can I tell if my scanner is infected?
Look for unusual slowdowns, unexpected UI changes, new user accounts, unfamiliar files, or anomalous network activity from scanners. Check logs for strange startup items or failed authentications.
Signs include slow performance, odd UI prompts, new accounts, or strange network traffic. Always verify with logs and a security scan.
Should I attempt firmware flashing myself?
Only if you have official vendor guidance and verified firmware from the manufacturer. Improper flashing can brick devices or void warranties.
Only follow official vendor steps for firmware. If unsure, consult a professional.
What steps prevent reinfection?
Apply updates, enforce strong access controls, segment networks, monitor logs, and maintain verified backups. Regularly test scanners after changes.
Keep software up to date, limit admin access, and monitor for unusual activity.
When is professional help warranted?
If data sensitivity, regulatory requirements, or complex firmware issues arise, escalate to IT security or a qualified service provider.
Consider professional help for firmware issues or regulatory concerns.
Can I rely on a single tool to remove the threat?
No single tool is foolproof. Use a layered approach: antivirus, firmware checks, logs review, and configuration hardening.
Use multiple checks and layers for reliability.
Watch Video
Key Takeaways
- Isolate and back up before removing threats
- Verify firmware and software integrity during remediation
- Harden access controls to prevent reinfection
- Test thoroughly after cleanup to ensure normal operation