How to Check Scanner Payment History in PhonePe
Learn how to check scanner-based payments history in PhonePe, verify QR-based receipts, and reconcile records. This practical guide from Scanner Check covers steps, tips, and security best practices for accurate tracking.

Goal: learn how to check scanner payment history in PhonePe. You’ll access your transaction history, filter for QR/scan payments, and verify merchant details against receipts. Requires a PhonePe account with access to History and proper permissions. This guide walks you through exact steps for accurate reconciliation.
Why checking scanner payment history matters
According to Scanner Check, validating QR-based payments helps prevent fraud and ensure you can reconcile receipts. In many everyday scenarios, scanner-based payments via PhonePe are a common method for quick checkout, whether at a local store or a pop-up market. Keeping a reliable record of these payments enables you to verify who paid, when, and what was purchased. This diligence is essential for business owners who process frequent QR payments, as well as hobbyists who want personal finance clarity. By knowing how to check scanner payment history in PhonePe, you gain a practical tool for fraud detection, dispute resolution, and accurate bookkeeping. The process is straightforward, but knowing where to look makes a big difference in speed and accuracy. This guide is designed for tech enthusiasts, DIYers, IT pros, and general consumers who want hands-on, practical steps.
What counts as a scanner payment and why PhonePe stores them
A scanner payment occurs when a customer or merchant scans a QR code to initiate a transaction. In PhonePe, many QR payments happen when you scan a merchant’s code to complete a purchase. The transaction data captured includes details such as the merchant name, payment amount, timestamp, and the transaction status. While the exact UI labels may vary with app versions, the underlying data remains consistent: a unique transaction ID ties the payment back to a specific scan. PhonePe retains these records to support post-transaction reconciliation, customer inquiries, and dispute resolution. For users who manage business transactions, understanding what qualifies as a scanner payment helps you separate QR-based payments from card or wallet top-ups, enabling precise filtering in the history view. This section sets the groundwork for identifying and filtering scanner payments efficiently, regardless of whether you are checking receipts after a sale or auditing a personal expense.
Navigating PhonePe: prerequisites and access control
Prerequisites for viewing scanner payment history include having a valid PhonePe account, being signed in, and having access permission to the relevant transaction history. If you share a device or operate a business account, ensure you have explicit consent to view sensitive financial data. Review any app-specific privacy settings and understand who can see what in the history. While the exact navigation may vary by app version, the core actions are consistent: locate the Transactions or History section, and prepare to apply filters that narrow results to scanner-based payments. This section emphasizes safe access and the importance of protecting login credentials to prevent unauthorized viewing of payments.
How PhonePe captures scanner transactions and what to look for in your history
PhonePe captures scanner transactions in a structured log that includes fields like timestamp, merchant name, amount, payment method, status, and a unique transaction ID. When you inspect a scanner-based payment, look for clear indicators such as the merchant’s name, the exact amount, and a timestamp that matches your receipt. Depending on app updates, labels may appear as scan_id or qr_id, but the essential linkage—transaction ID to a specific scan—remains. If you notice missing fields, ensure you’re using the latest app version and that your date range is correct. This section helps you identify the key data points you will rely on when reconciling records.
Interpreting the data: what the numbers mean
Interpreting scanner payment data involves understanding status flags (Completed, Pending, Failed), refunds, and any reversals. Completed transactions reflect settled payments, while Pending may indicate processing delays. If a merchant issues a refund, the history will show a reversal or negative amount, depending on the UI. Cross-checking timestamps with your own receipts helps confirm that values match exactly. Be mindful of potential time-zone differences if you review history across different locales. This section equips you to read the data confidently and identify anomalies early.
Troubleshooting and reconciling discrepancies
Discrepancies between PhonePe history and merchant receipts can arise from timing differences, partial payments, or data-entry errors at the merchant end. Start by exporting or screenshotting the transaction details, then compare against the merchant’s receipt and your bank statement. If the amounts or timestamps don’t align, filter by date and re-check the same transaction across different screens (e.g., overview vs. details). When a mismatch persists, contact the merchant and PhonePe support with the transaction ID for resolution. Keeping a clear audit trail, including notes on what was checked, speeds up the process.
Privacy, security, and best practices when sharing history
Treat transaction history as sensitive data. Avoid sharing full records through insecure channels and redact personal information when necessary. Use secure, password-protected devices and consider exporting only the necessary transactions for review. For business accounts, implement role-based access so only authorized personnel can view scanner payment histories. Regularly review who has access, and log any data-sharing events. These practices reduce risk and protect customer and merchant information.
Authority sources
- https://www.consumerfinance.gov
- https://www.nist.gov
- https://www.ftc.gov
Additional resources and next steps
If you want deeper guidance, follow the step-by-step procedures in the STEP-BY-STEP block and check the recommended external sources for broader context on digital payments and data privacy. Practicing these checks regularly will improve accuracy and speed in reconciling QR-based payments. Consider bookmarking this guide for quick reference during busy periods, when you need to verify multiple scanner transactions in PhonePe.
Tools & Materials
- Phone with PhonePe app installed(Latest version recommended)
- Active PhonePe account with login access(Admin or user with history access)
- Stable internet connection(Wi-Fi or reliable mobile data)
- Merchant QR code or transaction receipts(Used for cross-checking details)
- Screenshot tool or screenshot capability(Optional for record-keeping)
- Secure device with screen lock(Protects sensitive financial data)
Steps
Estimated time: 15-25 minutes
- 1
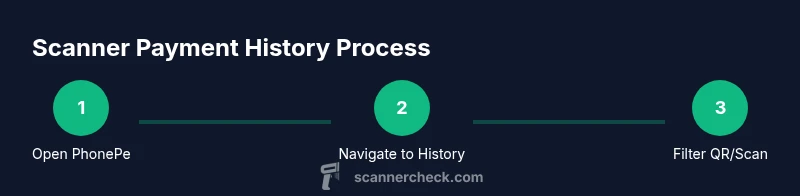
Open PhonePe and sign in
Launch the PhonePe app and log in to your account. Ensure you’re using the correct profile if you manage multiple accounts. If you use biometric login, enable it for faster access while maintaining security.
Tip: Use a strong device password and enable fingerprint/face ID for quick, secure access. - 2
Navigate to the transaction history
From the home screen, locate the Transactions or History section. This is where all past payments are logged, including scanner/QR-based transactions. If you don’t see it, check under a menu labeled 'Payments' or 'Wallet'.
Tip: If you use the search bar, try keywords like 'history' or 'transactions' to locate the right view quickly. - 3
Apply a filter for QR/Scan payments
Use the filter options to show only QR/scan-based transactions. Filtering reduces noise from card payments, wallet top-ups, and other actions. Adjust date ranges to cover the period you’re auditing.
Tip: If filters aren’t obvious, look for a funnel icon or a ‘Filter’ button; some versions group filters under a 'More' menu. - 4
Tap a transaction to view details
Select an individual scanner payment to view its details, including timestamp, merchant name, amount, and a unique transaction ID. Check that the merchant, amount, and time match your records or receipts.
Tip: Take note of the transaction ID; it’s useful if you need to escalate or reconcile later. - 5
Cross-check against receipts and records
Compare the PhonePe transaction details with the merchant receipt or your bank statement. Look for exact amounts and timestamps. If there’s a mismatch, document it with the corresponding identifiers and prepare to contact support.
Tip: Keep a simple reconciliation template to log matches and discrepancies as you go. - 6
Export or capture the data for records
If available, export the selected transactions to a CSV or PDF, or take secure screenshots for your audit trail. Store these exports in a protected location.
Tip: Redact sensitive data if you need to share the document with others; never expose full account details publicly. - 7
Repeat for other dates or merchants
Continue across the desired date ranges or merchant lists to complete your review. Consistency is key; regular checks prevent backlog and errors.
Tip: Schedule recurring audits to maintain up-to-date records and minimize end-of-month crunches.
Common Questions
How do I filter scanner payments in PhonePe?
Open the transaction history, then apply the filter to show only QR/scan payments. If needed, adjust the date range to cover the period you’re auditing. Filters help you focus on relevant transactions.
Open the history screen, apply the QR or scan filter, and adjust the date range to narrow down your list.
What if a scanned payment shows as pending?
Pending status usually indicates processing; verify later and compare with merchant receipts. If it remains unresolved, contact PhonePe support with the transaction ID.
If a scan shows as pending, check back after a short while and compare with the merchant receipt; contact support if it stays unresolved.
Can I view scanner payments for a merchant I don’t own?
Access to specific merchant transactions depends on your account permissions. If you are part of a business account, ensure you have authorized access; otherwise, you may not see those details.
Access depends on your permissions; if you’re on a business account, ensure authorization to view that merchant’s scans.
How far back can I view scanner payments in PhonePe?
PhonePe history generally allows you to review transactions within the app’s defined retention window, which can vary by version and region. Use date filters to extend the visible range as needed.
Review the app’s retention window and use date filters to go back as far as allowed.
What should I do if the data doesn’t match the merchant receipt?
Document the discrepancy with transaction IDs and timestamps, compare all details, and reach out to the merchant and PhonePe support for resolution. Keep a record of every step taken.
Log the mismatch with IDs, compare details, and contact support with the records for resolution.
Is it safe to share PhonePe history with colleagues?
Only share portions of your history that are necessary and with trusted individuals. Use secure channels and redact sensitive data when possible.
Share only what’s needed, use secure channels, and redact sensitive data when appropriate.
Watch Video
Key Takeaways
- Identify scanner payments quickly using filters.
- Cross-check against merchant receipts for accuracy.
- Protect and share data securely only when needed.
- Use exports to maintain an auditable record.
- Review scanner transactions regularly to catch issues early.