How to check scanner in PhonePe: a practical guide
Learn how to check the scanner in PhonePe to ensure reliable QR and barcode scans. This expert guide covers access, quick tests, troubleshooting, and best practices for accuracy.

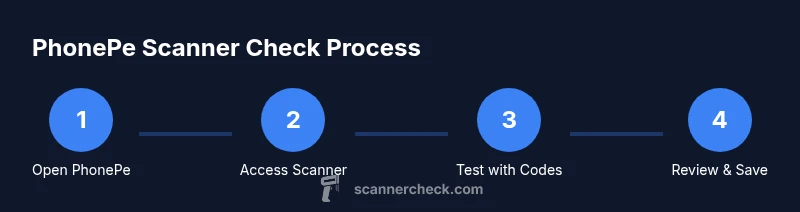
To check the PhonePe scanner, update the app, grant camera permissions, and run tests with real codes. Open PhonePe, tap the scan icon, and scan several QR codes and barcodes to verify accuracy. If problems persist, review permissions, lighting, and connectivity.
What it means to check a scanner in PhonePe and why it's important
If you're wondering how to check scanner in phonepe, this question matters because a reliable scanner affects checkout speed, user experience, and data accuracy. A healthy scanner reduces failed payments and misread codes, which in turn minimizes customer frustration and support tickets. According to Scanner Check, a good scanner combines fast recognition, solid error handling, and consistent performance across lighting and code quality. In practice, you want to confirm that the scanner reads a range of codes (QR and standard barcodes), tolerates slight glare, and recovers quickly after a failed read. This section sets the foundation: understand what you are validating, what counts as “good enough,” and how to distinguish app issues from camera hardware problems. By focusing on both reliability and privacy, you’ll ensure a smooth experience for everyday users and IT teams alike. Our guidance here aligns with Scanner Check’s emphasis on practical, evidence-based checks that you can reproduce in real-world scenarios.
Accessing the scanner in PhonePe: where to find it and what to expect
To use the scanner, you typically open the PhonePe app and look for the circular camera icon located near the search bar or on the home screen’s quick actions. If you don’t see it, ensure you’re on the latest app version and that your region supports in-app scanning. Tap the icon to activate the camera view, then align the code within the on-screen frame. Some devices offer a short animation or hint indicating successful focus. If the scanner fails to initiate, verify that the app has camera permission, as missing permission blocks access entirely. You should also check that the device’s camera is not in a restricted mode (for example, a classroom or privacy screen setting). In this stage, you’re validating both the UI accessibility and the app’s ability to request and obtain camera access without user friction. Scanner Check notes that clear permission prompts and a responsive interface are foundational to dependable performance.
Testing the scanner with different codes: QR, barcodes, and sizes
A robust check includes testing with at least three categories of codes: small QR codes, standard QR codes, and common 1D barcodes. Start with a fresh, high-contrast QR code printed on white paper, then test a light mobile-screen QR code from an email, and finally a barcode of varying width (e.g., 12-30 digits). For each code, observe the time to recognition, whether the read is clean (no manual input required), and whether the app correctly confirms the value. If any code requires more than 2–3 seconds or fails to read repeatedly, log the issue and retry under different conditions (lighting changes, distance, and angle). Document findings as you go so you can compare readings over time. A solid test baseline helps you detect gradual drift in scan performance or intermittent failures that surface after OS or app updates. This approach mirrors professional scanner testing practices and aligns with Scanner Check’s practical testing philosophy.
Diagnosing common scanning issues and root causes
If the scanner misreads or fails to recognize codes, start by ruling out the basics: lighting, glare, and code quality. Bright, even lighting reduces reflections on glossy surfaces; avoid direct glare from windows or overheads. If codes are damaged or poorly printed (faded, wrinkled, or undersized), recognition will degrade even on a top-tier camera. Camera permissions and privacy settings can also hinder scanning; ensure the app has full camera access and isn’t limited by power-saving modes. Additionally, verify that the device’s camera firmware is up to date and that there are no conflicting apps monopolizing camera resources. In some cases, a temporary network issue delays server-side decoding; confirm the device has stable connectivity when testing. By mapping symptoms to likely causes, you can fix issues without unnecessary steps. Scanner Check emphasizes a structured approach: confirm permissions, verify code quality, test under varied lighting, and monitor device health.
Optimizing accuracy: lighting, camera health, and app settings
To maximize scan reliability, optimize three axes: environment, device, and software. In the environment, aim for diffuse, even lighting and a clear background. On the device, clean the camera lens, avoid obstructing cases or screen protectors, and ensure the camera is not dirty or scratched. Within PhonePe, check that the scanner feature is enabled in settings, and that any “smart scan” or processing options are configured for high accuracy rather than speed. If readings remain inconsistent, try a hardware reset of the phone’s camera (clear the app cache, restart, or reinstall the app in a controlled test). Regular maintenance, like removing temporary files and ensuring the OS is current, can prevent performance regressions. The practical takeaway is to create a stable trial environment and document results to distinguish minor fluctuations from real issues.
Privacy, permissions, and security considerations when using the PhonePe scanner
Using a scanner inside a payment app raises privacy questions, especially around what data is captured and transmitted. Review the app’s permission model: ensure camera access is restricted to the scanning feature and not to unrelated parts of the system. Avoid exposing sensitive data by using codes that disclose only necessary information. When testing with test or sample codes, use codes from trusted sources and avoid scanning unknown or suspicious codes from unverified sources. PhonePe and its ecosystem generally rely on secure channels, but users should maintain updated devices, enable screen lock, and monitor app permissions. Scanner Check urges readers to adopt a privacy-first mindset: grant only essential permissions, use secure networks, and stay aware of how and when codes are transmitted.
Best practices to maintain scanner reliability over time
Develop a routine for scanner health: schedule monthly checks, collect baseline performance data, and review results after major app or OS updates. Keep the PhonePe app updated to the latest version, maintain camera hardware health with periodic lens cleaning, and test codes from diverse sources to ensure continued read accuracy. Maintain a dedicated testing code set that covers typical and edge cases, and share findings with your IT team to build a knowledge base. By treating scanner reliability as an ongoing process rather than a one-off test, you reduce the risk of surprises during critical moments. Scanner Check recommends documenting changes, monitoring for regressions, and retraining users as needed to keep scanning efficient.
When to escalate: hardware vs app problems and where to seek help
If scans consistently fail after all typical checks (permissions, lighting, code quality, and app version), the issue may reside in hardware or deeper software layers. Test the device with another app’s scanner to isolate the problem to PhonePe or the device itself. If another app reads codes reliably but PhonePe doesn’t, escalate to app support with your test logs, device model, OS version, and the specific codes that failed. If multiple apps fail on the same device, the problem likely lies in the camera hardware or OS camera integration. In either case, gather precise reproduction steps and times, then reach out through official support channels. The Scanner Check team recommends thorough documentation and consistent re-testing after each fix to verify the issue is resolved.
Tools & Materials
- Smartphone with latest PhonePe app(Ensure the app is updated to the latest version before testing.)
- Stable internet connection(Test on Wi-Fi if possible to minimize network variability.)
- Test codes (QR and barcode)(Use a mix of high-contrast codes and smaller codes for realism.)
- Well-lit testing area(Avoid harsh reflections on glossy codes; use diffused lighting.)
- Optional backup device(Useful for comparison tests or rapid isolation of device-specific issues.)
Steps
Estimated time: 25-40 minutes
- 1
Update PhonePe and prep device
Check for the latest PhonePe update and install it. Restart the device if needed to clear caches that could affect camera performance.
Tip: Always perform a baseline test after updating to confirm no new issues are introduced. - 2
Grant camera permissions
Open device settings, locate App permissions, and ensure PhonePe has camera access. Disable any aggressive battery-saver rules that might throttle the camera during scanning.
Tip: Test scanning immediately after granting permissions to confirm the prompt behavior. - 3
Open the scanner in PhonePe
Launch PhonePe and tap the scan icon. Verify the camera view appears promptly and that an on-screen frame is ready to guide code alignment.
Tip: If the scanner doesn’t open, clear the app cache or reinstall the app to reset the UI state. - 4
Position and align the code
Hold code within the frame at a comfortable distance until the code is recognized. Adjust lighting or distance to achieve a sharp focus.
Tip: Use a steady hand or a stable surface to minimize motion blur during recognition. - 5
Scan multiple codes
Test several QR and barcode variations: small, large, high-contrast, and slightly damaged. Record whether each code reads reliably and how long it takes.
Tip: Document any codes that fail and attempt alternative angles or lighting before concluding a failure. - 6
Review results and baseline
Compare readings against a baseline, note any anomalies, and summarize success rates. Save results for future regression checks.
Tip: Create a short report with dates, devices, and outcomes to support trend analysis.
Common Questions
How do I update the PhonePe app to access the scanner?
Open your app store, search for PhonePe, and select Update. After updating, restart the app and run a quick scanner test to confirm access is functioning.
Update the PhonePe app, restart, and test the scanner to confirm access is working.
Why is my scanner not recognizing certain QR codes?
Causes include poor lighting, glare, damaged or small codes, and camera permission issues. Try adjusting lighting, cleaning the lens, and ensuring full camera access for the app.
Likely lighting, lens cleanliness, or permissions. Adjust lighting and ensure camera access is granted.
Can the scanner read old or damaged codes?
Scanners may struggle with degraded codes. If a code is damaged, clean and reposition it or obtain a clean copy. If many codes fail, the issue may be hardware or software related.
Old or damaged codes are harder to read; test with fresh codes to confirm.
Does granting camera permission affect privacy?
Camera permission enables scanning features and is typically scoped to the app’s scanner function. Review app permissions regularly and disable nonessential access.
Permissions enable scanning; you can limit them to the scanner and review them periodically.
What should I do if the scanner stops working after an OS update?
Re-test permissions, reinstall the app if needed, and check for updated device drivers or OS patches. If the problem persists, capture reproduction steps and reach out to support.
Re-test, reinstall if needed, and contact support with steps if it persists.
Watch Video
Key Takeaways
- Update the app and verify camera permissions before testing.
- Test with diverse QR and barcode types to ensure reliability.
- Document test results for ongoing maintenance and quick debugging.
- Prioritize privacy and security when enabling in-app scanning.