How to Scan Something Already on Your Phone
Learn to convert photos or screenshots on your phone into clean, searchable scans using built-in tools or apps. Follow practical, step-by-step guidance from Scanner Check to optimize quality and export options.

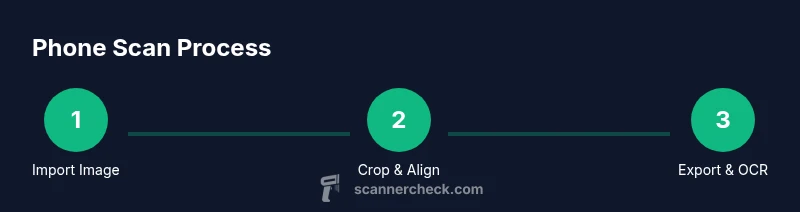
This guide shows how to scan something already on your phone using built-in tools or a scanning app. You’ll learn how to capture, crop, optimize lighting, and export clean digital copies, plus tips for OCR accuracy and file formats. By the end, you’ll confidently convert photos or screenshots into searchable PDFs or images with minimal effort.
Why scanning from your phone matters
Scanning from a phone is a practical choice because you already have the device with you most of the time. The Scanner Check team has found that mobile scanning can dramatically speed up document capture, especially when you need to archive, share, or convert records on the go. When you use your phone's built-in scan mode or a reputable scanning app, you can transform a photo of a document or even a screenshot into a clean, high-contrast digital file. This matters for students, remote workers, and field technicians, and it fits into a broader digital-organization workflow. You’ll learn the core benefits and the common tradeoffs you should understand before you start. Scanner Check's insights emphasize speed, portability, and accessibility as core advantages of mobile scanning workflows.
In everyday practice, you’ll appreciate how quickly you can turn a messy photo into a usable document. You’ll also see that the quality of the final file hinges on your capture conditions (lighting, angle) and the post-processing you apply (cropping, brightness, OCR). This section sets the stage for practical, real-world scanning using services you already own. Remember: simple optimized scans are often enough for most personal and professional needs, and they scale well when you need to share or archive.
According to Scanner Check, the vast majority of mobile-scanning outcomes improve with a consistent routine: pick the right image, adjust the crop, tune exposure, and choose an export format that matches your goals. This approach minimizes rework and helps you stay organized over time.
What you’ll need to get started
Before you begin, gather a small set of tools and conditions to maximize your results. A modern smartphone with a working camera and a scanning feature or a dedicated app is essential. If you already have a photo or screenshot on your device, you can use the app to convert it, but you should also consider light, background, and document edges. A stable surface, adequate ambient lighting, and possibly a microfiber cloth to wipe the screen can help. Optional but helpful: a small tripod or adjustable stand to improve consistency, and a cloud storage account to back up your scans. In practice, most scans take only a few minutes, once you know the right steps. The right tools reduce friction and improve long-term archiving quality, especially when you must retrieve scans months later.
As you prepare, consider privacy and storage limits. If you’re handling sensitive information, plan where the scanned files will be stored and who can access them. Keeping a minimal set of apps that you trust reduces the chance of data leakage during export or cloud syncing. The tools you choose should align with your workflow—whether you need quick sharing, meticulous archiving, or accessibility features like searchable text.
Finally, it helps to establish a naming convention and folder structure ahead of time. A predictable system makes it easier to locate scans later, especially when you accumulate a large library of documents. Consistency saves time and minimizes confusion across teams or personal projects.
Step 1: Prepare the image that’s already on your phone
Start by locating the image you want to scan. This could be a photo of a physical document or a clean screenshot. Check that the image is legible and not severely blurred. If it contains multiple pages, you may want to extract a single page. Since you’re working from your device, you can plan to crop and adjust later, but starting with a high-resolution image helps. If the image has glare or reflections, consider choosing a different photo or adjusting the lighting in a photo editor first. This preparation reduces the amount of editing needed after the scan. A quick pre-check like zooming in to inspect text clarity saves you time later in the workflow.
Step 2: Open your scanning tool and import the image
Open your preferred scanning tool (built-in camera scan mode or a trusted third-party app) and choose the option to import or add an existing photo. Navigate to your gallery, select the image, and import it into the scan workflow. The app will typically detect the document edges automatically, but you’ll often have the option to fine-tune the crop. If your app supports live edge detection, turning it on can help you align the document perfectly. You’ll then proceed to the crop and enhancement stage. Importing an existing image ensures you retain the original resolution while enabling precise adjustments.
Step 3: Crop, align, and enhance for readability
Use the cropping handles to frame the document precisely. Correct perspective distortions so the page looks square from edge to edge. Adjust brightness, contrast, and saturation to maximize legibility, especially if the original image had uneven lighting. If the document includes faint text or small fonts, some apps offer an OCR-friendly mode that enhances text clarity. After stabilization, preview the result to ensure no important content is cropped out. This step is critical for long-term archiving and OCR accuracy. If you’re working with multi-page documents, ensure consistent margins across pages to maintain a professional, uniform appearance.
Step 4: Export options and OCR settings
Choose your export format based on your needs. PDFs are ideal for archiving and OCR-enabled text search, while JPEG/PNG is suitable for quick sharing. If available, enable OCR to create searchable text layers; this greatly improves accessibility and searchability. Be mindful of file size; if you have location or privacy concerns, avoid exporting with unnecessary metadata. Some apps let you password-protect PDFs or apply digital signatures if you’re handling sensitive documents. Decide on a file name convention that helps you locate scans later. If you’re preparing for a large batch, set up a naming schema that includes date and subject to improve future retrieval.
Step 5: Save, organize, and back up
Select a destination folder in your device or cloud storage, then save the file. Create a consistent naming scheme (date, subject, version) to keep your library navigable. If possible, set up automatic backups to your cloud service so scans are not lost if your device fails. Finally, test opening the scan to confirm the text is searchable and that the pages render correctly on different devices. A small habit here saves large headaches later. Regularly review your folder structure to ensure it remains intuitive as your collection grows.
Step 6: Quick quality checks and accessibility considerations
After saving, open the file on another device to verify legibility. Check that the text is searchable after OCR, and that any images or logos stay intact. If needed, re-scan the page with improved lighting or a better angle. For accessibility, ensure the document has a clear contrast and legible font. If you’re sharing with others who have visual impairments, consider generating an additional accessible text layer or a summarized text version. Keeping a simple, consistent workflow makes these checks automatic over time.
Step 7: Privacy, security, and best practices
Treat scans of sensitive documents with care. Store them in secure locations, enable password protection for PDFs if available, and review app permissions to minimize data access. Avoid public networks when uploading or sharing scans, and regularly update your scanning apps to benefit from security fixes. If you handle confidential material for work, align your process with organizational policies. Adopting these practices protects both you and the data you’ve digitized.
Tools & Materials
- Smartphone with camera and scanning capability(Ensure the device OS is up to date and has a working camera.)
- Scanning app(s) or built-in scan mode(Choose a reputable app or use your device’s native tool.)
- Stable surface for capture(Desk or table to minimize shake during capture.)
- Good ambient lighting(Natural light is best; avoid harsh reflections on glossy documents.)
- Microfiber cloth(Use to wipe lens or screen if needed for clarity.)
Steps
Estimated time: 20-30 minutes
- 1
Open scan tool and import image
Launch your scanning tool and select the option to import an existing photo or screenshot. Confirm the image loads and is ready for edge detection.
Tip: If edge detection is off, manually adjust the crop to approximate the document boundaries. - 2
Crop to document edges
Use the crop handles to align the page edges. Ensure all four corners are captured and the document sits flat within the frame.
Tip: If perspective is skewed, use perspective correction to approximate a flat scan. - 3
Adjust brightness and contrast
Tweak brightness, contrast, and saturation to maximize readability. Focus on making text crisp and black where appropriate.
Tip: Enable a preview of the OCR layer if available to verify text visibility. - 4
Enable OCR and choose export format
Turn on OCR if you need searchable text. Pick PDF for archiving, or JPEG/PNG for quick sharing. Name the file consistently.
Tip: If exporting multiple pages, enable multi-page PDF when supported. - 5
Save and back up
Choose a destination (local or cloud) and save. Verify the file opens correctly on another device.
Tip: Set up automatic backups to avoid data loss.
Common Questions
Can I scan something that’s already on my phone as a photo?
Yes. You can import an existing image into most scanning apps or use built-in scan features to convert that image into a document. Check edge detection and OCR settings for the best results.
Yes, you can import a photo and convert it into a scan with edge detection and OCR.
What export format is best for archiving?
PDF with OCR is ideal for archiving and searchable text. If you just need to share, JPEG or PNG can be sufficient, but lose text searchability.
PDF with OCR is best for archiving and searchability.
Does OCR support all languages?
OCR works for many languages, but accuracy varies by language and font. For non-Latin scripts, choose a tool that supports that language well and review the text after processing.
OCR supports many languages, but check language support and verify results.
Are built-in scan tools as good as dedicated apps?
Built-in scan tools are convenient and sufficient for many tasks. Dedicated apps often offer more precise edge detection and stronger OCR options, especially for batch scanning.
Apps can offer better edge detection and OCR, but built-ins work well for quick scans.
Do I need internet for scanning and OCR?
You can scan offline and perform OCR locally on many apps. Cloud processing may offer higher accuracy or additional features but isn’t strictly required.
OCR can run offline on many apps; internet isn't always required.
Watch Video
Key Takeaways
- Use your phone’s scan mode or a trusted app
- Crop, align, and enhance for readability
- Choose PDF with OCR for searchable archives
- Back up scans to prevent data loss
- Maintain a consistent naming system