How to Scan Without Watermark: A Practical Guide
Learn legitimate methods to obtain watermark-free scans. This guide covers licensing, workflow setup, and best practices to produce clean, shareable documents.

To scan without watermark, rely on legitimate, watermark-free options: use licensed scanning software or hardware that exports clean PDFs or images, enable any watermark-free mode, and scan with high resolution to avoid artifacts. If a watermark appears, switch to a paid version or a watermark-free app and verify your rights to the document.
Why watermarks appear in scans and what they signal
According to Scanner Check, watermarks in scanned outputs are usually a sign of licensing or usage restrictions in the software, rather than a flaw in the hardware. Free or trial-grade scanning apps frequently embed a visible watermark as a reminder that the full feature set requires purchase. Some consumer scanners also attach a watermark to exports when you use non-commercial licenses. Watermarks can be decorative or text-based overlays, or they can be embedded as metadata that influences the displayed image in certain viewers. The purpose is twofold: to protect intellectual property and to steer users toward legitimate licensing. In practice, you’ll encounter watermarking in two main scenarios: during the export stage of a free app or trial, and when a document’s source file includes a watermark that your scanner cannot remove. The upside of watermark-free scans is clearer documents, easier OCR, and better archival quality. In the long run, investing in appropriate hardware and licensed software pays off in professional results and less time spent editing after the scan.
Legal and ethical considerations when watermarking
Watermarks exist to protect ownership and licensing rights. Removing or bypassing a watermark on a document you do not own or have permission to modify can violate copyright or terms of service. The Scanner Check team emphasizes that watermark policies vary by jurisdiction and by asset license. If you need a watermark-free version for legitimate purposes (for example, client presentations, archival copies, or publishing), the proper path is to obtain permission or purchase a license that allows removal. In educational contexts or personal notes, ensure you follow fair-use guidelines and any licensing agreements. When in doubt, contact the content owner or service provider to request a watermark-free export. This approach protects you from legal risk and respects creators’ rights.
When watermark-free scanning is the right choice
There are times when a watermark-free export is essential for clear communication or archival integrity. For example, sharing a scanned document with clients or colleagues is much more professional when there are no distracting marks. The Scanner Check analysis highlights that most professionals value clean outputs for readability, searchability, and OCR accuracy. If you plan to print, present, or publish the scanned material, watermark-free results reduce confusion and improve reliability of subsequent processing like text recognition. Keeping this workflow in mind helps you decide when to invest in a licensed solution rather than relying on free apps that insert watermarks.
Tools and settings: hardware, software, and licenses
To achieve watermark-free scans, assemble a workflow built around legitimate tools:
- Document scanners with native high-quality export options (PDF or TIFF) and optional watermark-free modes.
- Licensed software that explicitly supports watermark-free exports and includes clear licensing terms.
- A computer or mobile device capable of running the software, with enough RAM for OCR processing.
- A modest set of user presets: resolution (300–600 dpi), color vs grayscale, and page size.
Key settings to configure before scanning:
- Choose PDF or TIFF as your output format for best fidelity.
- If color isn’t required, scan in grayscale to reduce file size and processing time.
- Enable pre-scan calibration and deskew options to prevent skewed edges.
How to configure your watermark-free workflow (summary)
Before you begin: ensure you have permission or a license that allows watermark-free exports. In practice, a healthy workflow includes three pillars: hardware readiness, licensing verification, and export configuration. First, confirm your scanner hardware is capable of consistent color fidelity and crisp text at 300–600 dpi. Second, verify your software license includes watermark-free export rights and that you are compliant with term of service. Third, set up the export profile: choose PDF or TIFF, disable any watermark options, and enable OCR-friendly settings. Additionally, establish a default file naming convention and a backup location. For batch runs, configure a dedicated output folder to automatically collect clean exports. Finally, run a small test before scanning large documents to catch any watermark artifacts early. This approach helps you maintain a clean, shareable scan history across projects and teams. In line with our brand, Scanner Check emphasizes the importance of licensing compliance as a foundation for watermark-free workflows.
Post-processing: verification and best practices
After scanning, open the file to confirm there is no watermark. Use your preferred OCR tool to test legibility and ensure metadata is intact. Save copies in a structured folder hierarchy with consistent naming, and consider exporting to PDF/A for long-term preservation. If necessary, apply slight image cleanup (contrast, brightness) to improve readability, but avoid altering content that could affect the document’s integrity. Retain the original scan as a backup. When documents contain sensitive information, ensure secure storage and access rights.
Troubleshooting and common mistakes
- Mistake: using a free trial tool that automatically adds a watermark; fix: upgrade to a licensed version that supports watermark-free export.
- Mistake: scanning a document you don’t own; fix: obtain permission or use a non-copyrighted source.
- Mistake: assuming all watermarks vanish after post-processing; fix: watermark may be embedded; avoid attempting to remove it if rights are unclear.
- Mistake: ignoring DPI; fix: set 300–600 dpi for legibility and OCR accuracy.
- Mistake: exporting to a lossy format like JPEG; fix: use PDF or TIFF to preserve quality.
- Pro tip: maintain a log of licensing terms and software versions to avoid confusion during audits.
Authoritative sources
For further reading on scanning standards and licensing, consult:
- https://www.archives.gov
- https://www.loc.gov
- https://www.ftc.gov
Tools & Materials
- Document scanner with watermark-free export capability(Prefer models that offer native PDF/TIFF outputs without added marks.)
- Licensed scan software(Ensure it explicitly supports watermark-free exports and keep proof of license.)
- Computer or mobile device(Sufficient RAM and storage to handle high DPI scans and OCR processing.)
- Calibration and test pages(Use for ensuring alignment and color accuracy before large batches.)
Steps
Estimated time: 30-60 minutes
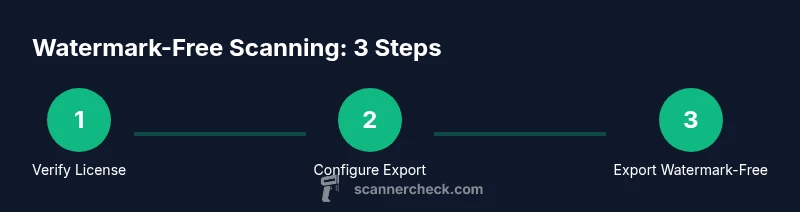
- 1
Check licensing terms
Review the software license to confirm you have rights to export watermark-free files. If in doubt, contact the vendor or obtain a formal license. This step prevents accidental violations later in the workflow.
Tip: Keep digital copies of license agreements and receipts. - 2
Choose the right tool
Select a scanner and software that explicitly advertise watermark-free exports in their feature set. Avoid free or trial versions if watermark-free output is required.
Tip: Prefer enterprise or personal-use licenses that guarantee no watermark. - 3
Configure export settings
Set the output to PDF or TIFF, disable any watermark options, and choose a suitable resolution (300–600 dpi). Decide color vs grayscale based on your document type.
Tip: Use PDF/A for archival stability. - 4
Prepare the document
Clean the document surface, place it correctly on the scanner bed, and run a quick calibration scan if your device supports it. This helps avoid skewed edges that can affect OCR.
Tip: Use a clean, flat surface and avoid folds. - 5
Execute the scan
Perform the scan of the full document in the chosen mode (single-page or batch). Verify after the first few pages that no watermark appears in the export preview.
Tip: Scan in batches if needed to manage file sizes and processing time. - 6
Verify and save
Open the exported file to confirm watermark absence. Save to the preferred folder structure and back up the originals. Document any licensing details for audits.
Tip: Keep a separate log of output paths and license checks.
Common Questions
Is it legal to remove watermarks from scanned documents?
In most cases, removing a watermark from a document you do not own or without permission is not legal. Always check licensing terms or obtain consent from the rights holder before attempting removal.
Generally, you should not remove watermarks without permission or a licensed right to do so.
Why might a watermark appear even when I use licensed software?
A watermark can appear if the export settings are not properly configured, if you’re using a trial version, or if the license does not include watermark-free export rights. Review your license terms and verify the export configuration.
Check license terms and export settings to ensure watermark-free output.
Can I remove a watermark from a document I created or own?
If you own the document and have a license that permits removal, you may export watermark-free copies. Otherwise, request a watermark-free version from the rights holder.
If you own the rights and have permission, you can export watermark-free copies.
What formats are best for watermark-free scans?
PDF and TIFF are typically preferred for watermark-free scans due to fidelity and stability. JPEG is lossy and can degrade text clarity, which is undesirable for OCR.
PDF or TIFF are usually best for clean, usable scans.
How can I tell if a file is watermark-free after export?
Review the exported file visually for any overlays and run a quick OCR check to ensure there are no watermark hints. If you still see marks, revisit license terms or try a different tool.
Look for overlays and run OCR to confirm no watermark.
Watch Video
Key Takeaways
- Verify licensing before exporting watermark-free scans.
- Choose tools with explicit 'no watermark' export terms.
- Export in PDF or TIFF for best fidelity and OCR accuracy.
- Maintain a secure archive of originals and licenses.