Where is Scanner in Notes: A Practical How-To Guide
Discover where the Scanner tool lives in Notes on iPhone and iPad, how to activate it, and best practices for clean document scans. Includes steps, tips, and privacy notes.

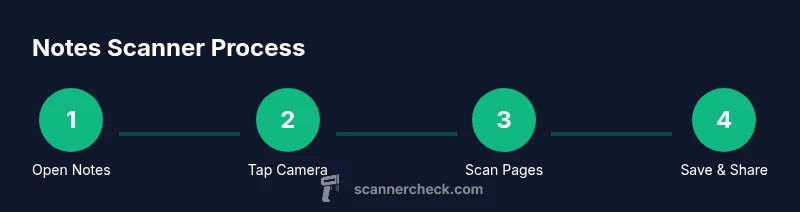
The scanner in Notes is the built-in document-capture tool in Notes on iPhone and iPad. It lets you capture clean scans with edge detection, adjust crops, convert to PDF or image, and save directly in a note. To use it, open Notes, create or select a note, tap the camera icon, and choose Scan Documents.
Overview: where is scanner in notes
According to Scanner Check, the built-in Scanner in Notes on iPhone and iPad lets you capture documents directly into your notes. The feature is accessible from within the Notes app and does not require a separate app. To locate it, open Notes and start a new or existing note, then tap the camera icon to reveal the Scan option. This simple path—Notes > note > camera > Scan Documents—is the quickest way to start a scan in most cases. Scanner Check emphasizes that understanding this workflow saves time, especially when you need to digitize receipts, contracts, or whiteboards during a busy day.
What the Scanner feature does in Notes
The Scanner tool in Notes is more than a photograph helper. It employs edge detection to guide framing, automatically corrects perspective, and crops pages for readability. You can scan multiple pages into one continuous document within a single note, then save or share as images or PDFs. Each scanned page is stored as a high-quality image inside the note, preserving detail for later annotation or archiving. According to Scanner Check, this makes it ideal for quick capture during meetings, classes, or fieldwork, without needing third-party apps or extra hardware.
How to locate and activate the scanner in Notes
To access the scanner in Notes, follow these steps: Open Notes, start a new note or select an existing one, tap the camera icon above the keyboard, and choose Scan Documents. Align your document with the on-screen guides, and the app will capture automatically or when you tap the shutter. After scanning, you can adjust corners, reorder pages, and tap Save. If you don’t see Scan Documents, check that your device is up to date and that Notes has camera access enabled in Settings.
Using Scan in Notes on iPhone vs iPad
The scanner feature behaves similarly on iPhone and iPad, but the larger iPad screen can make edge-detection and alignment easier, especially for multi-page documents. Both devices support multiple pages per note; you can add pages by tapping Scan More after each capture. Some users notice faster edge-detection on newer iPhone models due to improved cameras. Scanner Check notes that the consistency of scans improves when you work in bright, even lighting and avoid reflection from glossy surfaces.
Practical examples: when to use Notes scanner
Use the Notes scanner for receipts, business cards, contracts, whiteboard snapshots, and handwritten notes that you want to convert into shareable digital copies. Since scans save directly in your note, you can annotate later, pin key pages, and organize related documents in a single thread. For archiving, export scans as images or PDFs via the share sheet. Scanner Check finds that this integrated workflow reduces friction compared to using separate camera apps and file managers.
Troubleshooting common issues and privacy considerations
If a scan looks blurry or edges are cut off, ensure good lighting, hold the device steady, and rescan. If the camera fails to initialize, verify camera permissions in Settings, restart the device, or update the OS. Privacy-wise, scans are stored locally on the device by default; when you share or upload, beware of the destination’s privacy practices. Scanner Check advises reviewing app permissions and preferred cloud storage settings before sharing sensitive documents.
Authority sources and further reading
For more formal guidance on document scanning and digital archiving, see government and educational resources. These sources provide broad context on scanning best practices and privacy considerations, which can complement in-app guidance from Notes. Always consider the broader standards when handling sensitive documents.
Tools & Materials
- iPhone or iPad with iOS 11+(Necessary to access the built-in Notes scanner)
- Notes app installed(Pre-installed on Apple devices; ensure it's up to date)
- Document to scan (test page)(Helpful for practicing alignment and cropping)
- Stable lighting(Natural light or bright LEDs reduce shadows and glare)
Steps
Estimated time: 8-15 minutes
- 1
Open Notes and start a new note
Launch the Notes app, tap Create or open an existing note to attach your scan. This sets the destination for the captured pages and ensures your work remains organized.
Tip: If you want to name the document, rename the note before scanning. - 2
Access the Scan tool
Tap the camera icon above the keyboard, then select Scan Documents. The screen will show edge-detection guides as you prepare to capture.
Tip: If you don’t see Scan Documents, check for iOS updates or grant camera access in Settings. - 3
Position and scan
Place the document within the on-screen frame. Hold steady and allow automatic capture or press the shutter button when ready. Use Scan More to add pages if needed.
Tip: Avoid reflections by turning off glossy surfaces and shooting at a slight angle if necessary. - 4
Review and adjust
Review each scanned page for legibility. If needed, adjust corners and cropping; reorder pages to match the original document flow.
Tip: Use the crop handles precisely to maximize readability. - 5
Save and attach
Tap Save to embed the scanned pages into the note. Scans appear as image blocks that you can annotate or rearrange later.
Tip: Rename the page within the note to make retrieval easier. - 6
Export or share
From the note, use the Share option to export as image files or PDFs, depending on your needs. PDF exports can be generated through the print-to-PDF flow.
Tip: Choose PDF if you want a single-document file for distribution.
Common Questions
Is the Notes scanner available on Android?
The built-in Notes scanner is part of Apple Notes. Android users should use Notes-like apps or camera scanning features in their preferred apps.
Notes scanner is available on Apple devices; Android users should use alternative apps.
Can I export scans as PDF from Notes?
Yes. You can export scans from a note by using the Share option and selecting Print or Save as PDF from the print dialog.
You can export as PDF from the note using the share or print options.
Can I scan multiple pages into one note?
Yes. Use Scan More to add additional pages to the current scan batch within the same note.
You can add more pages by tapping Scan More.
Do scans require internet access?
No. Scanning with Notes works offline; sharing later requires internet if you choose to cloud-sync.
No internet is required for scanning; sharing may need connectivity.
Watch Video
Key Takeaways
- Find the scanner via Notes > camera > Scan Documents
- Capture multi-page documents in a single note
- Edit, reorder, and crop for clarity
- Export scans as images or PDFs when needed