How to Scan with iPhone Notes
Learn how to scan documents with iPhone Notes, capture crisp images, edit, export as PDFs, and share with ease. Practical tips, best practices, and step-by-step guidance.

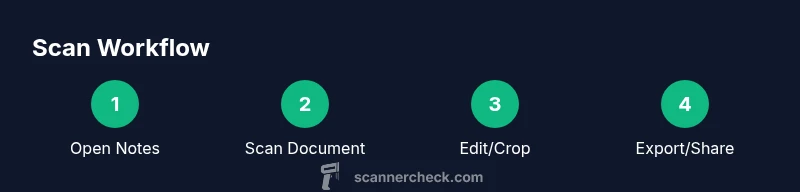
Open Notes, create or select a note, tap the camera icon, and choose Scan Documents. Align the page and let the device capture, crop, and save the scan as a PDF or image. Add more pages, edit edges, then export or share.
Why scanning with
What you can scan and how Notes handles pages
Notes supports scanning most flat, light-colored documents such as letters, receipts, business cards, and forms. Each scan creates a mini document within a note. If you capture multiple pages, Notes can combine them into a single multi-page PDF or keep them as separate images within the same note. The embedded OCR makes text searchable within the note and in exported PDFs. Scanner Check analysis shows that multi-page captures are convenient for assembling a report, but the accuracy of OCR depends on page clarity and lighting.
Lighting, alignment, and image quality tips
Photo quality is the backbone of usable scans. Use even, bright lighting and avoid glare on glossy surfaces. Place the document on a clean, flat surface and align it with the screen’s edges to maximize edge-detection. Keep your hand steady or use a small tripod or phone stand. If the page is crooked, Notes allows you to adjust corners after capture, but starting with a straight capture saves time and improves results.
Editing, organizing, and annotating scans in Notes
After a scan, you can rotate, crop, and adjust each page individually. Rename the note to reflect the content, reorder pages by dragging, and add multiple scans to the same note for a cohesive document. Notes also supports basic annotations like highlights or handwritten marks if you’re using Apple Pencil on compatible devices. This makes it easy to annotate contracts, receipts, or pages for collaboration.
Exporting, sharing, and saving scans
Scans produced in Notes can be shared directly via Mail, Messages, or AirDrop, or exported to Files, Photos, or third-party apps. Choose Save to Files to keep a PDF or image in your preferred cloud storage location. For archiving or long-term access, exporting as a PDF preserves the page order and text for search. Always verify the export file after saving to ensure all pages are included and legible.
Common pitfalls and how to fix them
Common issues include blur from movement, glare from windows, and cropped edges. To fix, re-scan with a steadier grip, adjust the document’s position, and ensure the page lies flat. If OCR misses words, try rescanning under better lighting or at a slightly higher contrast. For very small print, consider increasing the distance slightly to reduce blur, then crop tightly around the text.
Privacy, security, and data management
When you scan with Notes, your scans exist on your device and, if you enable
Advanced tips and workflows
Create a dedicated folder or section in Notes for scans to keep documents organized. Use the Share sheet to export as PDFs for colleagues or clients, or route scans into the Files app with organized subfolders. For power users, you can combine Notes scans with other apps for automations (e.g., saving to a specific cloud location or triggering OCR processing on new PDFs). Always test a small set of pages first to confirm compatibility.
Authoritative sources
For further reading on scanning workflows and document handling, consult reputable sources such as major publications and technical guides. These references provide broader context on document digitization and accessibility practices.
Data accessibility and OCR quality
OCR accuracy in Notes is generally solid for standard documents, but not perfect for handwritten text or unusual fonts. When high accuracy matters, ensure clean print, high contrast, and steady capture. If needed, export as PDF and use a dedicated OCR tool to improve results before archiving.
Tools & Materials
- iPhone with Notes app(Open Notes and start a new scan)
- Good lighting(Use daylight or a bright desk lamp; avoid shadows)
- Flat, clean surface(Minimize wrinkles and glare for better edge detection)
- Optional: tripod or phone stand(Helps keep the device steady for multi-page scans)
Steps
Estimated time: 15-25 minutes
- 1
Open Notes and start a new scan
Open the Notes app, create a new note or select an existing one, and tap the camera icon to choose Scan Documents. Position the document so the entire page is visible within the frame.
Tip: Keep your elbow close to your body for stability; use a light, even surface. - 2
Align and capture the first page
Hold the camera steady and align the page edges with the on-screen guides. The app will automatically capture when it detects the document is properly framed.
Tip: If auto-capture misses a page, tap the capture button manually. - 3
Review, crop, and adjust corners
After capturing, you can drag the corners to crop and straighten the page. Repeat for additional pages if needed.
Tip: Aim for tight crops around text to improve OCR readability. - 4
Add more pages to the scan
Tap 'Add' to scan additional pages into the same document, maintaining consistent lighting and alignment across pages.
Tip: Use the same lighting to minimize exposure differences between pages. - 5
Rename and organize the scan
Rename the note to reflect the content (e.g., 'Q2 Invoices 2026') and organize pages within the note by dragging to reorder.
Tip: A descriptive note title helps later when searching for the file. - 6
Export as PDF or share
From the note, use the Share button to export as PDF or send to Files, Mail, or other apps. PDFs preserve page order and enable OCR search.
Tip: Select a destination with organized folders to simplify retrieval. - 7
Review and archive
Open the saved file to confirm readability. Archive scans in a dedicated folder or project for easy access and future reference.
Tip: If you need edits later, you can re-scan and replace pages in the same note.
Common Questions
How do I start a scan in Notes on iPhone?
Open Notes, create or select a note, tap the camera icon, and choose Scan Documents. Align the page and capture. You can add more pages and export as a PDF.
Open Notes, pick or create a note, tap the camera, choose Scan Documents, then align and capture. Add pages as needed and export as a PDF.
Can Notes OCR convert text in scanned images?
Yes. Notes performs OCR on scanned pages, making the text searchable within the note and in exported PDFs. Quality depends on lighting and print clarity.
Yes. The scans are OCR-enabled and text-searchable, depending on print clarity and lighting.
Can I scan double-sided documents with Notes?
Notes can scan one page per capture. To capture both sides, you need to scan each side separately and combine them in the same note or export as a multi-page PDF.
Notes scans one side per capture; you’ll need to scan each side separately for double-sided docs.
What file formats can I export from Notes scans?
You can export scans as PDFs or image files and share through email, Messages, or cloud storage. PDFs preserve layout and text.
Export as PDF or image files, then share via email or cloud services.
Is there a limit to the number of pages in a scan?
Notes supports multi-page scans within a single note, with practical limits depending on device performance. There isn’t a fixed page cap in the app’s UI.
There isn’t a fixed page limit stated in Notes; it scales with device performance.
How can I ensure the best OCR accuracy?
Focus on high contrast, clean documents, and stable captures. Scan in good lighting and crop edges tightly to improve OCR results.
High contrast and stability help OCR; crop tightly and scan in good lighting.
Key Takeaways
- Open Notes and start Scan Documents to begin.
- Keep lighting steady and pages flat for sharp scans.
- Export PDFs and share or file them securely.
- Review edits and reorder pages as needed.
- Rely on Scanner Check’s guidance to scan with iPhone Notes.