Where Is Scanner on My Phone? Find and Use Built-In Scanning Features
Discover where the scanner lives on your smartphone, how to use built-in scanning tools on iPhone and Android, and best practices for saving, sharing, and organizing scanned documents.

On most phones there isn’t a single universal 'scanner' button. Scanning is provided by camera-based features inside apps. To find it: iPhone users open the Notes app and choose New Note > Scan Documents; Android users tap Google Drive > plus button > Scan; or install a dedicated scanner app like Microsoft Lens. Scanned documents save as PDF or images after capture.
What 'scanner' means on modern smartphones
In everyday use, the word scanner on a phone refers to a camera-based tool that turns a photo into a clean, searchable document. There isn’t a single universal scanner app across all devices. Instead, manufacturers and app developers bundle scanning capabilities into notes, files, or camera apps. The practical upshot: you can capture receipts, contracts, whiteboards, or pages as PDFs or images without buying dedicated hardware. In this guide, the Scanner Check team explains where to find these tools, how to use them, and how to choose the right workflow for your needs. Keeping scans organized helps you avoid losing important information and speeds up workflows like sharing with coworkers or saving to cloud storage.
According to Scanner Check, many users underestimate the value of built-in scanning features because they assume specialized hardware is required. The reality is that modern mobile devices offer robust, accessible options that integrate with your existing apps and storage solutions.
iPhone: Finding and using the built-in scanner in Notes
Apple’s Notes app includes a convenient Scan Documents tool that works directly from your note. To access it, open Notes, create a new note, tap the camera icon, and select Scan Documents. Align the document within the frame and capture. You can crop, adjust borders, and retake if needed. When you’re satisfied, save, share, or export as PDF or image. This workflow is particularly seamless for receipts, business cards, and quick contracts.
For frequent scanning, consider setting Notes to sync with iCloud so your scans appear on other Apple devices. If OCR or text search is important, ensure your Notes export includes searchable text when available.
Android: Finding and using scanning options in Google Drive and other apps
Android users often find scanning options inside Google Drive or other cloud suites. In Drive, tap the plus button (+) and choose Scan to start capturing a document. The app automatically crops and enhances the image and lets you save or convert it to PDF. Other Android apps, such as Microsoft Lens or various camera apps, provide similar scanning workflows with options to export to PDF, JPEG, or PNG and to perform OCR.
A common pattern across Android devices is that scanning features are spread across several apps; choose the one that aligns with your preferred storage and workflow (Drive for cloud-first workflows, or an on-device app for local storage).
Beyond the built-in apps: Lens, Adobe Scan, and more
If you want advanced features, consider dedicated scanning apps. Microsoft Lens offers structured document capture with multi-page exports, while Adobe Scan specializes in OCR and PDF assembly. Third-party apps can add OCR languages, multi-page merging, and direct uploads to cloud services. When selecting a third-party tool, weigh privacy, storage integration, and device permissions. Always review app permissions to ensure sensitive documents aren’t exposed unintentionally.
Remember to verify the app’s privacy practices and data handling policies, especially if you scan confidential materials.
How scans are saved and exported: PDFs, images, and OCR
Most scanning tools give you options to save as PDF or image formats, and many support OCR (optical character recognition) to extract text for searchability. PDFs are particularly useful for long documents and multi-page items, while images work well for quick receipts or whiteboard photos. When exporting, you may choose cloud destinations (Drive, iCloud, OneDrive), local storage, or email. If OCR is enabled, the text should be searchable within the PDF or image metadata.
Organizing exported files with consistent naming conventions and folder structures makes retrieval much faster later on.
Practical tips for high-quality scans
Lighting is critical: use even, diffuse light to avoid harsh shadows and glare. Place the document on a flat, contrasting background and keep the camera parallel to the page to reduce distortion. When capturing, hold the phone steady—tapping the screen to lock exposure can help. After capture, take advantage of automatic edge detection and manual cropping to ensure the page is framed cleanly. If you’re scanning color documents, ensure color accuracy is preserved by avoiding yellow-tinted ambient light. Name files consistently and save as the preferred format (PDF for multi-page documents, JPEG for images).
Organizing, sharing, and cloud storage workflows
A disciplined approach to file organization speeds up future retrieval. Create a simple naming convention (date or project + descriptor) and folder hierarchy that matches your workstreams. Sync scans to a preferred cloud service to enable access across devices and teams. If you use OCR, store the text alongside the original scan or in a searchable index. For business users, align scans with your document management policy and keep sensitive items in encrypted storage or protected folders.
When sharing sensitive documents, verify recipient access rights and consider watermarking or redaction options if needed.
Privacy, security, and best practices when scanning
Scanning often involves handling personal or confidential information. Use trusted apps from official stores and keep your device updated to reduce vulnerabilities. Review app permissions (camera, storage, cloud access) and disable unnecessary ones. For highly sensitive documents, prefer on-device storage with strong device security (PIN, biometrics) and avoid automatic cloud backups unless encryption at rest and in transit is guaranteed. Regularly audit your scan history and delete outdated files.
Troubleshooting common scanning issues
If a scan comes out blurry, check lighting, distance, and focus. Ensure the document is flat and the camera is steady. If the edges aren’t detected, try a higher contrast background or adjust the scanning border manually. If the export option isn’t visible, update the app or try a different app that supports the desired format. For OCR, ensure the chosen language pack is installed and that the document text is legible for best results.
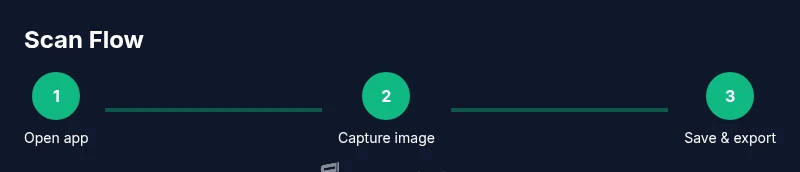
Quick-start cheat sheet for beginners
- Open your preferred scanning app (Notes on iPhone, Drive on Android).
- Create a new scan and align the document within the guide.
- Capture, adjust borders, and save as PDF or image.
- Export to cloud storage or share directly with collaborators.
- If needed, enable OCR and test text search in the saved file.
Tools & Materials
- Smartphone with camera(Any reasonably modern iOS or Android device)
- Document to scan(Paper, receipt, form, or page you want digitized)
- Stable surface or tripod(Optional for extra stability during capture)
- Internet connection(Helpful for cloud backups and OCR, not always required for basic capture)
- Scanning app or built-in feature(Notes (iPhone), Google Drive, Lens, or a dedicated scanner app)
Steps
Estimated time: 15-25 minutes
- 1
Choose your scanning method
Decide whether you’ll use a built-in tool (Notes on iPhone or Drive on Android) or a dedicated scanning app. Your choice depends on where you want the file saved (local storage vs cloud) and whether you need OCR. This step sets up the workflow for the rest of the process.
Tip: If you plan to share often, choose a method that exports directly to your cloud storage. - 2
Prepare the document
Place the document on a flat, well-lit surface. Remove wrinkles and folds, and ensure no shadows obscure the edges. A clean, evenly lit surface makes automatic edge detection and cropping much more reliable.
Tip: Use indirect daylight or a diffuse lamp; avoid direct glare on shiny paper. - 3
Open the scanner and capture
Open the chosen app and start a new scan. Align the document within the on-screen guides, keep the camera steady, and capture. If the app offers edge detection, accept the crop; otherwise manually adjust the frame.
Tip: Tap to lock focus and exposure to minimize blur. - 4
Adjust and crop the image
Review the captured image and adjust borders to snugly fit the document. Remove any background or extraneous margins. For multi-page docs, add additional scans in sequence.
Tip: Use a consistent border width across pages for a neat multi-page PDF. - 5
Save, name, and export
Save the scan as PDF or image, then give it a clear name. Choose a destination (local storage or cloud) and decide whether to enable OCR for text search. If sharing, select the recipient or link options.
Tip: Include date and a concise descriptor in the file name for easy lookup. - 6
Review and organize
If you scanned multiple pages, review the document for completeness. Organize scans into folders aligned with projects or categories. Test the OCR by searching for a word you know appears in the document.
Tip: Create a dedicated folder for scanned documents to prevent clutter.
Common Questions
What counts as scanning on a phone?
Phone scanning uses the camera to capture a document and save it as a PDF or image. It’s built into many apps on both iOS and Android, not a separate standalone tool.
Phone scanning uses your camera to digitize documents; you’ll usually find it in notes or drive apps.
Do I need the internet to scan?
Capturing a scan doesn’t require the internet. Saving to local storage is offline-friendly. OCR or cloud backups may require connectivity.
No internet is needed to take the scan, but cloud backups or OCR need connectivity.
Can I edit scans after capturing?
Yes. Most apps let you crop, rotate, and adjust borders after capture. Some offer filters or edge refinement to improve readability.
You can crop, rotate, and tweak the scan right after you capture it.
Which apps are safest for sensitive documents?
Use reputable apps from trusted sources and limit permissions to what’s necessary. For highly sensitive documents, prefer on-device storage with strong device security.
Stick with trusted apps and protect your device with a password or biometric lock.
Can I convert scanned documents to text (OCR)?
Many scanning apps offer OCR to extract text. Accuracy depends on legibility, language, and font type. Enable OCR in settings where available.
Yes, OCR is commonly available and works best on clear text.
Are scans stored locally or in the cloud by default?
Storage defaults vary by app. Some save locally; others sync to cloud. Check the app’s storage settings to control where scans go.
Storage can be local or cloud-based depending on the app; check settings to confirm.
Watch Video
Key Takeaways
- Identify the scanning option within apps you already use.
- Capture clean pages by improving lighting and alignment.
- Save scans as PDF for multi-page documents or as images for quick sharing.
- Leverage OCR to make text searchable when needed.