Where to Scan in iPhone: A Practical How-To Guide
Learn where to scan in iphone with built-in tools (Camera, Notes, Files) and trusted apps. This practical guide covers steps, tips, and privacy for digitizing documents efficiently on iPhone.

According to Scanner Check, you can scan documents on iPhone using built-in tools like the Camera app for quick captures or the Notes app’s Scan feature for organized PDFs. Start with even lighting and a flat surface, then save to Files or cloud storage. For longer workflows, third-party scanners exist, but built-in options cover most everyday needs.
What scanning on iPhone really means
In everyday work and home life, scanning with an iPhone means converting a physical page into a digital file using the device you already carry. This guide focuses on practical, reliable methods you can rely on without buying extra hardware. Whether you need a quick copy of a receipt, a contract, or a notebook page, you can capture sharp images and save them as PDFs or images. Throughout, we’ll emphasize accessible options first, then touch on more advanced tools if your needs grow. According to Scanner Check, the built-in capabilities in iPhone cover the vast majority of typical scanning tasks, making quick digitization straightforward for most users. The goal is to help you locate where to scan in iphone and choose the best workflow for your situation.
Where to scan in iphone: Built-in camera scanning
The simplest way to scan is with the iPhone Camera app in conjunction with other native apps. You don’t need extra software for basic scans, but you do want to leverage edge detection and stabilization features. For documents, aim the camera so the document fills the frame with good lighting. You’ll often see a natural edge detection highlight the moment you line up the page. Tap to capture, then you can crop and adjust later. This method is ideal for quick, on-the-fly captures when you’re away from your computer and need a fast copy.
Using the Notes app to scan documents
Notes includes a native Scan Document feature that produces clean, searchable PDFs. Open Notes, create a new note, and choose Scan Documents. Place the document on a flat surface, align it in view, and the app will auto-detect edges. You can retake the image if the framing isn’t perfect, then save the scan to your note or export as PDF. This approach is particularly useful when you want multiple pages in a single document, and it makes it easy to sync with iCloud for access on other devices. Scanner Check’s analysts suggest starting here for most users who want a polished, shareable result.
Scanning with the Files app
Files offers a built-in Scan Documents feature that creates a PDF directly from the Files app. Open Files, tap the three-dot menu or the Scan option, and position your page for edge detection. After capturing, you can reorder, crop, or rotate pages, then save the document to a folder or cloud storage. Saving here keeps your scans organized with other project files and makes it simple to share via email or messaging. This path is especially handy if you’re organizing a project with many related documents.
Third-party scanning apps worth considering
If your workflow requires advanced features, look at reputable third-party scanning apps that emphasize OCR accuracy, multi-page management, and seamless cloud import/export. These apps can offer features like automatic color enhancement, batch scanning, and direct export to workplace formats. When evaluating options, prioritize privacy controls, local processing versus cloud processing, and the ability to export to PDF, JPEG, or searchable PDFs. While the built-in tools are sufficient for most tasks, third-party solutions can save time at scale and support specialized needs.
Tips for high-quality scans
For crisp scans, ensure even lighting with minimal shadows. Place the page on a flat, non-reflective surface and avoid glare by using indirect light. Keep the camera steady—consider propping your elbow on a desk or using a small tripod. If your page has text, a slight tilt can cause distortion; align the page flat and parallel to the camera. When cropping, prioritize maintaining actual edges of the document; this improves OCR accuracy and reduces file size. Finally, name and organize files consistently to speed up retrieval later.
Troubleshooting common issues
Low light, glare, or crooked pages are the main culprits behind blurry scans. If text is fading, increase exposure in the scanning app or adjust the lighting. If edges aren’t detected, reframe the page to fill the frame more completely and try again. For multi-page documents, confirm that all pages are in the same export (PDF) and that page order is correct before sending. If you’re using OCR, verify that the text is selectable and searchable after export—some apps require an extra processing step.
Quick scan checklist you can use any time
- Clear, flat surface with even lighting
- Page edges visible and straight in frame
- Adequate white balance and contrast
- Save as PDF for documents; JPEG for images as needed
- Add a descriptive file name and store in a dedicated folder
- Verify OCR text if you need searchable content
- Share or back up to a trusted cloud destination
Converting scans to formats and sharing
Most scans are saved as PDFs by default, which is ideal for documents. If you need image-based scans, export as JPEG or PNG. You can also share directly from the iPhone via Messages, Mail, AirDrop, or cloud storage links. If you require editable text, use an OCR-enabled app or export to a PDF with searchable text. By mastering these options, you’ll find the right balance between file size, quality, and accessibility for your workflows.
Privacy and security considerations when scanning on iPhone
Scanning involves handling sensitive information. Always use trusted apps and review app permissions before scanning. Prefer local processing when possible to minimize data exposure, especially for personal or confidential documents. After sharing, ensure recipients have appropriate access and remove anything unnecessary from your device or cloud storage. Regularly review your device’s privacy settings and keep iOS updated to benefit from the latest security improvements.
Tools & Materials
- iPhone with iOS 16+ (any recent model)(Ensure camera is functional and storage space is sufficient)
- Notes app (built-in)(Use for Scan Document feature and PDF export)
- Files app (built-in)(Useful for organizing scans and cloud backup)
- Stable lighting and flat surface(Avoid glare and shadows for best edge detection)
- Optional third-party scanning app(Consider for advanced features (OCR, batch scans))
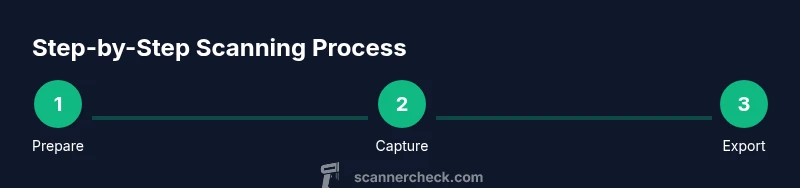
Steps
Estimated time: Estimated total time: 12-20 minutes
- 1
Prepare the scanning environment
Set up a clean, well-lit area with a flat surface. Clear shadows across the document and ensure the page lies flat to minimize distortion. This prep reduces glare and improves edge detection.
Tip: Use indirect natural light or a desk lamp at 45 degrees to avoid reflections. - 2
Choose your scanning method
Decide whether to use Notes Scan Document, Camera with manual capture, or Files Scan. Each method offers different export options; start with Notes for multi-page PDFs.
Tip: Notes Scan Document is best for multi-page projects and easy sharing. - 3
Capture the document
Position the document so it fills the frame. Hold the device steady, then scan. If the edge detection doesn’t activate, adjust distance and angle slightly.
Tip: Keep your elbow steady or use a small tripod or phone stand. - 4
Review and crop the scan
Review the captured image, crop to the exact page edges, and adjust the corners for a clean rectangle. Cropping helps OCR accuracy and makes the file look professional.
Tip: Enable automatic edge detection if available to simplify alignment. - 5
Save or export the scan
Save as PDF when possible, or export as JPEG if you need image-first storage. Choose a meaningful name to aid retrieval later.
Tip: Add a version or date stamp in the file name. - 6
Organize the scan
Move the file to a folder in Files or a cloud location. Create a consistent folder structure for documents, receipts, and notes.
Tip: Use folders like 2026_Receipts or Work_Project_X for easy search. - 7
Enhance with OCR (if needed)
If you need searchable text, use an OCR-capable app or export PDF with searchable text. Confirm that you can select text in the resulting document.
Tip: Check accuracy by selecting a few lines of text after export. - 8
Share or archive
Send the scan via email, Messages, AirDrop, or cloud links. Archive originals if you must, and ensure access permissions align with privacy needs.
Tip: Prefer encrypted sharing when sending sensitive documents.
Common Questions
Can I scan with just the iPhone camera without apps?
Yes. The Camera app can capture documents, but edge detection and export options are more robust when using Notes or Files. For quick captures, this suffices, but for polished PDFs, use Notes or a dedicated scanner.
Yes. You can scan with the iPhone camera, but for better results use Notes or Files for edge detection and export.
Which format should I use for scans on iPhone?
PDF is typically ideal for documents because it preserves layout and supports multi-page files. JPEG is suitable for single images or photos. Both can be exported or shared via Messages or email.
PDFs are best for documents; JPEG works well for images.
Can I search text inside scanned PDFs on iPhone?
Many scanners offer OCR to create searchable PDFs. Check the export options in Notes or your chosen app to ensure the text is selectable after export.
Yes, OCR makes scanned PDFs searchable. Look for the OCR option in your app.
What should I do if a scan is blurry?
Reframe the document to fill the frame, ensure steady hands, and use better lighting. If the blur persists, retake the scan with a slight adjustment to distance or angle.
If blurry, retake with steadier hands and better lighting.
Is it safer to scan sensitive docs using built-in apps?
Built-in apps minimize data transfer and are generally safer for sensitive documents. For extra privacy, review app permissions and use local processing when possible.
Yes, built-in apps are typically safer; review permissions and prefer local processing when possible.
Watch Video
Key Takeaways
- Use built-in tools first for most scans
- Notes offers reliable multi-page PDF export
- Files helps with organization and sharing
- Quality improves with lighting and stable framing
- OCR enhances searchable text when needed