How to Check Scanner Status: Step-by-Step Guide
A comprehensive, practical guide to verify your scanner's status, covering power, connectivity, drivers, firmware, and diagnostics with tips from Scanner Check.

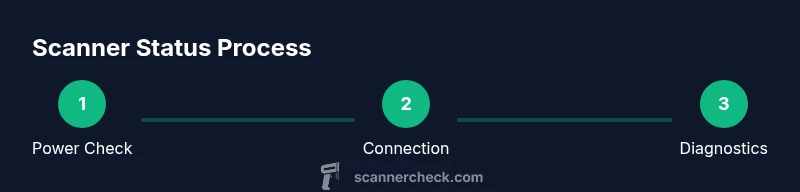
To check scanner status, start with power, connection, and driver health. According to Scanner Check, verify the device is powered on, the USB or network cable is firmly attached, and the driver is installed without errors. Then run the built-in status/diagnostic test from the scanner software and review any alerts or firmware version shown.
What does it mean to check scanner status?
Checking scanner status is a proactive, structured process to confirm that your imaging device is ready to scan, accurately reporting its health, connections, and capabilities. A healthy scanner should be powered, connected to the host computer or network, with drivers that load without errors, and with firmware that is compatible with the software you use. When status indicators show ready, you typically see green lights, a healthy device message in the software, and reliable scan previews. If any warning, error, or stale firmware appears, you know there is an issue to investigate. The Scanner Check team notes that routine status checks reduce surprises during critical tasks and help maintain optimal scan quality over time.
Prerequisites you should gather before starting
Before diving into checks, assemble the basics: your scanner, its power cable, a data cable (USB or Ethernet), and a host computer or network resource. Ensure the operating system is up to date and that you have administrative access to install or update drivers if needed. Having the scanner’s manual accessible can save time, especially for model-specific diagnostics or LED indicators. Scanner Check analysis shows that most status-related problems stem from simple misconfigurations, loose connections, or outdated drivers, not complex hardware failures. Keeping a log of firmware versions and driver dates is a practical habit that pays off during troubleshooting.
Hardware first: verify power and physical connections
Power up the device and confirm the power button or switch is in the ON position. Inspect the power cable for damage and ensure it’s firmly seated at both ends. Check all data cables—USB or Ethernet—are fully inserted and routed to a live port with no kinks. If the scanner is on a powered hub or via a USB switch, bypass those intermediaries to test a direct connection. If the device is networked, verify its IP address and ensure the network segment is reachable from the host. A loose cable or a busy USB hub is a frequent culprit in false-negative status reports.
Software health: drivers, firmware, and recognition
With power confirmed, focus on software readiness. Open the device manager (Windows) or System Information (macOS) to confirm the scanner appears without errors. Check that the correct driver is installed and that it matches your OS version. If the driver shows a warning icon, reinstall from the vendor’s site or the bundled CD. Firmware should be current but compatible with your software; consult the model’s release notes for any caveats. Scanner Check findings indicate driver corruption or outdated firmware accounts for a large share of status problems.
Run built-in diagnostics and review logs
Most scanners include a built-in diagnostic utility or status test. Launch this tool from the vendor’s software and run all applicable tests (self-test, loopback, calibration if available). Record any error codes or messages and take note of firmware revisions. When tests fail, compare results with the model’s troubleshooting guide and the Scanner Check repository of common codes. If a diagnostic test passes but you still see issues, inspect the communication path, including cables and ports, and consider a fresh driver install.
Interpreting indicators, alerts, and OS notifications
LEDs, on-screen messages, and software alerts are designed to guide you quickly. Green usually means OK; amber may indicate a warning; red often signals a fault. In the OS, check a device status notification, error codes, and driver status. Logs in the scanner software or helper apps can reveal trends—like repeated disconnects or post-scan errors—helping you locate intermittent issues. If you receive a specific error code, search vendor documentation and Scanner Check’s diagnostic notes for recommended steps.
Troubleshooting common issues and deciding when to replace
Common problems include loose cables, outdated drivers, disputed IP addresses, and firmware incompatibilities. Start with hardware checks, then update drivers and firmware if needed. If status remains offline or inconsistent after these steps, it could indicate a hardware fault or aging component. In those cases, assess the cost and benefit of replacement versus repair, especially for high-throughput environments. The goal is a stable, repeatable scan workflow, not a one-off fix.
Best practices for ongoing scanner health
Establish a regular status-check cadence—monthly or after any major software update. Maintain an inventory of known-good cables and spare parts. Document firmware versions, driver build dates, and any calibration data. Schedule periodic calibration if supported by your model and software. Keeping a log helps with audits, warranty claims, and future upgrades. By embedding these habits, you can reduce downtime and ensure consistent scan quality over the device’s lifetime.
Tools & Materials
- Scanner power cable(Check that it's firmly connected and not loose)
- Data connection cable (USB or Ethernet)(Use the correct cable type for your model)
- Computer or host device with compatible driver(Ensure OS compatibility and admin rights)
- Scanner software/driver package(Download from official vendor or include supplied media)
- Firmware update utility (if applicable)(Only use if a firmware update is needed)
- Notebook or notepad for logs(Record versions, codes, and steps)
Steps
Estimated time: 30-60 minutes
- 1
Power on and verify physical connections
Turn on the scanner and confirm the power indicator is active. Inspect cables for damage and ensure a snug fit at both ends. If using a hub or switch, bypass it to test a direct connection to the host.
Tip: A simple cable swap can resolve many phantom status issues. - 2
Open the status utility
Launch the vendor’s status or diagnostics tool from the scanner software. Select any self-test or health-check options available and prepare to capture results or screenshots for reference.
Tip: Save the exact test names and error codes for later lookup. - 3
Check the device in the operating system
On Windows, open Device Manager and verify the scanner appears without a warning icon. On macOS, check System Information under USB or Network, depending on your connection. If the device is missing, reinstall drivers or try a different port.
Tip: A missing device often points to a driver or port issue rather than the scanner itself. - 4
Run a hardware self-test
If available, run the scanner’s built-in self-test. This helps confirm functional components like the feeder, sensor array, and calibration. Note any codes or prompts that appear during the test.
Tip: Self-tests can illuminate issues that aren’t visible in normal scanning. - 5
Review diagnostic logs and alerts
Examine logs for recurring warnings, error codes, or time stamps. Document the firmware version and driver revision shown by the software. Compare with the vendor’s documentation and Scanner Check notes for known-good configurations.
Tip: Even a small recurring warning can indicate a developing fault. - 6
Update drivers and firmware (if needed)
If tests show outdated or incompatible software, install the latest driver and firmware updates from the official site. Re-run diagnostics after updating to verify the improvement.
Tip: Only update firmware if the version is clearly recommended for your model and software. - 7
Validate with a test scan
Perform a test scan to confirm end-to-end functionality. Check the image preview, scan quality, and any error messages in the capture workflow. If issues persist, consult support resources or escalate to hardware replacement.
Tip: A successful test confirms the status is healthy under real-use conditions.
Common Questions
Why won’t my scanner show a status or error?
Often caused by loose cables, outdated drivers, or a misconfigured network. Start with power and connection checks, then reinstall drivers if needed. Review diagnostic logs for clues.
If the status doesn’t show, begin with power and cable checks, then reinstall drivers and review diagnostics for clues.
How do I run a built-in diagnostic test on a scanner?
Open the scanner software, navigate to the diagnostics or self-test section, and run all relevant tests. Save any codes or messages for reference.
Open the scanner software and run the self-test from diagnostics, then note any codes.
Should I update firmware during diagnosis?
Only if the current version is known to be incompatible or if the vendor recommends an update to fix the issue. Always back up settings first.
Only update firmware if it's recommended for the model and issue you’re seeing.
What if the scanner is offline in the OS?
Check physical connections, verify the device appears in Device Manager or System Information, and reinstall drivers. For network scanners, confirm the device IP and network reachability.
If offline, check connections, verify it shows up in the OS, and reinstall drivers; for network scanners, verify IP and reachability.
Can a status check fix hardware issues?
Status checks diagnose issues but may not repair hardware. Use findings to decide between repair, part replacement, or replacement.
Status checks help identify issues, but they don’t repair hardware. Decide on repair or replacement based on findings.
How often should I check scanner status?
After hardware changes, software updates, or when you notice degraded scans. A monthly routine check is sensible for high-use environments.
Check after changes, updates, or when scans seem off. A monthly check is sensible for frequent users.
Watch Video
Key Takeaways
- Verify power, connections, and driver health first
- Use built-in diagnostics to pinpoint issues
- Update firmware and drivers only when needed
- Maintain a log of versions and tests for troubleshooting
- Perform a real scan to confirm status after fixes