Where is Scanner in Google: A Practical Guide
Discover where the scanner feature lives in Google apps, including Drive and Lens. Learn how to locate, use, and optimize document scans for quick sharing with Scanner Check.

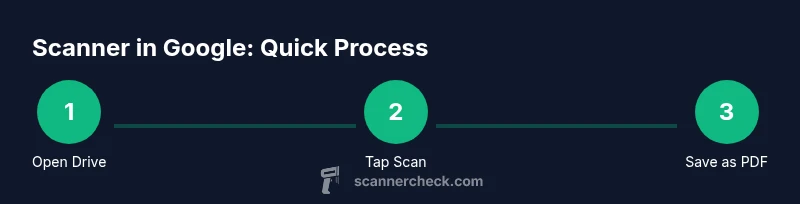
By the end of this guide you will locate and use Google's built-in scanner tools. In Google Drive on Android and iOS, press the plus button and select Scan to capture documents as PDF or images. You can also scan with Google Lens or Google Photos where supported. This quick path helps you digitize papers fast.
What the phrase 'where is scanner in google' means in practice
The query reflects a user’s intent to locate a built-in scanning capability within Google’s ecosystem. In practice, this points to scanning documents using Google Drive's native Scan tool or text capture via Google Lens. The exact path can vary by platform and app version, so understanding where these features live helps you save time and avoid third-party apps. This article explains reliable locations, how to access them, and best practices for quality scans.
How Google integrates scanning across its apps
Google embeds scanning functionality across several products. In Google Drive, you can use a native Scan tool to capture documents directly into your Drive as PDFs or images, with basic OCR support for searchable text. Google Lens offers on-the-fly text recognition and extraction from photos or live camera input, useful for converting printed text into editable content. Google Photos can serve as a storage hub for scanned images and export them when needed. The exact availability and UI may vary by device and app version, so try each path to see what works for you.
Finding the Scan tool on Android vs iPhone (iOS)
On Android devices, open the Google Drive app, tap the “+” button (often at the bottom-right), and select Scan. On iPhone, the Drive app follows a similar flow, though the interface may differ slightly due to iOS design conventions. If you don’t see Scan in Drive, ensure you have the latest app version and that camera permissions are granted. If your device doesn’t display Scan, Google Lens can offer a workaround via text capture from photos.
Best practices for high-quality scans
A sharp, legible scan starts with good lighting and a flat surface. Place the document on a clean, non-glossy background to minimize reflections. Align the document with the frame edges to avoid skew, and use a white or light-colored background when possible. For file quality, aim for a resolution in the 300–600 dpi range if the option is available, and save as PDF when you need multi-page documents. If you only need text, OCR-enabled formats help search later.
Troubleshooting when the Scan feature is missing
If the Scan tool isn’t visible, first check for app updates and install the latest version. Verify camera permissions in your device settings and ensure Google Drive has storage access. Some regions or device policies may hide features; in that case, try Google Lens’s text capture as a temporary workaround. Reinstalling the app can reset UI paths if settings became tangled.
Alternatives and complementary tools
If Drive’s Scan isn’t accessible, third-party scanning apps can fill the gap, though you may lose tight integration with Google Drive. Google Lens provides robust OCR for quick extractions when you don’t need a full PDF. For long-term workflows, consider storing scans in Google Drive folders with standardized naming conventions and tags for easier retrieval.
Practical workflow: end-to-end example
Imagine you receive a printed contract. Open Google Drive, choose Scan, capture each page, and save as a single PDF in your designated folder. Rename the file to reflect the project, add a description, and share it with teammates via Drive. This minimizes paper clutter while keeping a centralized, searchable archive.
Security and privacy considerations when scanning with Google
Only scan documents that you are authorized to digitize and store. Review Drive’s sharing settings to control who can access your scans. If your device is lost, ensure you have screen lock and account protection enabled. Use built-in app protections to minimize exposure of sensitive information.
Tools & Materials
- Smartphone with camera(Ensure the camera lens is clean and lighting is adequate for clear captures)
- Google Drive app(Use the latest version for Scan feature accessibility)
- Google Lens app (optional)(Useful for quick OCR when Drive Scan isn’t available)
- Stable internet connection(Helpful for saving scans directly to Drive and syncing)
- PDF viewer or editor (optional)(Helpful for reviewing and editing scanned PDFs)
Steps
Estimated time: 25-35 minutes
- 1
Prepare your device and apps
Update Google Drive to the latest version, grant Camera and Storage permissions, and clear a clean surface for scanning. This reduces blurriness and ensures the app can access the camera.
Tip: Check permissions first; without camera access, the Scan option won’t appear. - 2
Open Drive and access the Scan tool
Launch Google Drive, tap the plus (+) icon, and choose Scan. If Scan isn’t visible, try refreshing the app or reopening Drive.
Tip: If you don’t see Scan, use the Lens OCR path as a workaround. - 3
Capture pages with appropriate settings
Align pages to the frame, hold steady, and capture. Adjust color or black-and-white mode if offered, and specify resolution if available.
Tip: Capture in good lighting to minimize shadows and glare. - 4
Review, save, and export
Review each page for readability, then save as a PDF or image. Name the file clearly and choose a destination folder in Drive.
Tip: Use descriptive filenames with dates or project codes. - 5
Organize, share, and back up
Move the scan into a project folder, set sharing permissions, and ensure automatic backup is enabled if needed.
Tip: Enable Drive backup to keep originals safe across devices.
Common Questions
Where can I find the Scan feature in Google Drive on Android?
On Android, open the Google Drive app, tap the plus (+) icon, and select Scan. If it’s not visible, update the app and check camera permissions.
In Android, open Drive, tap plus, choose Scan. If you don’t see it, update the app and verify camera permissions.
Is Google Lens a replacement for Drive’s Scan?
Google Lens offers OCR and text capture, which can substitute for simple text extraction. However, for multi-page documents and PDFs, Drive’s Scan is the more integrated option.
Lens is good for quick text capture, but Drive Scan handles multi-page PDFs better.
Can I scan documents offline with Google apps?
Yes, you can scan while offline on some devices; however, saving and syncing to Google Drive requires an internet connection.
You can scan offline, but saving and syncing needs internet.
What file formats can I export scanned documents as?
Scans from Drive are typically saved as PDFs or images; check your app version for additional options.
Most scans export as PDFs or images.
Why is the Scan option missing after an update?
An update may temporarily hide features due to UI changes. Try signing out and back in, clearing cache, or reinstalling the app.
If Scan disappears after an update, try re-installing the app or signing out and back in.
How do I rename scans easily in Drive?
Open the scan file in Drive, tap the three-dot menu, and choose Rename. Use a consistent naming convention for easier search.
Open the file, select Rename, and use a consistent naming convention.
Watch Video
Key Takeaways
- Identify the Drive Scan path in both Android and iOS.
- Aim for clean lighting and proper alignment for readability.
- Save scans as PDF for multi-page documents.
- Organize scans in Drive folders with clear naming.
- Be mindful of privacy and sharing settings.