Where Is Scanner on Android? A Practical Quick Guide
Learn where Android scanners live, how to access built-in scan features via camera, Lens, or Drive, and when to choose third-party apps for document scanning on your phone.

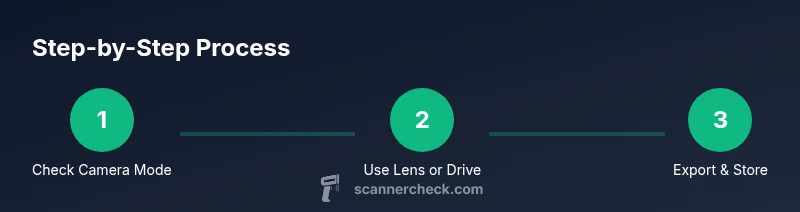
On Android, there isn’t a single universal 'scanner' app. To accomplish scanning, check your camera app for a Scan or Document mode, explore Google Lens for text and object capture, and use Google Drive’s scan feature to digitize documents. If none are available, install a reputable third-party scanner app from the Play Store.
Understanding Android Scanning: What counts as a scanner
To answer where is scanner on android, start by understanding what the term means on a smartphone. For many users, a scanner is any tool that converts physical documents or text into digital form, using cameras, OCR, or dedicated apps. On Android, scanning can be done with your camera in a Scan or Document mode, by using Google Lens for text capture, or via Google Drive’s built-in scan feature. According to Scanner Check, the landscape of mobile scanning has become more accessible on recent Android releases, with OEMs bundling options and Google’s apps enabling quick digitization. You’ll often find scanning capabilities tucked inside multiple apps rather than a single app named “Scanner.” This flexibility means you can start scanning almost anywhere on your Android device, provided you know where to look and what each tool can do. If you’re asking where is scanner on android, this guide covers built-in options and common third-party solutions to give you practical, real-world steps.
The goal here is practical accessibility: become familiar with the three common pathways—Camera, Lens, and Drive—and understand when to switch to a dedicated app for more complex jobs like multi-page PDFs or OCR-heavy workflows. Scanner Check has observed that most users scan documents weekly, so learning these entry points saves time and preserves document quality. The concept is not tied to a single brand; it’s about recognizing the available interfaces across Android versions and OEM skins. With this foundation, you can identify the best option for different scanning needs, from quick one-page captures to organized digital archives.
tip
Tools & Materials
- Smartphone with internet access(Android 6.0+ recommended; recent updates improve OCR and camera scanning)
- Camera app with scan mode(Look for Scan, Document, or PDF options in your default camera app)
- Google Lens app(Often built into the camera app; install from Play Store if not present)
- Google Drive app(Offers an integrated Scan feature for PDFs and images)
- Third-party scanner app (optional)(Examples include Adobe Scan, Microsoft Office Lens; use for OCR-heavy tasks)
Steps
Estimated time: 15-30 minutes
- 1
Check built-in camera scan mode
Open your camera app and look for a Scan, Document, or PDF option. If found, activate it, align the document, and capture. Many phones provide automatic edge detection and perspective correction to produce a clean scan.
Tip: If you don’t see scan mode, explore the camera’s More/Tools menu or check for an update that brings a dedicated scanning feature. - 2
Explore Google Lens for scanning
Open Google Lens (often accessible from the camera or as a standalone app). Use the Text or Document options to capture text and export or copy it to other apps. Lens can also identify QR codes and barcodes.
Tip: For frequent text extraction, enable Lens in Quick Settings so you can launch it quickly from the home screen. - 3
Use Google Drive’s scan tool
Open Google Drive, tap the plus (+), and choose Scan. Capture the document, adjust borders, and save as a PDF or image. Drive stores scans in your Drive, making them easy to organize.
Tip: After saving, rename files consistently (e.g., ClientName_ProjectDate_Scan) to simplify retrieval. - 4
Install a dedicated scanner app (if needed)
If built-in options aren’t enough (OCR accuracy, multi-page handling, or exports), install a trusted third-party scanner app from the Play Store. Use features like multi-page PDFs, cloud export, and OCR.
Tip: Check app permissions and privacy settings before scanning sensitive documents. - 5
Test and compare outputs
Create a few sample scans with different apps to compare image quality, OCR accuracy, and export options. This helps you choose the best tool for your workflow.
Tip: Save originals separately from edited copies to preserve an unaltered reference if needed. - 6
Organize and share
Move scanned files into organized folders, add metadata, and share links or PDFs with teammates or clients. Consistent naming and folder structure save time later.
Tip: Consider adding password protection on sensitive PDFs when sharing via cloud links.
Common Questions
Is there a universal Android scanner app?
No. Android devices use several tools (camera scan modes, Google Lens, Google Drive scans) or third-party apps for scanning tasks. Availability varies by device and OS version.
There isn’t a single universal scanner on Android; you’ll typically use camera scan modes, Google Lens, or Drive, or choose a third-party app for more features.
Where is the scanner located in stock Android camera apps?
Look for Scan, Document, or PDF options within the camera app. If not visible, check the camera’s More or Tools menu or update the app. Some devices place it under the 'Modes' carousel.
In many stock Android cameras, tap Scan or Document mode, or look under More/Modes to enable scanning.
Can I scan without internet access?
Yes. Most scanning features save locally and synchronize later when connected. Some OCR tasks may require internet for higher accuracy if the app processes text in the cloud.
Yes, you can scan offline; OCR happens locally or later when you reconnect.
Where are scans stored and how can I export them?
Scans can be saved to device storage or cloud accounts (Drive, Photos). Exports are commonly available as PDF or image formats and can be shared via email or links.
Most scans save to your device or cloud, and you can export as PDF or image.
What about privacy and permissions when scanning?
Scanning apps request camera, storage, and sometimes microphone access. Review permissions, disable cloud backups if you prefer local storage, and use reputable apps with clear privacy policies.
Grant only necessary permissions and choose trusted apps with clear privacy policies.
Do I need a special app for advanced OCR or multi-page PDFs?
For advanced OCR quality or multi-page PDFs, third-party apps like Adobe Scan or Microsoft Office Lens often offer more features than built-in options.
For advanced needs, consider third-party scanners with better OCR and multi-page support.
Watch Video
Key Takeaways
- Identify where scanning options live on your Android device
- Compare built-in camera, Lens, and Drive for quick digitization
- Know when to reach for third-party apps for heavier OCR needs
- Prioritize privacy and file organization when scanning