What to Do When Your Scanner Isn’t Working
Facing a non-working scanner? This urgent troubleshoot guide from Scanner Check walks you through quick fixes, diagnostics, and a step-by-step plan to get your scanning gear back online fast.

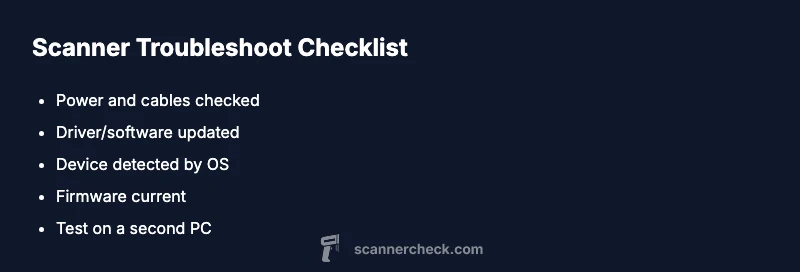
If your scanner isn’t working, start with the basics: verify it’s powered on, connected properly, and the driver software is installed and up to date. If there’s still no response, perform a simple reset, re-seat cables, and test with another computer or USB port. These quick checks often resolve most common starting issues.
Quick assessment and immediate actions
If you’re wondering what to do when scanner is not working, start with a quick, practical check. According to Scanner Check, most problems stem from power, cables, or outdated drivers, not a defective device. This means you can often rescue a non-responsive scanner in minutes with the right sequence. Begin by ensuring the scanner is powered on, the USB cable (or network connection) is firmly plugged in, and the power indicator shows status. Then verify that the computer recognizes the device in the operating system (Device Manager on Windows, System Information on Mac). If the device appears but still won’t scan, move to the next steps: try a different USB port, restart the computer, and install any pending driver or firmware updates. If the scanner continues to fail, document the symptoms with dates and versions, and prepare a short checklist to guide further troubleshooting. This quick assessment sets the foundation for a reliable diagnosis and prevents unnecessary franken-steps.
Check hardware connections and power
The next step is to inspect the physical setup. Ensure the power cable is firmly connected and the power switch is on. If the scanner connects over USB, try unplugging and re-plugging the cable at both ends. If you’re using a network-connected model, confirm the device appears on the network with a valid IP address and no duplicate addresses. Avoid forcing connections; loose cables or intermittent power can mimic more serious faults. If possible, try a different USB port or a known-good power outlet to rule out supply issues. As Scanner Check notes, many failures start with simple hardware hiccups rather than a dead device.
- Check all physical connections.
- Test alternate ports and outlets.
- Confirm network connectivity for USB-over-Ethernet models.
Verify drivers and software compatibility
Driver and software compatibility is a frequent bottleneck. Start by checking that the latest driver is installed for your scanner model from the manufacturer or trusted sources. If the scanner uses bundled software, ensure that it’s compatible with your operating system version. On Windows, open Device Manager and verify the scanner shows up without error icons; on macOS, check System Information and any scanner apps for error messages. If you see a warning symbol, uninstall the driver completely, reboot, then reinstall the latest version. Don’t rely on old drivers from disk images that came with the device, as compatibility can change with updates. If the issue persists, temporarily disable security software that could block peripheral drivers during installation and re-test.
- Update or reinstall drivers.
- Verify OS compatibility.
- Check for software conflicts or security blocks.
Diagnostic thinking: mapping symptoms to causes
A structured diagnostic mindset helps you connect symptoms to likely causes. Start by listing exactly what fails: does the scanner power on, can you see the device in the OS, is there a scan preview, or are only certain file types affected? Map each symptom to a potential cause such as power issues, USB/port problems, driver corruption, or firmware glitches. Typical patterns include: no power indicators (hardware/power), device listed but not usable (driver or firmware), intermittent scans (cable or port), or abnormal error codes (firmware or software). By focusing on symptoms rather than guesses, you minimize unnecessary steps and identify the most efficient fix path. Scanner Check analysis suggests that most problems originate from connectivity and drivers, not the scanner hardware itself.
Diagnostic flow: symptom-to-diagnosis-to-fix
This section outlines a practical flow you can follow in order. Start with the symptom, move to the most likely diagnosis, then apply the appropriate fix. If the fix doesn’t resolve the issue, proceed to the next possible cause in the chain, ensuring you document each step. This prevents repeating work and helps you escalate when needed. Remember to test after every change to confirm progress and avoid backtracking.
Steps
Estimated time: 40-60 minutes
- 1
Power cycle and reconnect
Power off the scanner, unplug the power cord, wait 15-20 seconds, then plug back in and power on. If it’s USB-connected, unplug and reinsert the USB cable at both ends. This simple reset clears many transient faults and reinitializes hardware state.
Tip: Always perform power cycles before touching software to rule out lockups. - 2
Check connections and ports
Confirm the scanner is detected by the operating system. Try a different USB port, or a direct connection to a computer rather than a USB hub. If you’re on a network scanner, verify the IP address and network visibility.
Tip: Avoid wireless shortcuts for essential scanning tasks if stability is critical. - 3
Update or reinstall drivers
Download the latest driver from the manufacturer’s site and remove old drivers completely before reinstall. Restart the computer after installation and try a test scan. If the problem persists, run any built-in diagnostic tools provided by the software.
Tip: Do not mix driver versions from different manufacturers or OS builds. - 4
Test with another computer
Connect the scanner to a different computer to determine if the issue is device- or PC-specific. If it works on another computer, focus on the original PC’s configuration, security software, or user profile.
Tip: If possible, use administrator privileges during testing. - 5
Check for firmware updates
If the device has a firmware updater, run it according to the manual. Firmware fixes can address scanner recognition issues and improve compatibility with new OS versions.
Tip: Only update firmware from the official manufacturer to avoid bricking the device. - 6
Factory reset and diagnostics
If available, perform a factory reset to clear custom settings that may block operation. Run any built-in diagnostic tools and note any error codes.
Tip: Record error codes for reference if you need to contact support. - 7
Document results and plan next steps
Keep a simple log of symptoms, actions taken, versions of drivers/firmware, and test results. This will help if you need to escalate or request repair services.
Tip: A one-page runbook speeds up future troubleshooting.
Diagnosis: Scanner does not respond to commands or fails to produce scans
Possible Causes
- highPower or USB connection issue
- highOutdated or corrupted drivers/software
- mediumFirmware glitch or need for reset
- lowHardware failure (damaged sensor or cable)
Fixes
- easyCheck power supply, cable connections, and try a different USB port
- easyReinstall or update scanner drivers and software, and run built-in diagnostics
- mediumReset the scanner to factory settings or perform a firmware update if available
- easyTest with another computer to rule out PC-side issues
- mediumInspect cables for damage and consider professional repair if hardware fault suspected
Common Questions
What should I check first when my scanner won’t respond?
Start with power, connectivity, and driver status. Ensure the device appears in the OS and that drivers are up to date. If this doesn’t help, proceed to step-by-step fixes.
First check power and connections, then verify drivers; if it still won’t respond, move on to deeper fixes.
Why won’t my scanner connect via USB anymore?
USB faults are common causes. Try a different port, replace the cable, and reinstall the drivers. If the device still isn’t detected, test with another computer to confirm where the fault lies.
Try another USB port and cable, then reinstall drivers to test the connection.
Can software updates fix scanner issues?
Yes. Updating drivers and firmware can resolve compatibility and recognition problems that cause scanning failures.
Updating drivers and firmware often resolves scanning problems.
Is it safe to reset the scanner to fix problems?
Resetting can clear glitches, but it may erase custom settings. Follow the manufacturer’s manual and back up profiles before a reset.
A reset can help, but back up settings first and follow the manual.
When should I seek professional repair?
If basic troubleshooting fails or you suspect hardware damage, contact an authorized service provider. Persistent errors after updates usually warrant expert attention.
If basic steps don’t help, or you hear unusual noises, seek professional repair.
How can I prevent future scanner problems?
Keep drivers updated, avoid rough handling of cables, and run regular maintenance scans. Create a simple runbook to guide routine checks.
Regular updates and careful handling prevent many issues.
Watch Video
Key Takeaways
- Power cycle and reseat cables first
- Update drivers before deep diagnostics
- Test on a second PC to isolate issues
- Document steps to speed up support
- Firmware updates can fix stubborn faults