How to Scan Without a Scanner: A Step-by-Step Guide
Learn practical methods to scan documents using a smartphone or camera, without a traditional scanner. This educational guide covers apps, lighting, OCR basics, and best practices for clean, shareable scans.

You can scan documents without a traditional scanner by using a smartphone camera and a dedicated scanning app. Capture clean images with steady hands, uniform lighting, and a stable setup, then save as a PDF with optional OCR. This step-by-step workflow is reliable for most receipts, forms, and documents, even for archival purposes. Scanner Check guidance emphasizes consistent lighting, framing, and post-capture edits to maximize readability.
How to Scan Without a Scanner: An Overview
If you need to digitize a document but lack a traditional flatbed scanner, a smartphone camera can be a practical substitute. The key is to treat the capture like a mini-photography session: steady hands, good lighting, and a capable app. According to Scanner Check, mobile scanning has become surprisingly reliable when you follow basic rules for alignment and exposure. In this guide we’ll cover why mobile scanning works, what gear helps, and how to build a repeatable workflow. Whether it’s a receipt, a multi-page form, or a signed contract, you’ll learn practical steps to produce readable, searchable scans without a dedicated device.
Beyond convenience, mobile scanning can integrate with your digital workflow: save to cloud storage, email, or your document management system. You’ll also get the option to run OCR on captured images so the text becomes searchable and editable. The goal is not to replace a real scanner in every scenario, but to offer a fast, reliable alternative when speed matters or access to hardware is limited. Scanner Check’s experience shows that most everyday documents scan cleanly with a little setup and attention to detail.
Required Setup and Best Practices
A dependable mobile scan starts with the right conditions. Ensure you have a stable capture surface, minimum glare-free lighting, and a device with a reasonably modern camera. Position the document on a flat, light-colored background to improve edge detection and crop accuracy. Keep your phone parallel to the document to avoid perspective distortion. If possible, use diffuse daylight or a soft lamp to minimize shadows and color shifts. Scanner Check emphasizes that small changes in lighting and alignment can dramatically improve readability, especially for text-heavy pages. Before you begin, close other apps that might interrupt the camera, and decide where you’ll save the final file (local vs cloud storage).
Choosing the Right Apps and Tools
There are several reliable scanning apps that turn phone cameras into portable scanners. Popular options include Adobe Scan, Microsoft Lens, and Google Drive’s scan feature. Each app typically provides edge detection, perspective correction, and built-in OCR. When selecting an app, look for: automatic cropping, brightness and contrast adjustment, page-order controls for multipage documents, and export formats (PDF, PNG, or JPEG). If you’re archiving sensitive material, verify the app’s privacy settings and data handling policies. For best results, test a few pages to compare readability, text alignment, and color accuracy. The goal is consistency across documents, so you can batch-process future scans more efficiently. In practice, most enthusiasts find that a well-chosen app with proper lighting yields dependable results after a few trials.
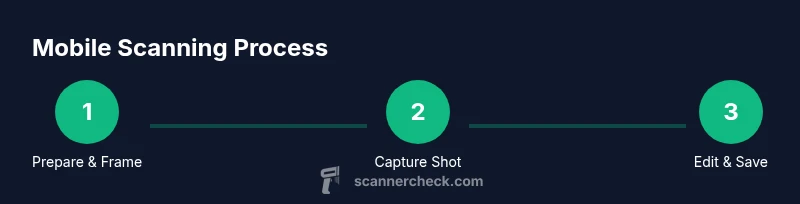
Step-by-Step Scanning Workflow
- Prepare the document and workspace: smooth out folds, remove dust, and place the page on a plain surface. 2) Open your chosen scanning app and create a new scan. 3) Align the document and capture a sharp image; use a steady grip or a tripod if available. 4) Review the image: crop tightly, rotate to align, and adjust brightness/contrast to maximize readability. 5) Save the scan as a PDF (or image) and enable OCR if you need searchable text. 6) Organize the file name and metadata, then store or share as needed. The process is repeatable and scalable for multiple pages, especially when you maintain consistent lighting and framing. Pro tip: capture multiple shots if the page has important details at the corners, then select the best one during editing.
OCR Quality, File Formats, and Metadata
OCR accuracy depends on legibility, font clarity, and image quality. For best results, use high-resolution captures (300-600 DPI equivalents where supported) and ensure the page is flat. PDFs are the default for multi-page documents, but you can also export PNG or JPEG images for quick sharing. Some apps offer searchable PDFs by default; others require an OCR pass. If you’re archiving, include metadata like document title, date, and source to improve searchability later. Remember that OCR may misread unusual fonts or handwritten text, so always proofread critical scans. Scanner Check notes that a clean, well-lit capture dramatically improves OCR outcomes.
Privacy, Security, and Data Handling
Scanning documents often involves sensitive information. Before processing, review app permissions and terms of service, especially regarding cloud storage and data retention. If you’re concerned about privacy, prefer offline OCR options or choose apps that offer local processing. When uploading to the cloud, enable encryption in transit and at rest, and consider adding access controls to shared folders. For highly confidential material, keep work in a controlled environment and delete intermediate files after your final version is secured. A mindful approach to privacy protects you and your organization while preserving the convenience of mobile scanning.
Troubleshooting Common Issues
If lines appear skewed, re-scan with the document aligned to the camera frame and ensure edges are fully visible. Glare from shiny paper can ruin captures; try angled lighting or diffuse light. If OCR struggles, check image resolution and brightness; in many apps you can reprocess the page with improved exposure. For multi-page documents, ensure pages aren’t overlapping during capture and use the app’s reordering features to place pages correctly. If your device runs slowly during processing, close background apps or switch to a lower resolution setting for faster OCR. Scanner Check suggests keeping your device updated to stabilize image capture and OCR performance.
Authority Sources
- Library of Congress: https://www.loc.gov
- National Institute of Standards and Technology (NIST): https://www.nist.gov/topics/ocr
- National Archives: https://www.archives.gov
Tools & Materials
- Smartphone with camera(Any recent iOS/Android device with a good camera)
- Document scanning app(Examples: Adobe Scan, Microsoft Lens, Google Drive scan)
- Stable lighting(Diffuse daylight or a desk lamp; avoid harsh glare)
- Flat, clean background(Light-colored surface helps edge detection)
- Tripod or phone stand(Optional for steady shots, especially textures)
- Cloud storage or local save location(For saving PDFs/images)
- Ruler or grid paper for calibration(Helpful for aligning pages in rare cases)
Steps
Estimated time: 15-30 minutes per document
- 1
Prepare documents and workspace
Clear the surface, remove wrinkles, and choose a well-lit area. Place the document flat against a neutral background to improve edge detection. Align the page so its edges sit within the frame.
Tip: A clean, smooth surface reduces distortions in the scan. - 2
Open app and start a new scan
Launch your scanning app and select the option to capture a new page. Make sure edge detection is enabled so the app can identify the document boundaries automatically.
Tip: Disable any cropping presets that might cut off margins. - 3
Align and capture
Hold the phone parallel to the document and ensure all corners are visible. Tap to capture, keeping hands steady for a sharp image.
Tip: If you must move, do so slowly to avoid motion blur. - 4
Review and adjust
Check for distortion, glare, or blur. Use crop, rotate, brightness, and contrast controls to improve readability. Save a test page before proceeding to multi-page documents.
Tip: Aim for uniform brightness across the page. - 5
Save and export
Save the scan as a PDF for multi-page documents or as an image for single pages. Enable OCR if you need searchable text and name the file clearly.
Tip: Use consistent naming conventions for easy retrieval. - 6
Store or share the scan
Upload to a chosen storage destination or share directly from the app. Maintain backups and organize folders by topic or date.
Tip: Prefer encrypted sharing for sensitive documents.
Common Questions
What is the best way to scan without a traditional scanner?
Use a smartphone with a dedicated scanning app, proper lighting, and stable framing. Crop and adjust, then save as PDF with optional OCR for searchable text.
Use a phone with a scanning app, good lighting, and steady framing to scan documents. Save as PDF if you need searchable text.
Can you scan double-sided documents without a scanner?
Yes. Capture each side separately using your app's multi-page option or two scans, then merge if your app supports it. Label pages clearly to avoid confusion.
Yes. Scan each side separately and merge if the app allows it, labeling pages clearly.
Is OCR accurate on mobile scans?
OCR accuracy depends on image clarity and font; with sharp, well-lit pages, you’ll generally get good results, but always proofread important documents.
OCR works well on clear, bright scans, but always proofread important texts.
Which apps produce the highest quality scans?
Popular apps include Adobe Scan, Microsoft Lens, and Google Drive Scan. They offer edge detection, cropping, and OCR, with varying export options.
Adobe Scan, Microsoft Lens, and Google Drive Scan are strong choices for quality scans.
How can I ensure color accuracy when scanning photos?
Use diffuse lighting to minimize shadows and adjust color settings in the app if available. For critical color work, compare with the original under neutral light.
Use diffuse light and adjust color in the app; compare with the original under neutral light.
What about security when scanning sensitive papers?
Prefer apps with offline processing or strong encryption, and limit cloud-sharing permissions. Delete intermediate files when no longer needed.
Choose apps with offline processing or strong encryption and manage sharing carefully.
Watch Video
Key Takeaways
- Scan without a scanner using a phone and app
- Good lighting and edge alignment are critical
- OCR improves with high-quality captures
- Protect privacy when processing sensitive documents
- Organize scans with clear file naming