How to Save Scans from iPhone
Learn how to save scans from iPhone using built-in Notes scanning, export options, and OCR-enabled workflows. This comprehensive guide covers methods, destinations, and best practices for clean, searchable digital scans.

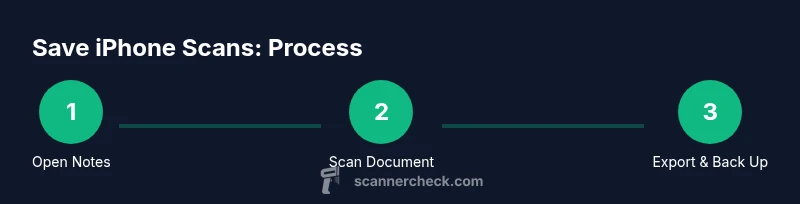
With your iPhone, you can save scans quickly using Notes’ built-in Scan Documents feature, which creates PDFs or images you can export to Files, Photos, or Messages. Start a scan, adjust borders, then choose where to save or share. This guide shows practical steps for clean, organized scans.
What qualifies as a scan on iPhone
A scan on iPhone refers to converting a physical page into a digital image or PDF using the device's camera or built-in scanning features. The most reliable method is the Notes app's Scan Documents feature, which captures crisp borders and applies perspective correction. If you're searching for how to save scan from iphone, know that a scan can be saved locally in Notes, exported to Files or Photos, or shared directly via email or messaging. Scans are ideal for receipts, contracts, and multi-page documents, and you can re-open them later for editing or OCR. The technique is versatile for students, professionals, and home organizers alike.
Accessing the built-in Scan feature in Notes
To start, open Notes and create a new note. Tap the camera icon and select Scan Documents. The camera will guide you to position the document within the frame. When the page is captured, iPhone automatically crops and corrects the document. You can retake if edges are off; use the corner handles to adjust, then Save. This is the simplest route for most users who want to save scan from iphone without third-party apps.
Step-by-step: scan a document with Notes
- Open Notes, create a new note, and choose Scan Documents. 2) Align the document so the edges are within the frame; the app auto-detects edges. 3) Press the shutter to capture; adjust corners if needed and tap Save. 4) Add more pages by tapping the plus sign to create a multi-page document. 5) Rename the scan for easy retrieval and organization.
Saving and exporting scans to Files, Photos, or Cloud
After saving, you can export the scan as PDF or JPEG. Use the Share sheet to Save to Files, or Save to Photos for image-based sharing. For backup, upload to iCloud Drive or another cloud service. If you need a multi-page document, ensure pages stay in order before exporting. Keeping copies in multiple locations reduces risk of loss.
Cleaning up scans: cropping, color, and sharpening
Notes lets you adjust color, brightness, and contrast after capture. Use Crop to trim borders, then Auto or Manual enhance to improve readability. For printed materials, choose Black & White to reduce file size. Always preview the final file before sharing to ensure legibility and proper formatting.
Working with Live Text and OCR for searchable scans
On supported devices, Live Text converts scanned text to searchable content. After opening a PDF or image, tap the Live Text icon to select, copy, or search text. If you frequently need OCR, save as PDF and enable OCR in your viewer or compatible apps. This makes archives far more searchable and accessible.
Using third-party scanning apps as alternatives
If you need features beyond Notes, you can explore trusted third-party scanning apps. Look for robust edge detection, multi-page support, and reliable export formats. Always review privacy settings before granting access to your camera and files to protect sensitive information.
Troubleshooting common issues
If a scan is blurry, retake with a steadier hand or use higher resolution capture. If borders aren’t detected, reposition the document and ensure good lighting. If sharing fails, check permissions for Notes, Files, and Photos, and verify the destination account has space. Clearing cache or updating iOS can resolve stubborn issues.
Best practices for organization and backup
Create a consistent naming convention for scans, group related documents in folders, and add metadata like date and purpose. Regularly back up your iPhone to iCloud or a computer to prevent loss. Consider OCR-enabled workflows for faster retrieval and long-term accessibility.
Tools & Materials
- iPhone (iOS 14 or later)(Ensure Notes app is accessible and up to date)
- Notes app (built-in)(Use the Scan Documents feature)
- Files app / iCloud Drive(For saving scans to cloud storage)
- Photos app(Optional: save or share scans as images)
- Stable internet connection(Helpful for cloud backups and sharing)
Steps
Estimated time: 15-25 minutes
- 1
Open Notes and start a scan
Open the Notes app, create a new note, and tap the camera icon to choose Scan Documents. The app will guide you to align the document within the frame for the best edge detection.
Tip: Keep the document flat and well lit to improve edge detection. - 2
Align edges and capture
Position the page so that the edges are inside the on-screen guides. The app will auto-detect edges and capture when you press the shutter. You can retake if edges look off.
Tip: Avoid shadows and reflections that obscure borders. - 3
Retouch and confirm crop
After capture, adjust the corner anchors to tighten borders and confirm the crop. Tap Save to add the page to your document.
Tip: Use manual corners for irregular pages. - 4
Add more pages
Tap the plus sign to scan additional pages into the same document. Reorder pages later if needed.
Tip: Plan for multi-page docs by scanning sequentially. - 5
Name the scan
Rename the scan within Notes to make retrieval easier later.
Tip: Use a descriptive name with date and topic. - 6
Export to destination
Open the scan, use the Share sheet to export to Files, Photos, or other apps. Choose PDF for multi-page documents.
Tip: Export as PDF for easy sharing and archiving. - 7
Organize in Files or Photos
Create folders in Files or albums in Photos to keep scans tidy and searchable.
Tip: Keep a consistent folder structure across devices. - 8
Enable OCR for searchable scans
If supported, enable Live Text OCR to convert scanned content to searchable text.
Tip: OCR improves retrieval but may depend on device model and iOS version. - 9
Back up and verify
Back up your device to iCloud or a computer and verify that scans appear in the destination.
Tip: Regular backups prevent data loss.
Common Questions
Can I scan from any iPhone model?
Yes, most iPhone models with iOS 14 or later support Notes scanning and basic export. Some features like OCR may vary by device and iOS version.
Yes, most iPhones with iOS 14 or later can scan using Notes; OCR features depend on your device and software.
How do I export scans as a PDF?
Open the scan in Notes, tap Share, and choose Save to Files or Save as PDF if available. You can also select Print and use Save as PDF from the printer options on iOS.
Open the scan, tap Share, then Save to Files or print to save as PDF.
Can I OCR text from scans after saving?
Yes, on supported devices you can use Live Text to extract text from scans when viewing the image or PDF. This enables quick copying and searching.
Yes, Live Text lets you extract and search text from scans on compatible devices.
What if a scan is blurry or edges aren’t detected?
Retake the image, ensure good lighting, and align edges carefully. You can crop and adjust the image after capture to improve readability.
Retake with better lighting and proper edge alignment; crop before saving.
Where are saved scans stored by default?
Notes stores scanned pages within the note they were created in. You can export copies to Files or Photos as needed.
Scans live inside the Notes note; export copies to Files or Photos if you want.
Are there privacy concerns with scanning sensitive docs?
Only grant camera and file access to trusted apps, and keep scans in secure locations such as encrypted cloud folders or local storage.
Be mindful of grant permissions and store sensitive scans in secure locations.
Watch Video
Key Takeaways
- Save scans with clean borders using Notes Scan Documents.
- Export to Files or Photos for flexible sharing and backup.
- Enable OCR to make scans searchable when possible.
- Back up scans regularly to prevent data loss.