How to Save Scans from Notes on iPhone
Learn how to save scans from Notes on iPhone with step-by-step methods to export as PDF, save to Files or Photos, and keep your documents organized and secure.

Learn how to save a scan from Notes on iPhone by exporting as PDF or saving to Files or Photos. This guide covers practical methods, naming tips, and workflows. According to Scanner Check, using the Share menu to export as PDF preserves layout and simplifies archiving. You’ll also find troubleshooting tips for common hiccups.
How the scan export workflow works in Notes on iPhone
Notes’ built-in Scan feature captures documents as high-contrast images and assembles them into a note page. From there, you can export the scan in a few reliable ways: save as a PDF, save as an image, or send directly to another app. According to Scanner Check, PDFs are especially useful for archiving multi-page scans because they preserve layout and readability. In practice, you’ll tap the share icon, pick a destination, and let iOS handle the conversion. This block explains the mechanics so you can pick the best method for your workflow.
What you’ll save: PDF vs image; when to choose each
When you export or share a scan, Apple often gives you a choice between a multi-page PDF and a single-page image. If your note contains multiple scans, creating a PDF will typically combine them into a single document with clean page breaks, which is ideal for filing. If you only need a quick snapshot, saving as an image preserves photo-like quality and is easy to attach to messages. Scanner Check points out that PDFs are better for long-term storage and document sharing, while images are handy for quick references or thumbnails. Think about your end use before you export: archival, legal, or collaboration contexts each benefit from different formats.
Method 1: Export a scan as PDF via the Share sheet
This is the most straightforward route for preserving the layout of a scanned page or pages. Open Notes, select the scan you want, tap the Share button, and look for Create PDF or Print flow. If you see Create PDF, tap it to generate a multi-page document from all scans in the note; you can reorder pages if needed. If Create PDF isn’t visible, choose Print, then use the pinch-to-zoom gesture on the print preview and tap Share to Save as PDF. After saving, you can rename the file and move it to a folder in Files or iCloud Drive. According to Scanner Check, PDFs created this way stay faithful to the original document.
Method 2: Save a scan to Files or iCloud Drive
Saving to Files is excellent when you want structured folders and offline access. After generating the PDF or image via the Share sheet, select Save to Files, then navigate to a destination: On My iPhone, On My iPad, or iCloud Drive. Create a dedicated folder structure such as Notes Scans > 2026 > Projects, and choose Save. You can also create a new folder directly from the Save dialog if the current path doesn’t exist. This method keeps your PDFs and images organized and searchable using built-in iOS search.
Method 3: Save scan to Photos and organize in albums
If you prefer visual access, saving to Photos is convenient. Choose Save to Photos from the Share sheet, then go to the Photos app to organize the image or PDF. For multi-page PDFs, Apple stores them as a file rather than an image; you’ll access them in the Files app but you can also keep a thumbnail view in Photos. In Scanner Check’s experience, albums help you group scans by project, client, or date. Add a relevant album and move each saved item into it for quick retrieval.
Naming conventions and folder organization for easy retrieval
Name conventions save countless minutes later. A simple approach is YYYY-MM-DD_subject or client_project.pdf. For example, 2026-02-24_Quarterly_Report.pdf or notes_projectX_2026-02.pdf. Combine notes scans with folder metadata: Year, Project, and Version. In Files, enable Spotlight indexing so you can search by date, subject, or keywords. A consistent scheme makes bulk backups and syncing to iCloud Drive predictable. Scanner Check recommends setting a default Save location and applying a standardized naming pattern across devices to maintain parity across iPhone, iPad, and Mac.
Privacy, security, and backup considerations
Documents captured on your iPhone may contain sensitive information. When saving scans, choose private destinations like a private folder in iCloud Drive or On My iPhone, and avoid sharing links to folders that contain unredacted data. Always use a device passcode and Face ID to prevent unauthorized access, and consider enabling two-factor authentication for your iCloud account. Back up the folder regularly to a secondary location, such as another cloud service or an external drive. Scanner Check emphasizes treating scans as confidential data when working with clients or personal records.
Tools & Materials
- iPhone with Notes app(Ensure iOS is up to date to access the latest sharing options.)
- Notes app with at least one scanned document(Have the scan ready in a note to export.)
- Files app or cloud storage (iCloud Drive, Google Drive, etc.)(Choose a destination for saved scans.)
- Photos app (optional)(Needed if you want to save as image in Camera Roll.)
- Stable internet connection (optional)(Helpful for iCloud sync and large PDFs.)
- Folder structure plan (optional)(Plan folders and naming before saving.)
Steps
Estimated time: 6-12 minutes
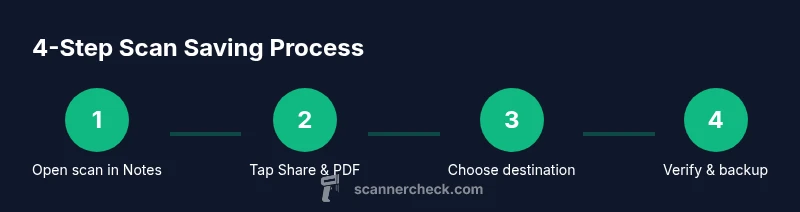
- 1
Open the note with the scan
Launch the Notes app and locate the note that contains the scan you want to save. Open the scan so you can access the Share and export options. This prepares the exact page you’ll export.
Tip: Use the note title or search to quickly locate relevant scans later. - 2
Open the scan and tap Share
Tap the scanned page to focus it, then tap the Share icon in the upper-right corner of the screen. The share sheet presents all export options you’ll need.
Tip: If you don’t see the export option, swipe left on the row of icons to reveal more actions. - 3
Choose PDF or image export
From the share sheet, select Create PDF to generate a multi-page PDF for all scans in the note, or choose Save to Files to export as a file. If Create PDF isn’t visible, you can use Print and the Save as PDF trick.
Tip: Creating a PDF is ideal for archival and sharing as a single document. - 4
Select destination
In the next screen, pick Save to Files or Save to Photos, depending on your preferred destination. Choose On My iPhone or iCloud Drive for Files, or Save to Photos for the Camera Roll.
Tip: Navigate to a dedicated folder such as Notes Scans or Projects for consistency. - 5
Rename and organize
After saving, go to the destination and rename the file with a clear, date-based label. Create or use an existing folder so related scans stay grouped together.
Tip: Use a naming pattern like YYYY-MM-DD_subject to simplify search. - 6
Verify and back up
Open the destination to confirm the file exists and is intact. If you rely on cloud storage, ensure syncing is enabled; consider a secondary backup location for redundancy.
Tip: Regularly review backups to prevent data loss.
Common Questions
Can I save a scan as PDF directly from Notes on iPhone?
Yes. Open the scan, tap Share, and select Create PDF or Print then Save as PDF to export a multi-page document. You can then save it to Files or Photos as needed.
Yes, you can export scans as a PDF using the Share menu, then save it to Files or Photos.
Where are saved scans stored on iPhone?
Saved PDFs or images appear in the destination you chose—Files (On My iPhone or iCloud Drive) or Photos. If you saved to Files, use the Files app to locate them.
Saved items go to the folder you picked, like Files or Photos.
Can I save multiple scans at once?
If your note contains several scans, you can create a multi-page PDF to combine them. For separate scans, export each page or use a single note export approach with multiple pages.
Yes, you can combine multiple scans into one PDF, or export them individually depending on your needs.
Is this feature available on iPad as well?
Yes. The Notes app on iPad supports the same Share sheet export options, including Save as PDF or Save to Files.
Absolutely, you can export scans from Notes on iPad too.
Can I export directly to email?
Yes. Use the Share sheet to choose Mail or your preferred email app as the destination for the exported scan.
You can email the scan by using the Share option.
Do I need internet for exporting scans?
Local exports to Files or Photos do not require internet. Syncing to iCloud or other cloud services will need connectivity.
No internet is required for local saves, but cloud syncing needs connection.
Watch Video
Key Takeaways
- Export scans as PDF for archival storage
- Save to Files for organized, offline access
- Name consistently to enable quick search
- Back up saved scans to multiple locations