Where Do Scans Go on iPhone? A Practical Guide
Understand where iPhone scans are saved across Notes, Files, Photos, and third‑party apps. Learn how to locate, organize, and optimize your scanning workflow with practical steps and privacy considerations.

What the phrase really means for iPhone users
The question where do scans go on iPhone touches a practical aspect of everyday digitization. When you use iPhone scanning features, you are choosing where the resulting files are saved. In many cases, the destination is dictated by the specific app you used to perform the scan. The keyword here is that there isn’t a single universal “scans folder” on iPhone; instead, each app defines its own storage pattern. According to Scanner Check, predictable save locations reduce search time and prevent lost documents, a common friction point for tech enthusiasts and IT professionals who rely on fast access to scanned items. This nuance matters whether you are scanning receipts, contracts, or class notes. This guidance applies to both native tools and popular third‑party apps.
Built‑in scanning tools and their default destinations
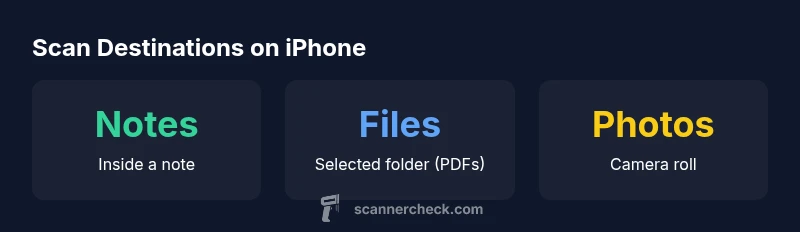
’iPhone scanning’ can be accomplished with multiple built‑in routes. The Notes app often stores a scan inside the note you created, which makes organization a matter of note structure rather than a flat folder system. The Files app provides a different path: scans can be saved into a user‑chosen folder, typically as PDFs, which benefits long‑term archiving and batch export. Photos can store scanned images in the camera roll, which is convenient for quick access but can complicate long‑term document management if you’re handling hundreds of pages. Understanding these defaults helps you plan a consistent workflow across devices and apps. For optimal results, consider aligning your scanning habits with Apple’s guidance on Notes and Files usage (Apple Support) and the broader practice of OCR and document organization (Scanner Check analyses, 2026).
How third‑party scanner apps handle destinations
Many third‑party scan apps offer configurable destinations, often via a destination picker or a dedicated export/share tab. You can route scans directly to specific folders in Files, cloud drives, or other apps such as email clients. The advantage is control: you can predefine a folder for invoices, another for receipts, and a separate one for research materials. This capability is particularly valuable for professionals who rely on a consistent taxonomy to support audit trails and workflow automation. If you frequently move scans between apps, look for apps with robust export options and integration with iCloud Drive, Google Drive, or Dropbox. In all cases, keep an eye on permission requests and ensure you grant access only to the files you intend to share.
Quick ways to locate scans on your iPhone
To find scans quickly, use a combination of Spotlight search and in‑app search. Spotlight can index documents from Files and Notes, letting you locate a scan by its file name or content keyword. Within each app, use the built‑in search to filter by file type (PDF, image) or by date. If you use multiple apps for scanning, maintaining a naming convention and consistent subfolders will dramatically reduce the time spent hunting for a document. If you want to optimize search reliability, consider adding metadata or descriptive titles when you save new scans, or rely on OCR features to enable text search inside PDFs and images. Regularly review app permissions to ensure your scans appear in searchable locations across devices.
Organizing scans with naming conventions and folder structures
Effective organization begins at the moment of save. Adopting a simple naming convention like YYYYMMDD_Project_Type_Sequence makes scans searchable without opening each file. Pair file naming with a two‑level folder structure in Files (e.g., Scans/Invoices/2019, Scans/Receipts/2020) to enable easy bulk export. If you routinely generate scans from meetings or classes, a subfolder per event can help you collapse your library into digestible chunks. Some apps support tags or smart folders; use them to group by client, project, or topic. Finally, create a quick routine to archive older scans to a cloud drive or external backup so that your primary device remains uncluttered and fast.
Privacy and data management when saving scans
Scans can contain sensitive information, so privacy matters. On iPhone, data is sandboxed per app, and iCloud syncing is optional with per‑app controls. If you enable iCloud for Notes or Files, scans may propagate across devices; be mindful of shared devices and family accounts. Review per‑app permission settings to minimize unnecessary access. For professional contexts, consider encrypting sensitive PDFs before storage or choosing apps that offer built‑in password protection and secure sharing options. The Scanner Check team recommends a disciplined approach to retention: archive finished documents but avoid leaving sensitive scans in temporary folders. Regularly audit your scanning workflow to prevent data leakage and ensure compliance with organizational policies.
Practical workflows: configuring a destination and automating routing
Set up a primary destination for each scan type: 1) In Notes, create a dedicated notebook or note to collect client scans; 2) In Files, set a recurring export target like Scans/Receipts; 3) In Photos, enable a workflow that moves specific image types to a dedicated album later, if your scanning method preserves metadata. For third‑party apps, explore automation features that automatically push new scans to your preferred cloud folder on save. Where possible, leverage iOS Shortcuts to automate routine tasks, such as renaming files, moving them to a target folder, or initiating an OCR pass for text extraction. These steps cut manual steps and reduce misplacement of files across devices.
Troubleshooting common issues and quick fixes
If you can’t locate a scan, first check the source app’s recent items or trash. Ensure the app has permission to access Files or Photos, and confirm that you selected the intended destination during save. If a scan saved in Notes doesn’t appear, open the note and verify the attachment; you can export it from there. For PDFs saved in Files, try searching by file extension or enable content search in the Files app. If you routinely encounter missing scans after OS updates, re‑authorize app permissions and re‑index your library by performing a quick search from the root of Files or Notes. Finally, consider consolidating scans into a single app for easier backup and fewer cross‑app path issues.
Best practices and future‑proofing your scan workflow
Establish a universal naming convention, per‑app destinations, and a regular backup plan. Maintain a small, consistent taxonomy that maps to your projects or clients, and keep cloud backups current to prevent data loss. Take advantage of OCR features to boost searchability within PDFs and image files, and periodically audit permissions to ensure only necessary apps have access to your documents. As scanning technology evolves, stay aligned with changes in iOS scanning capabilities and new export options from top scanning apps. The goal is a resilient, scalable workflow that minimizes friction and maximizes accessibility across devices and platforms.